

Fill nail holes in wood wall paneling with a repair material matched to the finish: sandable wood filler before painting, a compatible stainable filler before staining, or color-matched repair wax on an already-finished surface. Clean the hole, press in the material, remove the excess, and finish according to the repair product’s instructions; avoid broad sanding on thin veneer or factory-finished panels.
- How to fill nail holes in wood wall paneling: match the repair material to the existing finish first.
- Painted wood wall panels suit sandable filler; finished wood veneer often suits a compatible color-matched repair wax.
- The Panel Hub sells decorative and acoustic wall panels; identify your panel construction before attempting a repair.
- Test the complete repair on an offcut before touching a visible wall.
How do you fill nail holes in wood wall paneling?
Choose the repair by finish, not just by hole size. A filler that disappears beneath paint can leave a pale spot on stained wood, while wax used too early can interfere with subsequent finishing.
Before using this 2026 repair checklist, establish whether your wall has solid wood, wood veneer, or a printed decorative surface. The guide to natural wood veneer wall panels explains the panel category where preserving the thin face layer matters most.
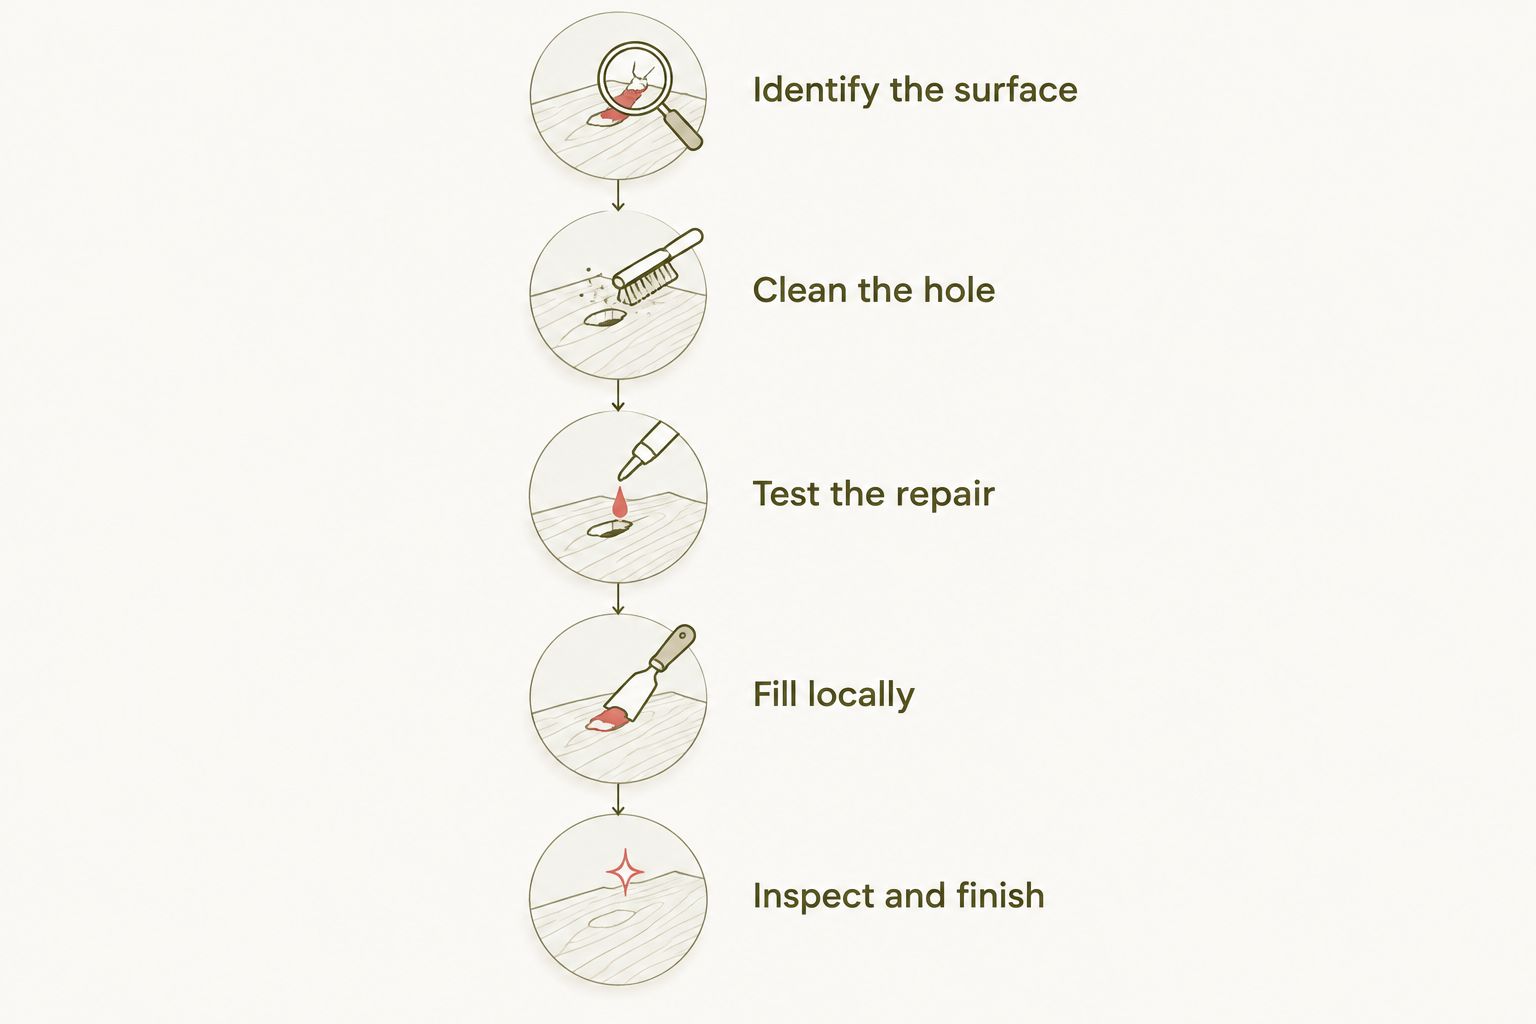
- Identify the surface. Decide whether you will preserve the existing finish, repaint, or stain the wood.
- Check the fastening. Confirm that the panel is secure and that a projecting nail is not causing the defect.
- Clean the hole. Remove loose particles with a soft brush and lift away dust without soaking the panel.
- Test the repair. Apply the intended filler and finish to an offcut or hidden area.
- Fill locally. Press the material into the hole rather than spreading it across the surrounding grain.
- Level appropriately. Sand a cured, sandable filler only where the surface permits; level compatible wax without sanding.
- Inspect and finish. Check the patch under the room’s lighting before applying any compatible paint or protective finish.
The repair is cosmetic. If the panel moves, the nail keeps lifting, or the hole has torn edges, address that problem before concealing it.
Why this matters for a 2026 wall refresh
A nail-hole repair has to match more than color. Texture and sheen also determine whether the spot disappears when daylight moves across the wall.
On painted paneling, leveling the patch is usually the main task because paint covers the repair material. On clear-finished wood, a smooth patch still stands out if it interrupts a dark grain line or leaves a glossy smear.
Keep the repair footprint smaller than the defect’s visual footprint. Aggressive sanding, solvent wiping, and oversized filler smears can turn a small hole into a much more noticeable patch.
Gather the repair materials first
Set out the materials before opening the filler:
- A soft brush and clean, lint-free cloth.
- A small filling knife or the applicator specified for the repair material.
- A compatible wood filler or finished-surface repair wax.
- A nail set only if a sound, retained finish nail needs careful recessing.
- An offcut or concealed test area.
- Fine abrasive paper only if the panel and repair instructions allow sanding.
- Matching primer, paint, stain, or protective finish when the repair requires it.
Wear eye protection when setting a nail and follow the repair product’s ventilation and protective-equipment instructions. Do not mix cleaners, fillers, or finishes unless their instructions establish compatibility.
Which nail-hole repair material should you use?
For a 2026 paneling project, read the current repair-product label rather than relying on a familiar package color. Products described as filler, putty, or repair wax do not all cure or accept finishes in the same way.
| Repair option | Best for | Main advantage | Main limitation |
|---|---|---|---|
| Sandable wood filler | Small holes in paneling you will paint | Can be leveled before priming | Can leave a visible patch on clear-finished wood |
| Stainable wood filler | Unfinished wood you intend to stain | Accepts stain when the product specifies it | Does not necessarily stain like the surrounding wood |
| Color-matched repair wax | Small holes in compatible, already-finished wood | Avoids sanding the surrounding finish | Can interfere with later coatings |
| Paintable caulk | Flexible joints where its label permits use | Accommodates movement at a suitable joint | Is not the default choice for a flush, sanded nail-hole repair |
Use wood filler for a repair you will finish over; use compatible repair wax for a finish you intend to preserve. The label and your test patch decide the final choice.
Painted paneling: use a compatible sandable filler
Best for: nail holes in painted wood or paint-grade paneling that you plan to touch up.
Press the filler into the hole with a narrow applicator. For a curing filler that requires sanding, leave only the small amount of excess its instructions recommend, then allow it to cure before leveling.
The advantage is a flat surface that accepts primer and paint. The drawback is that a local paint touch-up can still show because the surrounding coating has a different sheen, texture, or age.
Unfinished wood: test stainable filler with the actual stain
Best for: unfinished paneling that will receive stain and a protective finish.
Test the filler, stain, and clear finish together on matching scrap. A filler labeled stainable accepts stain; that does not mean it absorbs color exactly like the wood beside it.
This approach lets you complete the repair before finishing the wall. Its limitation is color matching, especially across prominent grain or contrasting growth rings.
Finished wood: test color-matched repair wax
Best for: small cosmetic holes in an existing finish that the wax manufacturer identifies as compatible.
Press in a small amount and level it with the recommended applicator. Remove residue using the product’s specified method, without rubbing wax over a wide area.
The benefit is preserving the surrounding coating without sanding. The limitation is future refinishing: wax residue can prevent paint or another coating from adhering properly.
How do you prepare the hole without damaging the panel?
Start with a dry inspection. Look closely at the hole’s edge and check whether the fastener remains inside it, projects above the face, or has pulled away from the panel.
If a retained finish nail needs recessing, use a correctly sized nail set and light, controlled taps. Do not drive the nail deeper merely to create room for filler: thin faces and unsupported panel sections are vulnerable to damage.
Brush out loose dust and fragments. Do not dig into an intact veneer edge or enlarge the opening to make the applicator fit.
A raised chip needs a different decision from a clean pinhole. If the face has lifted, split, or separated from its backing, resolve that damage before applying filler; otherwise, the patch sits on an unstable edge.
How do you fill and level the hole neatly?
Load a small amount of material onto the applicator and press it into the opening from different directions. Scraping a film across the top can leave a hollow underneath that becomes visible after curing.
For sandable filler, follow the stated application depth and curing instructions. If the patch sinks, apply another compatible coat as directed rather than covering the depression with paint.
For repair wax, level the material using the recommended tool instead of reaching for sandpaper. Keep the surrounding surface clean so the repair does not become a shiny ring.
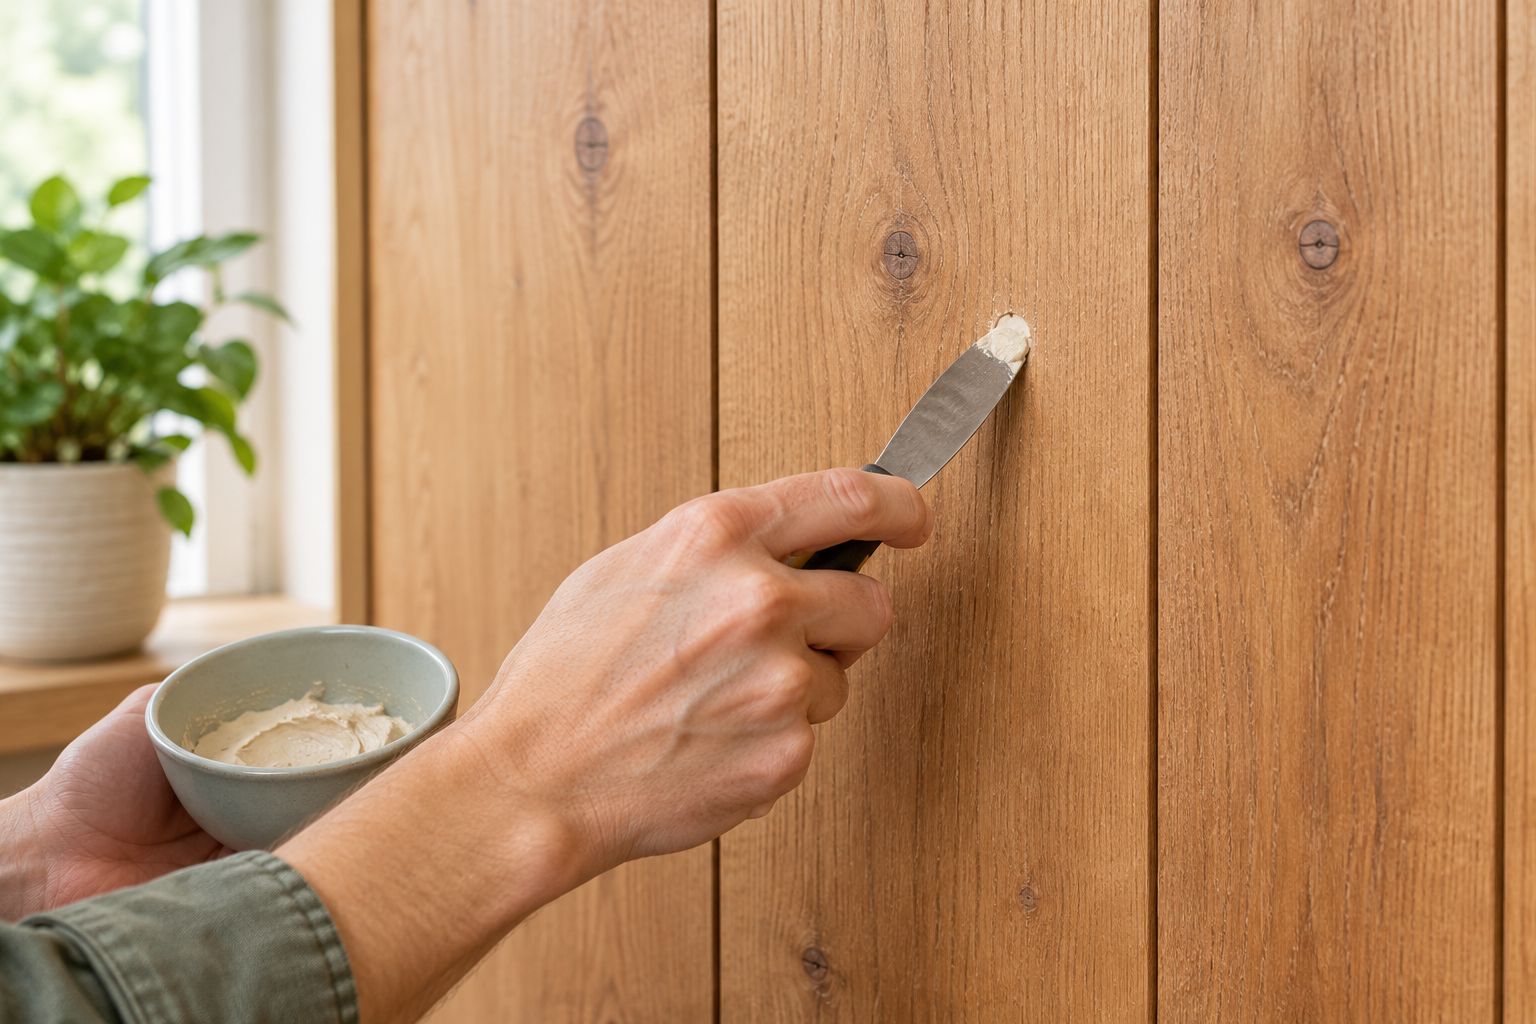
Check the patch from the side as well as straight on. A ridge that feels minor under your fingertip can cast a visible shadow when a nearby window or wall light illuminates it.
Sand only when the surface permits it
On a sandable repair in wood you will refinish, work with the grain and keep the abrasive localized. Stop as soon as the filler is flush.
Do not assume thin veneer tolerates the same sanding as solid wood. Sanding through the face layer exposes the substrate, and more filler will not restore the missing grain.
On a factory-finished wall, sanding can also change the sheen beyond the original hole. If preserving that finish is the priority, test a compatible no-sanding repair method first.
Why nail-hole repairs vary
These factors determine the right method and how visible the finished patch remains:
- Panel construction: solid wood, veneer, and printed surfaces tolerate different repair techniques.
- Existing finish: paint conceals filler color, while transparent finishes leave the patch visible.
- Hole condition: a clean opening is different from a split edge, raised chip, or loose fastener.
- Repair-material compatibility: curing, sanding, staining, and recoating requirements differ by product.
- Grain and texture: a flat patch interrupts a textured surface or a strong grain line.
- Room lighting: light falling across the wall reveals ridges, depressions, and sheen changes.
For acoustic slat walls, separate a hole in the wood face from a fastening point in the backing. Do not smear filler across backing material or bridge intentional gaps between slats.
The Panel Hub’s Acoustic Slat Wood Wall Panels | SoundPanel™ illustrate the panel category where checking the face and backing separately matters. A cosmetic wood-face repair is not a substitute for the panel’s fastening instructions.
The Panel Hub is best for homeowners shopping for decorative and acoustic wall panels, rather than repair compounds. Select the repair material for your existing surface; replacing a sound panel is not the first step for an isolated cosmetic hole.
Can you make a filled nail hole completely invisible?
A small hole can blend into the wall, but filler does not recreate continuous wood grain. On clear-finished paneling, color and sheen matching matter just as much as a flush surface.
Inspect the completed test in daylight and under the lights you actually use. If the patch remains obvious, change the repair approach before repeating it across the wall.
Should you fill nail holes before or after painting?
Fill nail holes before painting when you are using a compatible, paintable wood filler. Let the filler cure, level it as permitted, and prime the repaired area according to the coating instructions.
For paneling you are not repainting, use a repair system intended for the existing finish. Do not apply wax and then assume paint will adhere over it.
What if the nail hole keeps coming back?
A recurring hole or lifting nail calls for a fastening inspection, not repeated cosmetic filling. Movement can break the patch even when the filler was applied correctly.
Check the panel installation instructions and the condition of the supporting wall. Stop cosmetic work if you find moisture damage, loose backing, or an unstable panel.
FAQ
What’s the best way to fill nail holes in wood wall paneling?
Match the material to the finish: sandable wood filler before painting, compatible stainable filler before staining, or color-matched repair wax on a suitable finished surface. Test the entire repair on scrap or a hidden area first.
Can I use caulk instead of wood filler for nail holes?
Wood filler is the better default for a flush repair that you will sand and paint. Reserve caulk for joints and applications its manufacturer specifically permits.
Do I have to sand after filling a nail hole?
Sand only when the repair material and panel surface permit it. Compatible finished-surface repair wax is leveled without sanding, while a sandable filler requires its specified curing and finishing process.
Will stainable wood filler match my wood paneling?
Stainable wood filler does not necessarily match the surrounding wood after staining. Test the filler with your actual stain and protective finish before repairing the visible wall.
Can I repair nail holes in acoustic wood slat panels?
A small hole in a wood slat face can receive a compatible cosmetic repair. Keep repair material off the backing and out of intentional gaps, and follow the panel’s fastening instructions.
Does an NRC 0.85 rating tell me which filler to use?
An NRC 0.85 rating describes sound absorption, not filler compatibility. The Panel Hub’s stated acoustic rating does not replace the need to identify the face material and finish.
What should I check before repairing paneling in 2026?
Check the current repair-material instructions, your panel construction, and whether you will preserve or replace the existing finish. Confirm compatibility with a complete test patch before starting visible repairs.
One last thing
Before repeating your repair across the wall in 2026, finish the test patch completely and inspect it from the doorway. The smallest patch is not always the least visible; the patch that matches the surrounding sheen is often harder to spot.
Keep a labeled offcut with the successful repair materials noted on it. That gives you a useful reference for the next hole without experimenting on the finished wall again.
Related guides
- Grooved wall panels for modern interiors
- Wall panels for DIY beginners
- Installing wall panels around window and door casings