
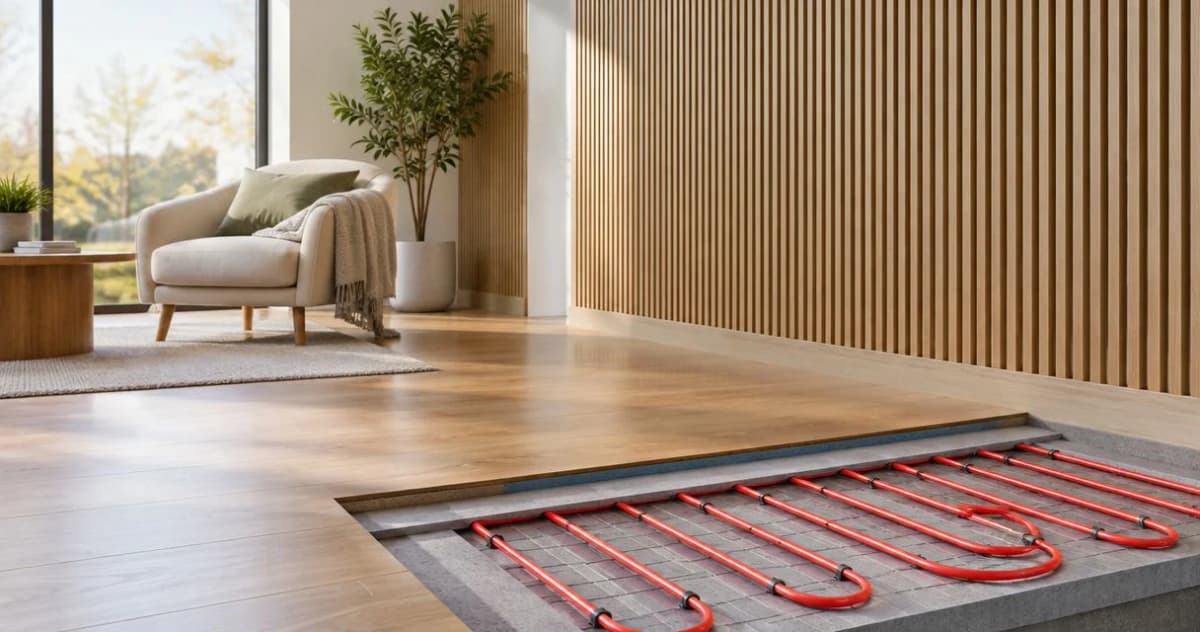
Instead of choosing wall panels and radiant floor heating separately and fixing awkward junctions later, plan the floor edge, wall finish, and heating controls together before installation. Combining wall panels with radiant floor heating works when the floor system, panel material, and installation details meet their manufacturers’ requirements; decorative wall panels are not part of the heating system.
- Combining wall panels with radiant floor heating requires coordinated floor edges, panel fastening, and thermostat placement.
- The Panel Hub suits homeowners adding acoustic wall panels or decorative wood finishes to rooms with radiant floor heating.
- Keep floor movement joints clear and protect heating cables, tubing, and sensor wiring during installation.
- Confirm material requirements before installation; a decorative or acoustic rating does not establish heat compatibility.
Why this matters
Radiant floor heating warms the room from the floor assembly. Wall panels finish a different surface, but the two installations meet at the baseboard, door trim, and corners. Those junctions deserve a drawing before either installer starts.
The Panel Hub is best for homeowners adding decorative or acoustic wall panels to an interior upgrade, not for specifying radiant heating equipment. Use The Panel Hub to explore the wall finish, then have the heating installer confirm the heating design independently.
For your 2026 renovation, separate appearance, acoustics, and heating performance. A warmer-looking wood wall does not establish better heating efficiency, and an acoustic panel does not stop heat loss through an inadequately insulated building envelope.
The brand describes acoustic panels rated NRC 0.85. NRC measures sound absorption, not thermal resistance or heat tolerance. That distinction prevents an attractive product specification from answering the wrong installation question.
Before you start
- Gather the installation documents. Have the exact wall panel instructions, radiant heating instructions, and floor covering instructions. Confirm adhesive requirements, substrate preparation, movement joints, and any operating limits before cutting materials.
- Arrange the right access and help. You need access to the wall, floor perimeter, thermostat, and heating documentation. Have a qualified heating installer handle system design and commissioning; electrical connections require an appropriately qualified electrician.
- Identify the hidden fastening risk. Heating cables or tubing, perimeter supply routes, and floor sensor wiring can occupy areas you intend to drill or trim. Obtain the installation layout and photographs before fixing baseboards or low-level battens. Never treat an apparently empty floor edge as proof that drilling is safe.
Keep these 3 installation documents together throughout the project. A wall panel instruction cannot override a floor movement requirement, and a heating instruction cannot establish that a particular panel adhesive suits the wall substrate.
Room and material plan
Choose the wall finish for its actual job
Start with what you want the room to do. Acoustic treatment belongs in rooms where reflected sound is the problem; decorative relief belongs where texture and pattern are the priority. Neither choice replaces the floor heating specification.
These two options serve different wall-design goals. Their product descriptions do not establish approval for every heated-room installation, so confirm the relevant conditions before ordering.
| Wall panel option | Best for | Main benefit | Limitation to resolve |
|---|---|---|---|
| Acoustic Slat Wood Wall Panels | SoundPanel™ | Living rooms or bedrooms where sound absorption is part of the brief | Combines a slatted wood appearance with an acoustic purpose | An acoustic designation does not establish thermal resistance, adhesive compatibility, or heat tolerance |
| 3D Geometric Pattern Wooden Panels | GroovePanel® | Feature walls where solid-wood texture and pattern matter | The supplied description identifies real solid wood and a geometric design | Solid wood responds to moisture changes; follow the product’s conditioning and installation requirements |
Choose SoundPanel™ for an acoustic brief and GroovePanel® for a decorative brief. Do not choose either as an insulation upgrade without thermal performance documentation.
For a bathroom, specify a wall system approved for the actual exposure. A heated floor does not turn decorative wood into shower lining, and a decorative panel face does not establish a watertight assembly.
Establish the room conditions
- Confirm that the wall is sound, clean, and suitable for the selected fixing method. Resolve leaks, dampness, loose finishes, and unsuitable coatings before covering the surface.
- Complete wet construction work and follow the flooring and panel instructions for drying and conditioning. Do not use the heating system to force materials dry unless the relevant instructions explicitly permit that process.
- Check the panel manufacturer’s storage and acclimation instructions. Record the required conditions in your project notes rather than borrowing a timetable from a different product.
- Agree on the normal operating conditions with the heating installer. Bring the room into those conditions using the commissioning process required for the floor assembly.
Expected result: You have a suitable wall substrate and an agreed conditioning plan, rather than panels arriving in a room that is still drying out.
Floor-edge and fixing plan
Draw the finished junction
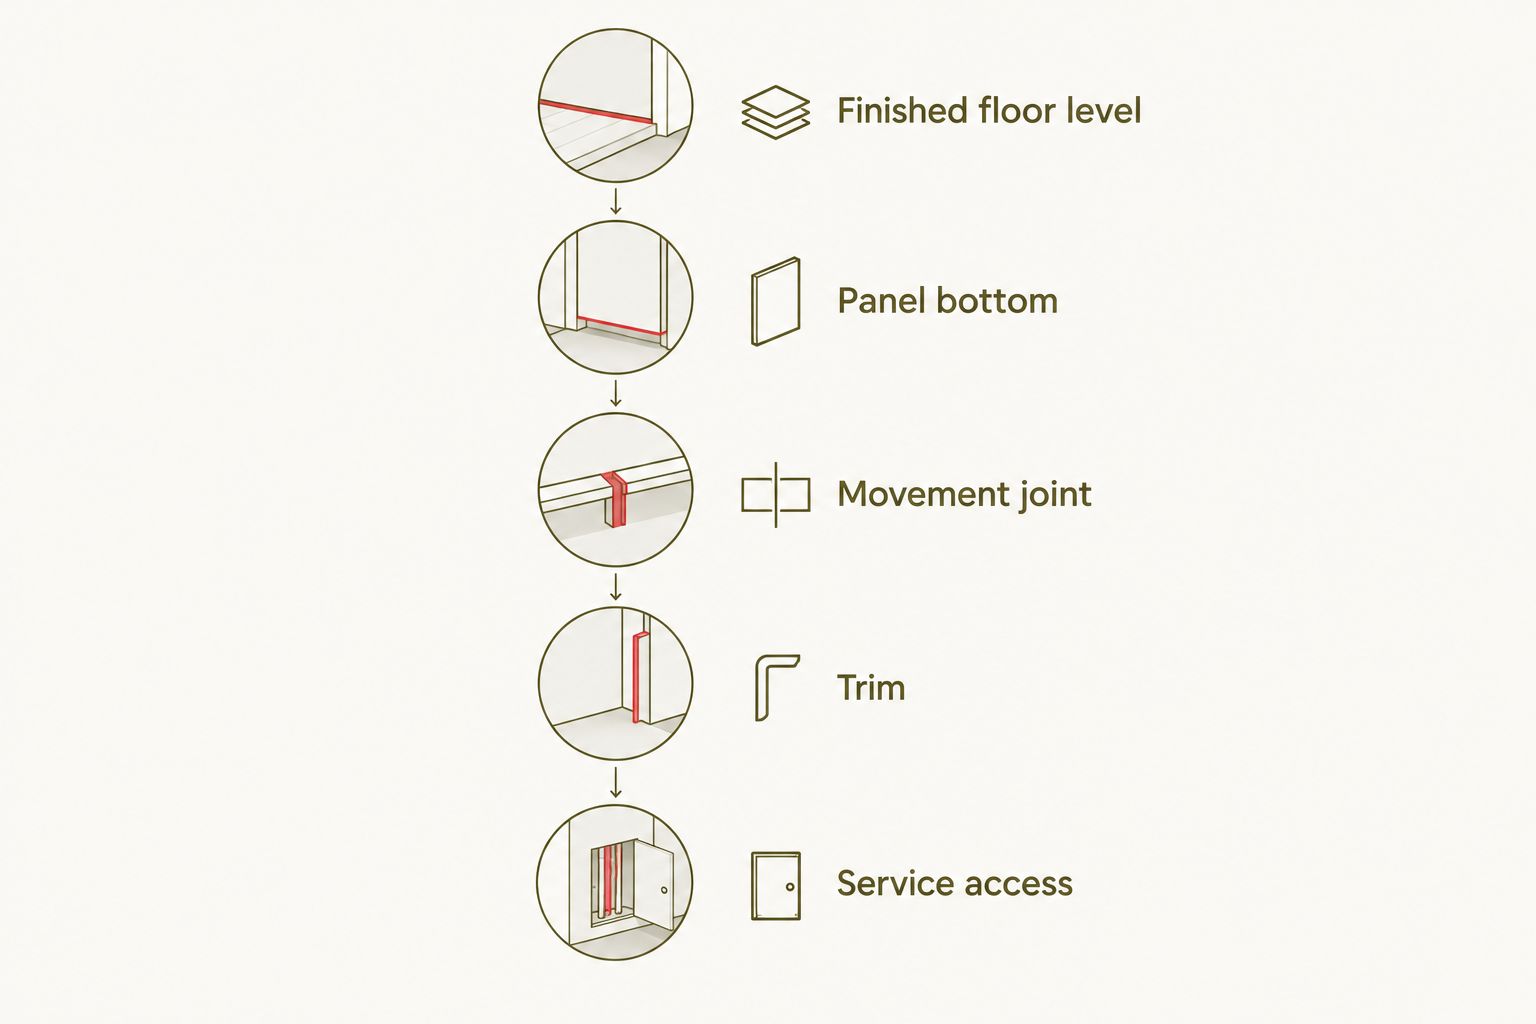
The wall-to-floor connection is where a good-looking project can become a maintenance problem. Plan the panel bottom, baseboard position, floor expansion detail, and any access requirements as one junction—not separate finishing decisions.
- Mark the finished floor level. Use the completed floor assembly height, including its final covering. A mark based on the unfinished substrate gives you the wrong panel starting point.
- Mark the panel bottom. Set this position from the panel instructions and chosen trim detail. Keep panels from bearing on the floor unless the complete system specifically requires that arrangement.
- Preserve the movement joint. Follow the floor covering manufacturer’s required perimeter detail. Do not bridge or pack that space with panel offcuts, rigid adhesive, or an improvised filler.
- Plan the trim. Decide whether the baseboard sits against the panel face or below it. Confirm the fixing method will not pin a floating floor or obstruct required movement.
- Mark service access. Keep heating controls, service points, and access covers usable. Design a removable detail wherever maintenance requires access.
Expected result: Your drawing shows how the wall finish ends without trapping the floor or concealing a service point.
Protect the heating installation
- Obtain the heating layout and locate perimeter routes before drilling. Ask the installer to clarify uncertain areas; photographs help document construction but do not replace safe service detection.
- Select fixings for the wall substrate and panel system. Do not extend wall-panel fastening into the floor to make a weak fixing feel secure.
- Check proposed low-level fasteners against concealed services. Include baseboard fixings, battens, corner trims, and door-stop locations in that check.
- Agree on how the heating installer will verify the system after nearby construction work. Use the checks required by the specific electric or hydronic system, not a generic test copied from another installation.
Expected result: Every fixing location has a safe installation method, and the heating system has a documented verification plan.
For a 2026 project, retain the final routing record with your renovation documents. The next person fitting a shelf, changing trim, or replacing flooring needs the same information.
Panel installation and heating handover
Install the wall finish
- Dry-fit the first panel and the bottom trim detail. Check that the layout still works around outlets, switches, corners, and the thermostat.
- Cut and prepare panels using the product’s instructions. Keep cutting debris away from exposed heating components and unfinished floor work.
- Apply the specified adhesive or install the approved mechanical fixings. Check the adhesive’s substrate suitability and curing conditions; room heat is not permission to shorten its cure.
- Fit adjoining panels using the prescribed spacing and joint treatment. Do not tighten joints simply because a smaller gap looks cleaner.
- Finish the baseboard and perimeter detail without restraining floor movement. Photograph the completed junction and any concealed fastening arrangements.
Expected result: The panels are secured to the correct substrate, their joints follow the instructions, and the floor perimeter remains functional.
A finished room can combine a textured wall with an unobstructed floor edge. The junction should look intentional, but its appearance must follow the technical detail—not replace it.
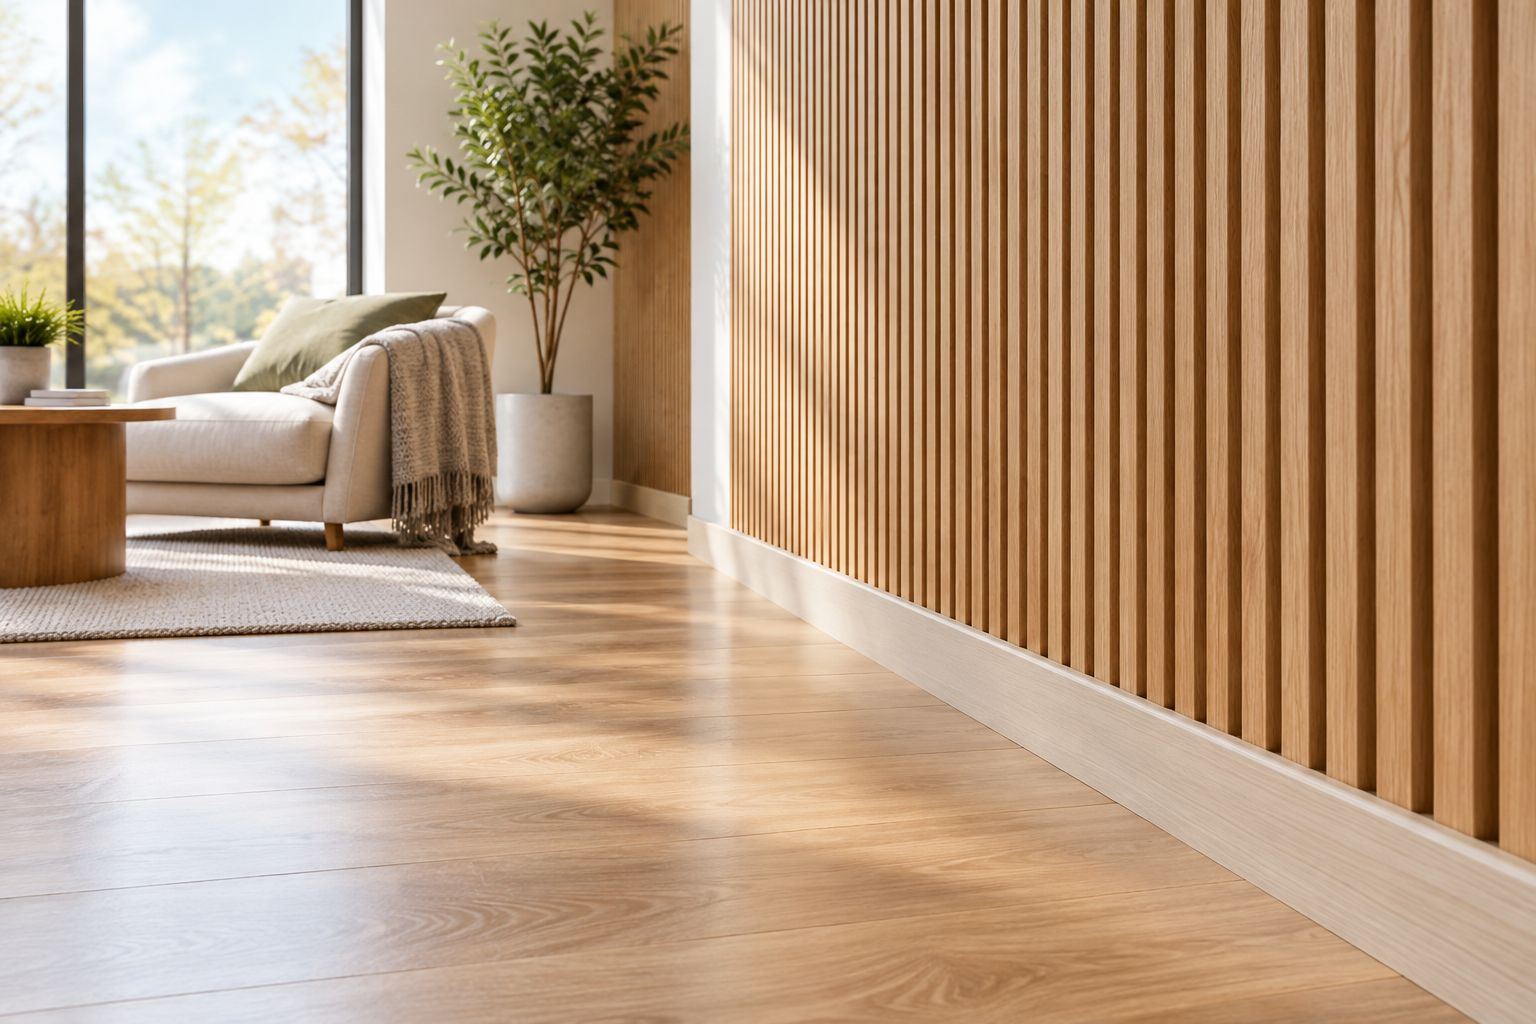
The Panel Hub describes quick-install wall paneling projects completed in under 2 hours. That is not a timetable for a combined heating and paneling renovation. Floor preparation, commissioning, material conditioning, and adhesive curing follow separate requirements.
Complete the heating handover
- Have the heating installer complete the prescribed commissioning checks. Confirm that recent trim and panel work has not affected wiring, tubing, sensors, or access.
- Keep the thermostat accessible. If panel thickness changes its mounting position, have the installer confirm the revised arrangement rather than surrounding or burying the control.
- Confirm the permitted operating settings for the entire floor assembly. Follow the floor covering and heating instructions; there is no single temperature setting that suits every construction.
- Record the approved settings and startup procedure. Do not increase the limit to compensate for a room that fails to reach its intended temperature.
Expected result: You have a functioning heating system, accessible controls, and written operating instructions for the completed room.
Your 2026 handover should include panel care instructions alongside the heating documents. Clean and maintain the wall finish as its manufacturer directs, without treating it as part of the heating equipment.
Adding panels when radiant heating is already installed
An existing heated floor changes the sequence: verify its condition and routing before you begin the wall work. You are protecting a working installation, not coordinating an exposed construction site.
- Ask for the existing heating records and operating instructions. Have the system assessed if its condition, routing, or control arrangement is uncertain.
- Protect the finished floor using a method suitable for its surface and operating conditions. Do not introduce temporary coverings that conflict with the floor or heating instructions.
- Follow panel and adhesive requirements for installation temperature and curing. Agree with the heating installer whether operation needs adjustment during the work.
- Install the wall panels and trim without drilling into the floor or disturbing its movement joints. Verify the heating system after the nearby work is complete.
Best for: A bedroom or living-room refresh where the heated floor is staying in place. The benefit is keeping the existing floor; the constraint is reduced access to concealed services.
For a 2026 refresh, inspect the existing baseboard detail before copying it. An old junction is not automatically a correct junction.
Troubleshooting
- Wood joints open or edges become uneven. Check room moisture conditions, conditioning history, fastening, and movement allowances against the panel instructions. Correct the cause before filling gaps or forcing panels together.
- The floor edge lifts or feels restrained. Check whether trim, adhesive, or panel bottoms have trapped a floating floor. Have the flooring installer restore the specified movement detail; do not simply add more fixings.
- Panels loosen after heating startup. Check substrate preparation, adhesive selection, cure conditions, and operating limits. Support loose material safely and follow the panel manufacturer’s repair method rather than applying an unapproved adhesive.
- The room remains cold. Have the heating installer check controls, sensor behavior, system operation, and the original heating design. Decorative wall panels are not a substitute for correcting an underperforming heating system.
- A heating fault appears after trim installation. Stop using the affected system and contact the qualified installer. Do not drill exploratory holes or keep resetting a faulting electric system.
Customize your workflow
Match the scope to the room. A single acoustic feature wall serves a different purpose from decorative panels around the entire perimeter, and neither scope changes the heating system’s required commissioning process.
For your 2026 plan, decide which parts you can complete yourself and which need specialist handover. Panel layout and finish selection are separate from electrical connections, heating design, and concealed-service checks.
Keep 2 checks on your final walkthrough: inspect the visible wall-to-floor junction, then confirm the heating records and controls. A neat room is not proof that hidden work is correct.
FAQ
Can I combine wood wall panels with radiant floor heating?
Yes, provided the wall panels, floor assembly, and installation details meet their respective manufacturers’ requirements. Confirm conditioning, fastening, movement joints, and operating conditions before installation.
Do acoustic wall panels improve radiant heating efficiency?
An acoustic rating does not establish improved radiant heating efficiency. NRC describes sound absorption; thermal performance requires separate documentation.
Should wall panels touch a heated floor?
Use the panel and floor manufacturers’ specified junction detail, not a universal gap. Keep the floor’s required movement space clear and avoid a panel or trim detail that restrains it.
Can I drill near the edge of a radiant heated floor?
Do not drill until concealed heating components and other services have been safely located. Perimeter tubing, cables, and sensor routes can conflict with trim fasteners.
Should I turn off radiant heating while installing wall panels?
Follow the panel, adhesive, floor covering, and heating instructions for installation and curing conditions. Have the heating installer confirm any operating adjustment and the correct restart procedure.
Which The Panel Hub wall panels suit a heated living room?
Choose The Panel Hub acoustic wall panels when sound absorption is part of the brief, or decorative wood panels when texture is the priority. Confirm the selected product’s suitability for the room conditions; its decorative or acoustic purpose does not establish heat compatibility.
Can I use decorative wood panels inside a shower with a heated floor?
Use only a wall system expressly approved for the shower exposure and installed as a complete watertight assembly. Radiant floor heating does not establish that decorative wood panels are suitable for direct water exposure.
One last thing
A baseboard can hide the most important mistake in the room. Before fitting it, photograph the floor movement space, panel bottom, and safe fixing locations. Once trim covers the junction, a future installer loses the clearest view of how the two systems meet.
Related guides