
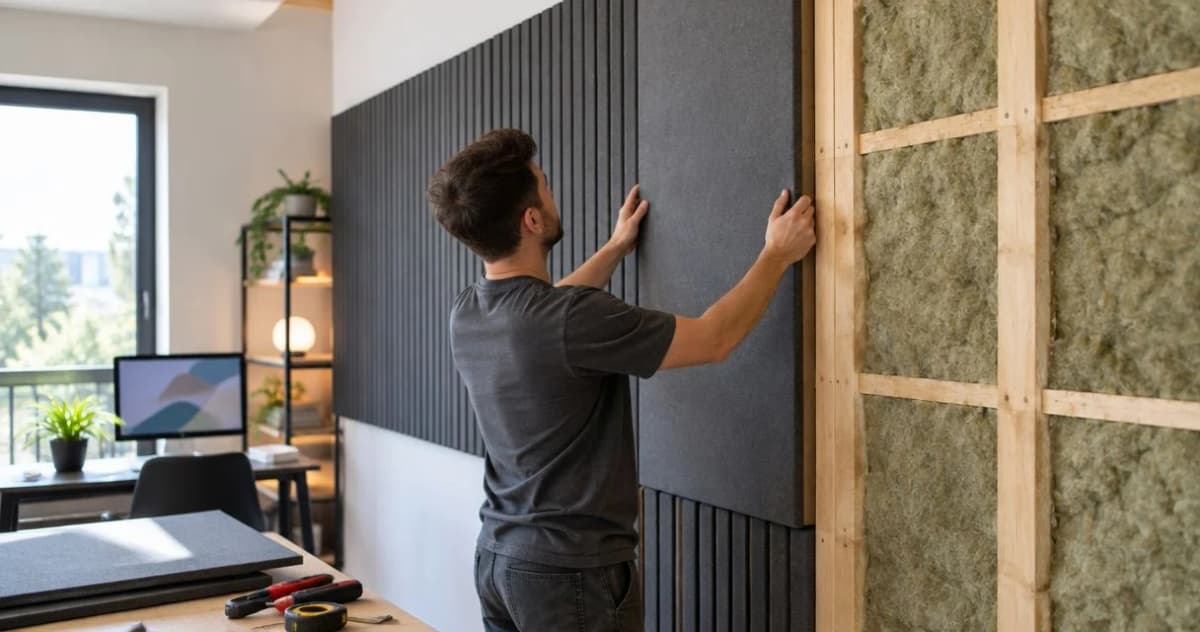
Instead of repeatedly moving furniture to manage echo and neighbor noise, use pairing soundproofing insulation with acoustic wall panels to address two different problems: insulation within a suitable wall assembly helps limit sound transmission, while exposed acoustic panels reduce reflections inside your room. Plan the wall construction first, then choose the visible finish, such as acoustic slat wood wall panels, without treating decorative paneling as a substitute for sound isolation.
- Pairing soundproofing insulation with acoustic wall panels addresses sound transmission and room echo through separate layers.
- The Panel Hub acoustic wall panels suit homeowners seeking wood finishes and room absorption, not standalone sound isolation.
- Complete cavity insulation, wall closure, and required sealing before installing the visible acoustic finish.
- For an existing closed wall, surface acoustic panels improve room absorption without replacing a wall-isolation upgrade.
Why this matters
Sound absorption and sound isolation are different jobs. Absorption reduces reflected sound within a room. Isolation limits sound traveling between rooms or from outside; it depends on the complete construction, including its weakest paths.
Cavity insulation absorbs sound within the wall cavity. Gypsum board, structural connections, doors, gaps, and adjoining surfaces also affect transmission. Wood acoustic panels face the room and manage reflections; they do not turn an ordinary partition into a soundproof barrier.
The Panel Hub acoustic wall panels are best for homeowners who want a wood finish and room absorption, not a standalone sound-isolation system. Their practical benefit is combining a decorative surface with an acoustic purpose. Their limitation is equally important: surface absorption does not establish the isolation performance of the wall behind it.
For a 2026 bedroom or home-office project, name the problem before buying materials. Hearing a voice through the partition calls for an isolation assessment. Hearing your own voice ring around the room calls for absorption. When both happen, you need both strategies.
Before you start
- Confirm access and permission. You need permission to alter the wall, access to the intended mounting surface, and any approvals required for electrical work or changes to a rated assembly. Renters should obtain written approval before opening walls or drilling.
- Gather assembly-specific instructions. Have the insulation instructions, panel mounting instructions, wall measurements, protective equipment, and appropriate measuring, cutting, and fastening tools. Match all materials to the actual wall construction rather than copying a generic installation detail.
- Check the hidden gotcha: assembly compatibility. A panel mounted over a finished wall is not the same as a panel mounted over exposed insulation. Keep required wall linings intact, preserve fire and moisture provisions, and verify that any proposed battens, air space, and fasteners match the panel instructions.
Stop before demolition if the wall has unknown wiring, suspected hazardous materials, dampness, or an unverified fire rating. Resolve those conditions with the appropriate professional first. Acoustic work does not justify covering a defect or compromising a protective assembly.
Noise assessment and wall plan
Choose the job for each layer
- Identify the sound you want to change. Listen for speech, television, outside noise, footsteps, and room echo. Record where each sound is strongest. A shared wall deserves attention, but noise at a door or ceiling junction points to other paths.
- Inspect the whole boundary. Check the wall perimeter, door fit, service penetrations, and connections to adjacent surfaces. Do not assume cavity insulation will solve sound traveling around the partition through another route.
- Assign each material a specific role. Put cavity insulation in the wall-construction plan and acoustic panels in the room-treatment plan. If the project requires a particular isolation result, use a documented assembly and obtain professional design advice rather than combining unrelated product ratings.
- Set a repeatable baseline. Choose 2 listening positions: one near the suspected transmission path and one where you normally sit or sleep. Use the same sound source and settings when checking the finished work. This is a practical listening comparison, not a certified acoustic test.
Expected result: You have a written plan separating incoming noise from reflected room sound, with the main sound paths identified before construction starts.
Compare the materials before ordering
These materials perform different tasks. None earns a soundproofing claim simply because it appears in the same wall.
| Material or layer | Best for | Practical advantage | Limitation or trade-off |
|---|---|---|---|
| Mineral wool cavity insulation | Absorbing sound within a compatible framed-wall cavity | Fits the cavity layer without becoming the visible finish | Needs wall access and does not replace wall mass, sealing, or separation |
| Fiberglass cavity insulation | Absorbing sound within a compatible framed-wall cavity | Provides a porous cavity-fill option | Poor fit, gaps, or unsuitable compression undermine the intended installation |
| Gypsum-board wall lining | Closing the partition as part of a specified assembly | Supplies a continuous wall surface and contributes mass | Performance depends on the complete assembly, joints, penetrations, and connections |
| Acoustic wood wall panels | Reducing room reflections while adding a wood finish | Combines room treatment with a decorative surface | Does not establish sound isolation; mounting details affect absorption |
Neither insulation type is a universal winner. Choose the material specified for your wall assembly, including its thickness, density, handling requirements, and any fire or moisture conditions. A familiar material installed incorrectly is not a dependable upgrade.
For your 2026 specification, keep absorption ratings separate from isolation ratings. NRC describes absorption under test conditions; STC describes airborne sound transmission performance under its own test conditions. You cannot add them together.
Cavity insulation and wall closure
The wall-construction sequence is simple to remember: Inspect, Insulate, Close, Seal, Mount. The final mounting stage belongs after the wall assembly is complete, not before.
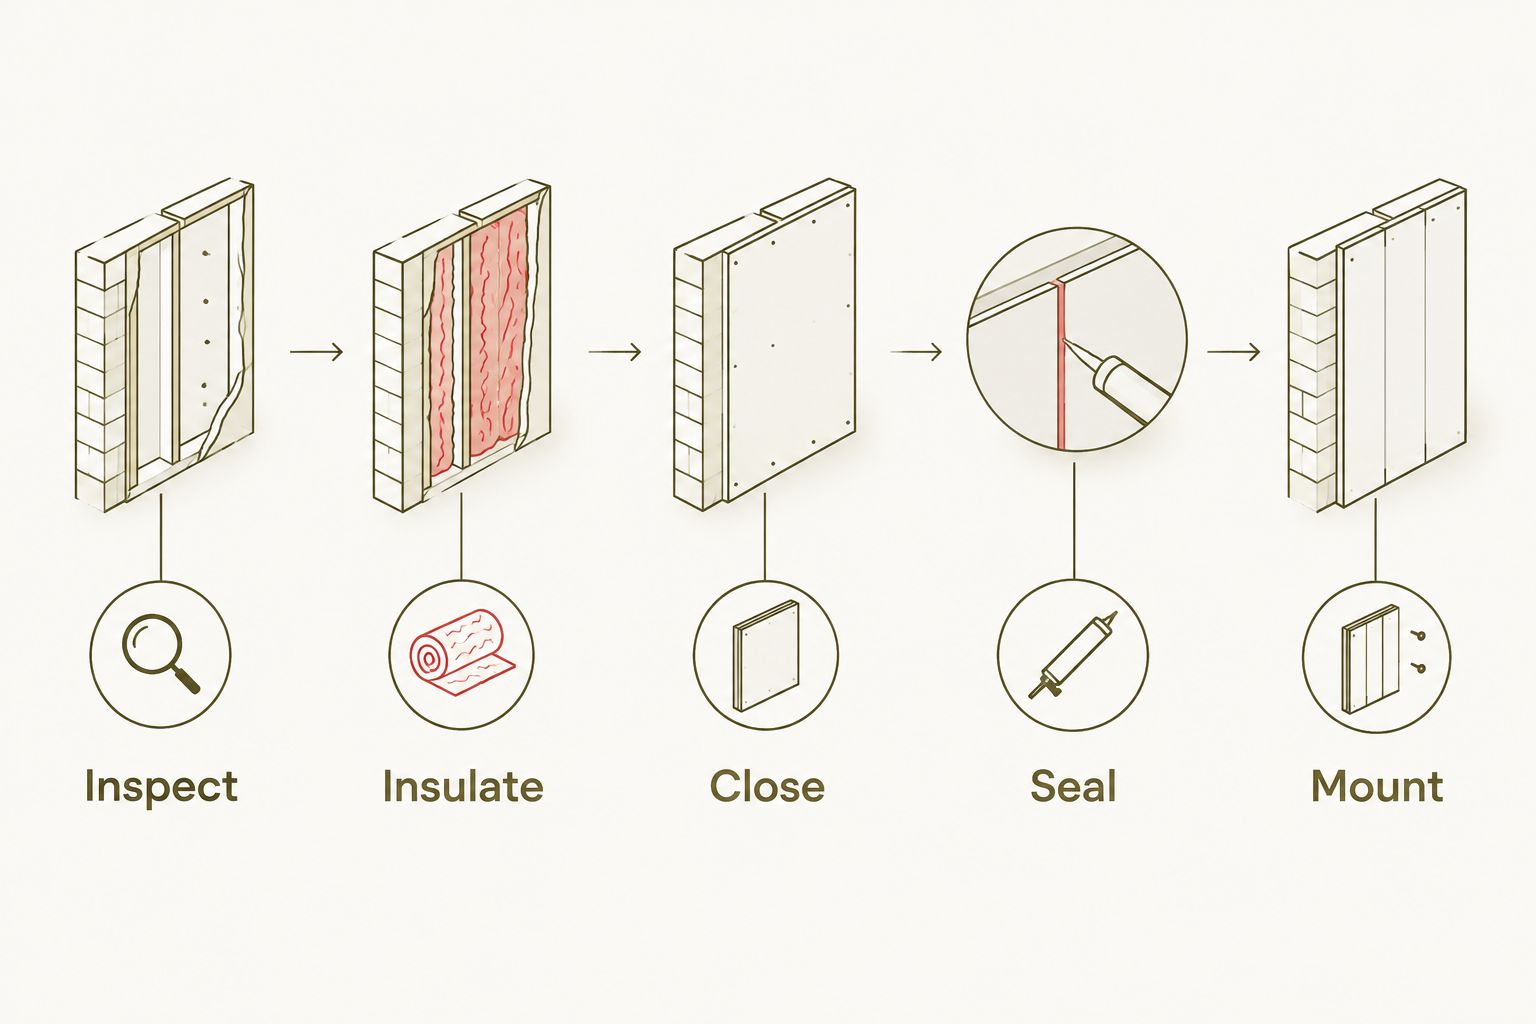
Install the cavity layer
- Inspect the accessible cavity. Confirm that it is dry and that framing and services are suitable for the proposed work. Have qualified trades handle wiring, plumbing, and any repair outside your competence. Do not bury an unresolved leak behind new insulation.
- Fit insulation according to its instructions. Cut and position the material so it fills the intended space without unintended gaps or excessive compression. Follow the manufacturer's directions around services, electrical boxes, and heat-producing equipment. Insulation is not a substitute for required clearances.
- Preserve the specified construction. If the wall uses an isolation detail, resilient connection, or particular lining schedule, keep that detail intact. Do not improvise extra fasteners or supports that bridge a deliberately separated assembly.
Expected result: The cavity contains the specified insulation, services remain compliant, and the construction is ready for its required wall lining.
Close and seal the partition
- Install the specified wall lining. Follow the assembly's fastening, joint, and finishing requirements. Use a qualified installer where the construction is rated or the details are unfamiliar. Acoustic slats are a finish, not permission to omit the required lining.
- Treat joints and penetrations correctly. Use compatible acoustic sealing details where specified. Where fire protection is required, use the appropriate approved firestopping system rather than assuming ordinary acoustic sealant is sufficient.
- Check the completed boundary. Inspect perimeters, service openings, and door-related gaps before paneling conceals access. Keep electrical boxes accessible and arrange compliant extensions where added finish depth requires them.
Expected result: You have a closed, correctly detailed partition that is ready to receive surface treatment. No exposed cavity insulation or unresolved service opening remains behind the planned finish.
Acoustic panel layout and mounting
Configure the visible finish
- Mark the treatment area and attachment points. Map panel edges, corners, outlets, switches, trim, and furniture. Check how the pattern terminates at each boundary. Confirm that the attachment method suits both the panel and the wall substrate.
- Install the approved mounting arrangement. Use the panel manufacturer's directions for direct mounting or a supported stand-off arrangement. Do not assume that adding an arbitrary air gap or insulation behind a panel produces its published absorption result.
- Finish edges without blocking access. Keep switches usable, electrical boxes serviceable, and ventilation openings clear. Do not coat or fill absorptive openings unless the manufacturer expressly permits that finish.
- Repeat your listening check. Use the same sound source, settings, and 2 listening positions from the baseline. Assess room echo separately from sound heard through the boundary. A nicer-sounding room does not automatically mean a better-isolated room.
Expected result: The panels are securely mounted, the layout looks deliberate, and your final check distinguishes reduced reflections from changes in transmitted noise.
A wood-slat feature wall works well visually when its edges relate to the desk, bed, or seating area. Plan that relationship before cutting. A small finish adjustment is easier on paper than after mounting.

Read the brand specifications correctly
The Panel Hub states an NRC of 0.85 for its acoustic wood panel offering. That is an absorption rating, not a promise that neighbor noise falls by 85%. Confirm the tested mounting arrangement and whether it applies to the exact panel you choose.
The Panel Hub also describes panel installation in under 2 hours and a 5-year warranty. Do not apply the panel-installation time to opening a partition, insulating its cavity, completing electrical work, or rebuilding its lining. Those are separate tasks.
For a 2026 project plan, keep the panel finish and wall-construction work on separate checklists. That prevents a quick decorative installation claim from becoming an unrealistic schedule for structural work.
Existing-wall variant: improve absorption without opening the wall
If your wall is already closed and the main problem is echo, skip cavity work and install a suitable acoustic surface treatment. This is a different workflow, not a shortcut to the same isolation result.
- Best for: homeowners who want less reflected sound and a decorative room upgrade without wall demolition.
- Advantage: you retain the existing partition and focus on the room-facing surface.
- Limitation: the closed wall's transmission paths remain unless separately addressed.
Start by checking the substrate and the panel instructions. Select a mounting arrangement that the manufacturer supports, protect service access, and compare the room before and after installation. Do not pack loose insulation behind a decorative finish without an approved support and enclosure detail.
For a rental, prioritize permission and reversibility. Adhesive is not automatically damage-free, and screw holes still alter the wall. If outside noise is the main complaint, discuss the building boundary with the owner before investing in a surface-only treatment.
Troubleshooting
- Neighbor speech remains audible. Recheck doors, penetrations, wall junctions, and adjoining construction. Surface panels address reflections; persistent transmission needs an isolation assessment rather than more decorative coverage.
- The room still sounds lively. Check whether the treatment faces the reflective areas relevant to your seating position and whether its mounting matches the intended arrangement. Other hard surfaces also contribute reflections. Expand treatment deliberately instead of assuming one feature wall treats the entire room.
- The finished wall does not match the claimed NRC. Check the exact panel, test mounting, backing, and air-space requirements. A published absorption rating describes a tested configuration, not every installation using a similar-looking finish.
- Panels loosen or edges lift. Stop using the affected area and inspect substrate condition, attachment compatibility, and required support. Correct the cause using the manufacturer's method; do not conceal loose work with trim.
- Footsteps or deep vibration remain. Investigate floor, ceiling, and structural transmission paths. A cavity-and-surface treatment on one wall is not a complete impact-noise solution. Get specialist advice before adding further layers.
Customize your workflow
Build your 2026 plan around how you use the room. A home office needs treatment related to the desk and call position; a bedroom needs attention to the noise path affecting sleep. A television room needs both the room response and sound traveling to adjacent spaces considered separately.
Finish the isolation work before choosing how much decorative coverage you want. Keep photos of concealed construction, record the materials and mounting method, and save the applicable installation instructions. Those records help when you change outlets, add shelving, or troubleshoot later.
FAQ
Does pairing soundproofing insulation with acoustic wall panels make a wall soundproof?
No. Pairing soundproofing insulation with acoustic wall panels addresses cavity absorption and room reflections, but sound isolation depends on the complete wall assembly and other transmission paths.
Should insulation go behind the drywall or behind the acoustic panels?
For a framed-wall isolation project, cavity insulation belongs within the specified wall assembly behind its required lining. Insulation behind surface panels is a separate absorption detail and needs a supported, manufacturer-approved arrangement.
Is mineral wool better than fiberglass for acoustic wall treatment?
Neither is universally better for every wall assembly. Choose the insulation specified for the construction and install it without unintended gaps or unsuitable compression.
What does an NRC of 0.85 mean for wood acoustic panels?
An NRC of 0.85 describes sound absorption under a particular test configuration. It does not mean that the panel blocks 85% of noise from another room.
Can I add acoustic panels without opening an existing wall?
Yes, when the substrate and mounting method meet the panel instructions. Surface-mounted panels address room reflections, not the unfinished isolation problems within or around the existing partition.
Can I put acoustic wall panels over electrical outlets?
Do not conceal electrical boxes or make outlets inaccessible. Plan openings and have any required box extensions or electrical alterations completed correctly by a qualified person.
Can acoustic panels stop footsteps from upstairs?
Surface acoustic panels are not a complete solution for transmitted footstep noise. Footsteps involve floor and structural paths that require a separate assessment.
How should I plan a combined insulation and panel project in 2026?
Plan wall construction and decorative panel installation as separate phases in 2026. Complete inspection, cavity work, lining, and required sealing before mounting the acoustic finish.
One last thing
A wall can look completely finished while its main sound path remains untreated. Before ordering extra panels, stand by the door and listen again. If noise is strongest there, adding more coverage to the feature wall is the wrong next move.
Related guides
- Soundproofing wall panels for apartments
- Acoustic panels for home theater rooms
- Wall panels for home offices
- Wall panels for DIY beginners