
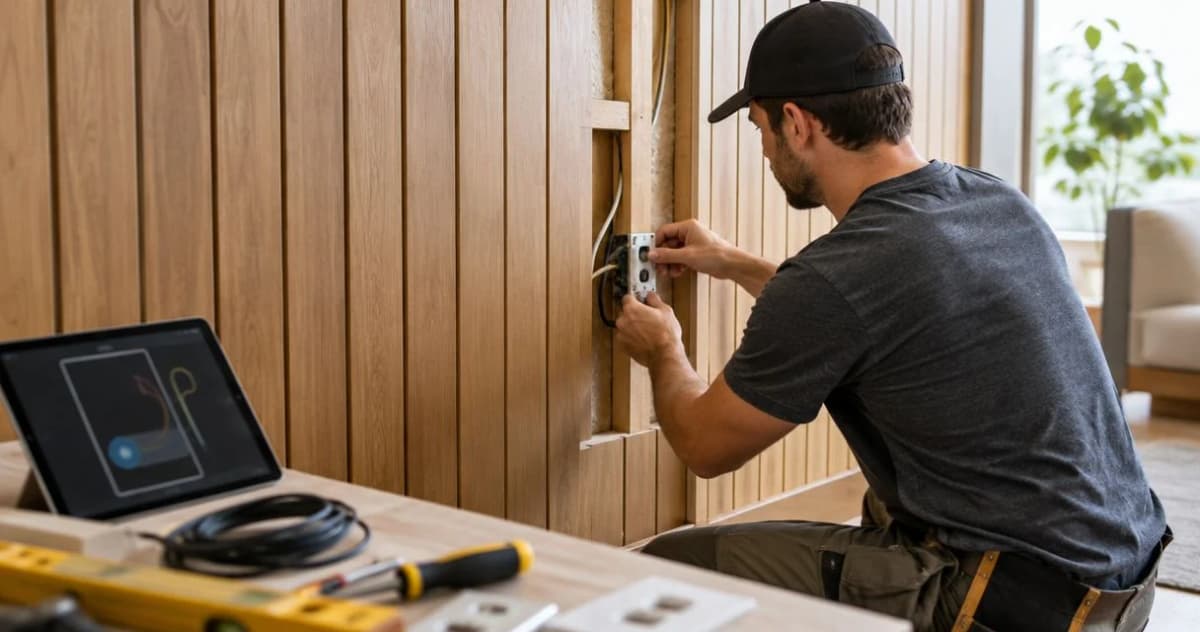
Instead of repeatedly trimming panels around a recessed outlet, plan wiring outlets behind wood wall panels with an electrician before you cut: establish the finished wall depth, bring the electrical enclosure to the wood surface, and keep every connection accessible. This 2026 workflow separates your panel-fitting work from the electrical work so the finished wall looks intentional without concealing a hazard.
- Wiring outlets behind wood wall panels requires accessible electrical boxes, suitable enclosure depth, and protected cable routes.
- The Panel Hub wood wall panels suit homeowners planning decorative upgrades; electrical alterations belong with a qualified electrician.
- Wood is combustible: do not apply the recessed-box allowance used for some noncombustible wall finishes.
- Dry-fit the panel opening and cover plate before attaching wood slat panels permanently.
Why this matters
An outlet that worked correctly before paneling can become incorrectly recessed afterward. Added wood, backing, adhesive, and mounting battens change the finished surface; a longer mounting screw alone does not extend the electrical enclosure.
The Panel Hub wood wall panels are best for homeowners planning decorative wall upgrades, not a substitute for electrical enclosure protection. Start with your preferred finish from The Panel Hub, then coordinate the outlet detail before installing it.
For a US project in 2026, the relevant National Electrical Code provisions include Section 314.20 for box position at combustible surfaces, Section 300.4 for protection against physical damage, and Section 314.29 for accessibility. Your local authority determines the adopted edition, amendments, permits, and inspection requirements; the calendar year does not establish which code applies.
Before you start
- Arrange electrical access and approval. Book a qualified electrician for enclosure changes, conductor work, testing, and any required inspection. Identify the circuit and arrange a time when it can remain safely isolated.
- Gather the complete wall assembly. Have a panel sample, any backing or battens, the intended cover plate, a tape measure, a level, marking tools, and appropriate panel-cutting equipment. Obtain the panel manufacturer's installation instructions and the electrical accessory instructions.
- Check the hidden gotcha: the finished depth is not just the panel thickness. A recessed box behind combustible wood needs a suitable enclosure solution. Uneven slats also need a stable mounting detail; a cover plate cannot replace a box extension or conceal an unsuitable opening.
Ask the electrician to inspect existing wiring before covering the wall. Damaged insulation, loose boxes, unidentified circuits, or overcrowded enclosures are reasons to resolve the electrical work first, not reasons to hurry the decorative work.
Choose your outlet workflow
The right arrangement depends on whether you are preserving the outlet position, moving it, or adding a thicker mounting assembly. These are installation approaches, not interchangeable electrical products.
| Workflow | Best for | Advantage | Limitation |
|---|---|---|---|
| Existing outlet position | A sound existing circuit and an outlet that remains useful | Preserves the room's current outlet layout | Added finish depth still requires an enclosure assessment |
| Relocated outlet | An outlet obstructed by furniture or a planned feature wall | Places the outlet where you need it | Requires electrical alterations and a plan for the original box |
| Batten-mounted panels | A panel system installed over a supporting framework | Allows the specified panel mounting arrangement | Adds depth and creates extra fastening locations near concealed cables |
Keep an existing outlet only when its position and electrical condition suit the finished room. Moving furniture after installation should not leave the only useful receptacle behind a fixed cabinet.
For your 2026 project plan, record the chosen workflow alongside the panel layout. A decision made on paper is easier to change than an opening cut into finished wood.
Finished-depth plan
- Measure the assembly. Add the thicknesses of the panel, backing, battens, and any other specified layers. Use the actual materials rather than an assumed catalog dimension.
- Locate the boxes. Mark each existing outlet and any other electrical enclosure on your wall drawing. Include junction boxes that do not contain a receptacle; those still need access.
- Choose the cover-plate landing. Position the outlet where its plate can sit properly on the intended finished detail. With slats or textured wood, discuss a flat mounting detail before committing to the pattern.
- Agree on the enclosure solution. Have the electrician select a listed box extension or a box repositioning arrangement suitable for the existing box and new surface. Do not assume every extender fits every enclosure.
Expected result: you have a measured wall build-up, marked box locations, and an agreed outlet detail before cutting any panels.
At a combustible wood surface, NEC Section 314.20 requires the box, extension ring, or listed extender to reach the finished surface or project beyond it. Treat 0 inches of setback as the planning limit for the enclosure edge at that wood surface; this is not the same as the position of the receptacle face.
Do not borrow the recessed-box allowance that applies to qualifying noncombustible finishes. Wood veneer over another material does not justify treating the exposed wood as noncombustible.
Circuit and enclosure preparation
- Have the electrician isolate the circuit. The electrician should prevent inadvertent reenergizing and verify the absence of voltage with appropriate equipment. An outlet that stops powering a lamp is not sufficient verification.
- Inspect the existing enclosure. Have the electrician check box security, conductor condition, grounding, available conductor length, and box-fill requirements before specifying an extension or relocation.
- Approve the cable route. For a new or moved outlet, the electrician should plan the route and protective measures before panel attachment. Do not place loose household cords behind permanently attached panels.
- Mark fastening restrictions. Transfer the electrician's cable-route information to the installation plan so panel screws and batten fasteners avoid those locations.
Expected result: electrical preparation is complete to the stage required for panel fitting, and you know where not to drill or screw.
NEC Section 300.4 includes a 1¼-inch clearance requirement from relevant framing edges for certain concealed cable routes, with protective measures where that clearance cannot be maintained. A stud finder does not establish that every cable meets this clearance.
For the bored-hole framing condition covered by Section 300.4(A)(1), a steel protective plate is generally at least 1/16 inch thick, subject to the provision's exceptions for listed alternatives. Have the electrician specify protection; do not add arbitrary metal scraps or drive panel fasteners through protective plates.
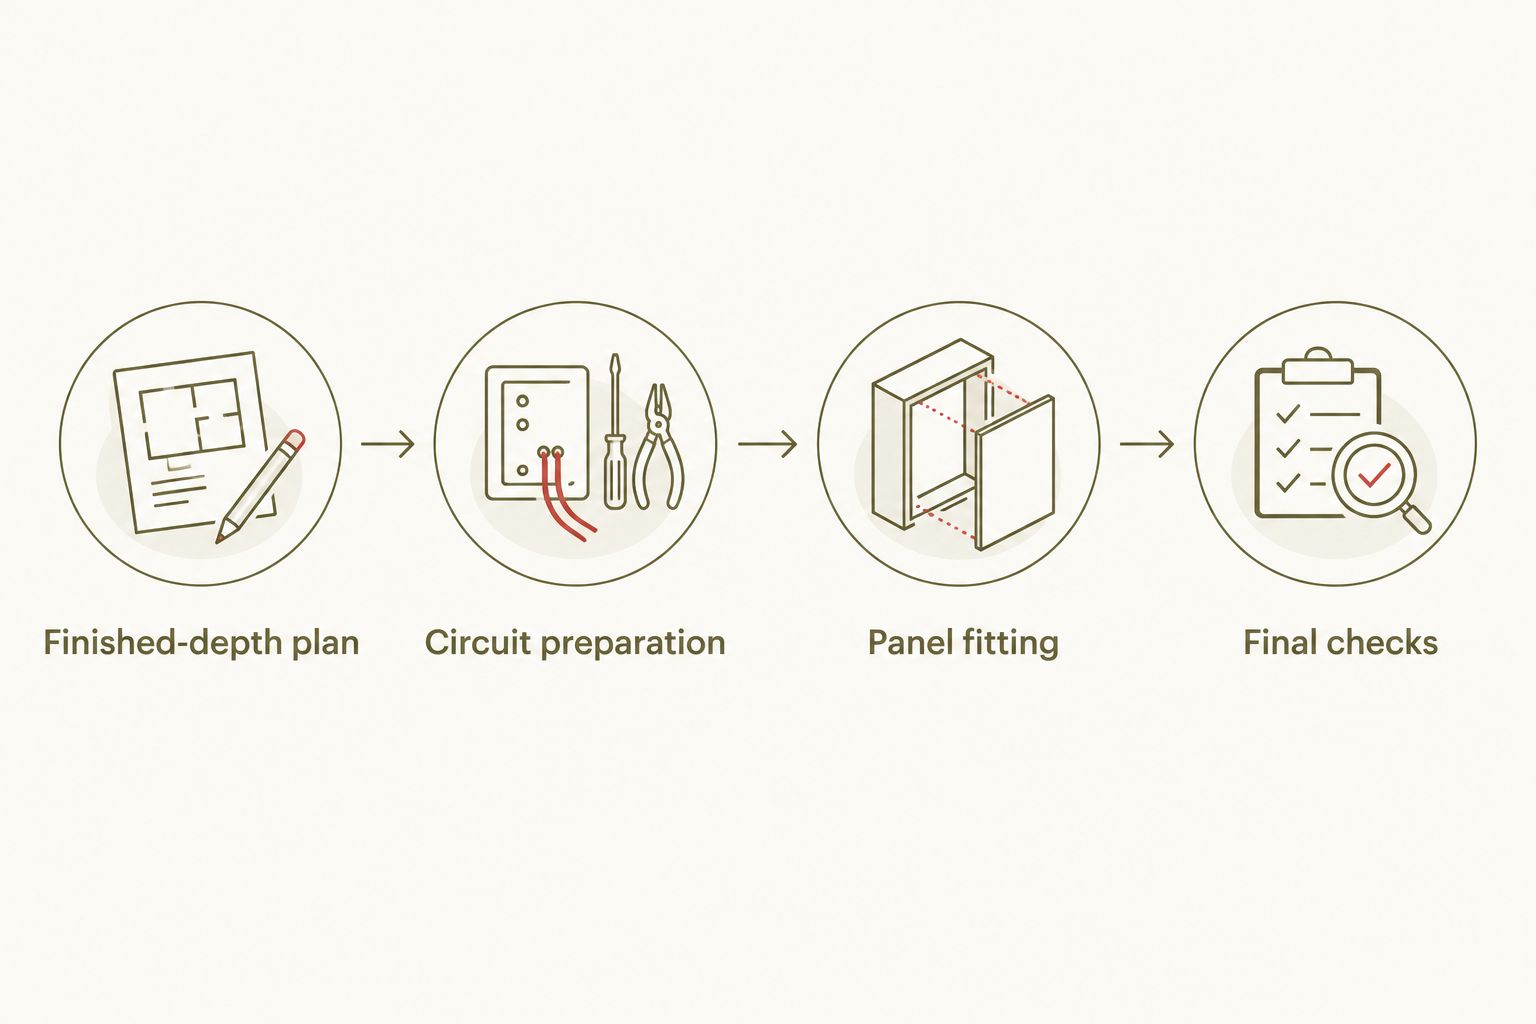
Panel fitting
- Transfer the opening to the detached panel. Measure from fixed reference points, checking orientation and the direction of the panel pattern. Mark the opening required by the agreed enclosure detail, not just the visible receptacle face.
- Cut away from the wall. Support the detached panel on a suitable work surface and use the manufacturer's recommended cutting method, eye protection, and dust controls. Never plunge a saw into the installed wall around concealed wiring.
- Dry-fit the panel and plate. Check the opening against the prepared enclosure, with electrical components handled by the electrician. Confirm that the intended plate covers the perimeter and has an appropriate landing surface.
- Attach the panel without obstructing access. Follow the panel installation instructions and fastening restrictions. Keep adhesive, dust, and wood offcuts out of the electrical enclosure, and leave electrical mounting points unobstructed.
Expected result: the panel opening fits the enclosure detail, the plate has a suitable landing, and the electrical box remains accessible without removing permanent paneling.
The cover plate should not serve as a clamp to bend slats flat. Likewise, an oversized plate is not a repair for an opening that leaves an unsafe gap or exposes combustible material inside the enclosure boundary.
Where the panel pattern has raised and recessed areas, test the actual plate against a sample. A pattern that looks flat from across the room can leave the plate rocking at the wall.
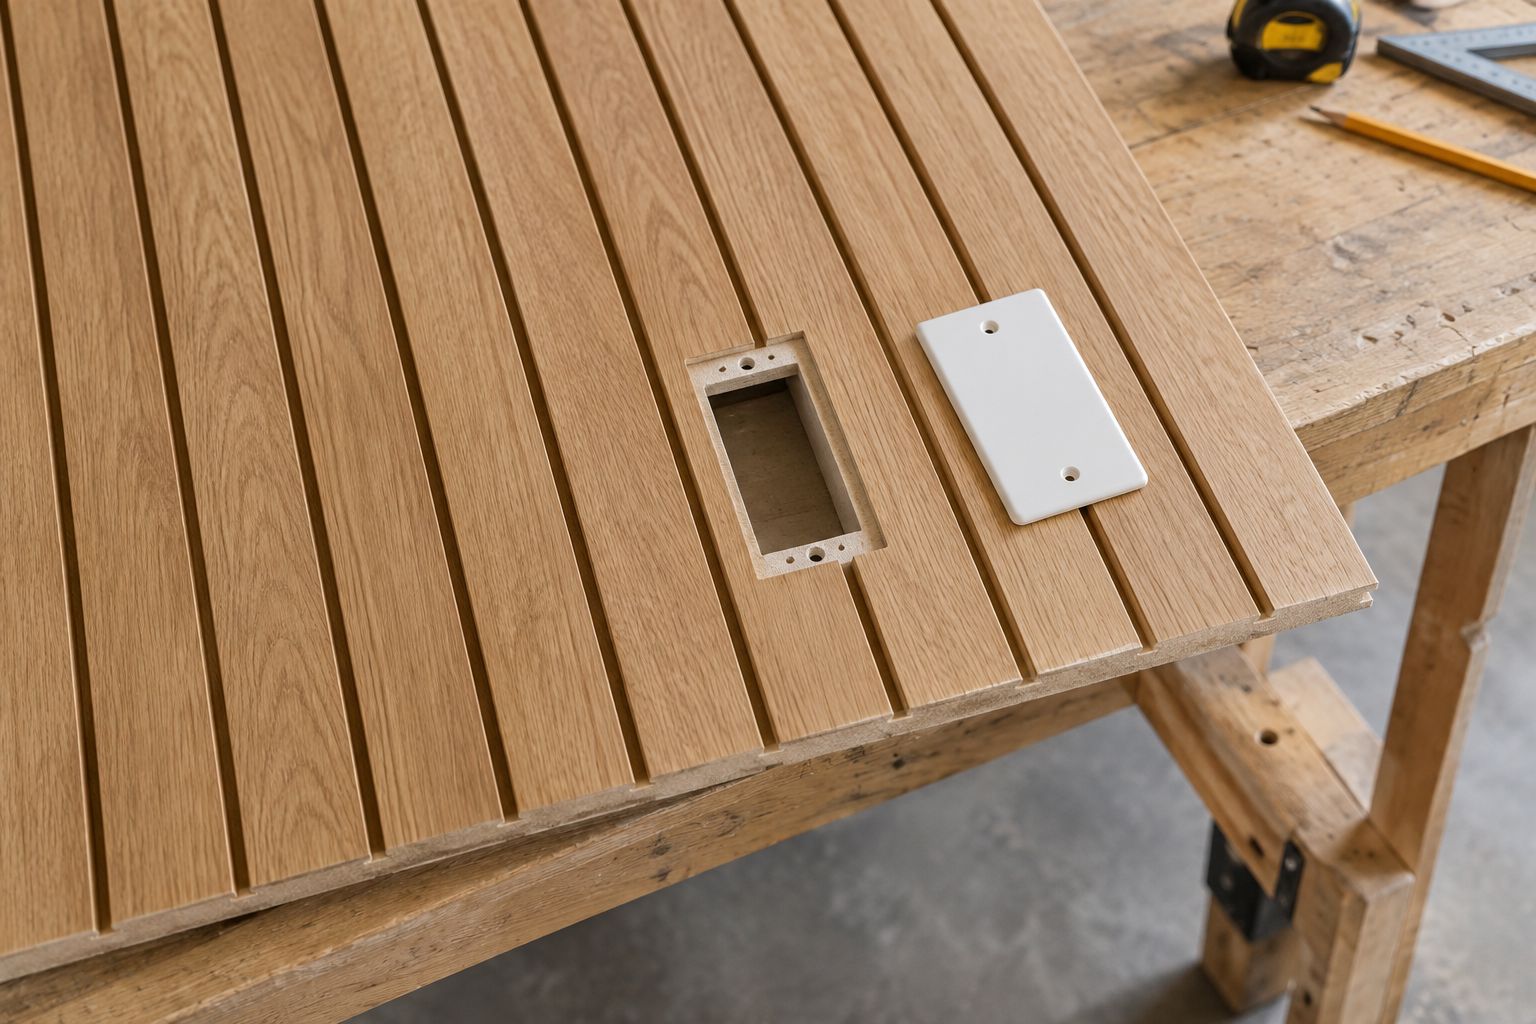
Leave final electrical assembly to the electrician. Your panel-fitting milestone is a clean, correctly located opening—not a powered outlet.
Final checks
- Have the electrician complete the device installation. The electrician should confirm the selected mounting hardware, device support, conductor connections, grounding, and enclosure arrangement meet the applicable requirements and accessory instructions.
- Check the finished plate. Confirm it is secure, sits properly, and leaves no exposed conductors. Do not tighten it excessively to compensate for an uneven panel surface.
- Complete electrical testing and inspection. Have the electrician verify operation and any required protective-device function before the circuit returns to normal use. Complete the local inspection process where required.
- Save the installation record. Keep photographs of cable routes, protective plates, and box locations before they are concealed, together with the panel and electrical accessory instructions.
Expected result: you have a finished outlet that is supported, enclosed, accessible, and checked—not merely one that powers a device.
For your 2026 installation record, note who completed the electrical work and which wall areas contain concealed routes. Photographs support future planning, but they do not replace professional checks before later drilling.
Second workflow: move the outlet before paneling
Best for: an existing outlet that will sit behind fixed furniture or interrupt the planned feature wall. Relocation addresses usability, but it adds electrical work and changes the treatment of the original box.
Have the electrician establish the new position, circuit suitability, cable route, enclosure depth, and local approval requirements before you order custom cuts. Then use the same finished-depth and dry-fitting sequence for the new location.
The original box cannot simply disappear behind permanent wood if it still contains connections requiring access. NEC Section 314.29 governs accessibility; the electrician must either provide compliant access or remove the need for that junction through a suitable rewiring arrangement.
Do not run a standard extension cord behind the panels to imitate a relocated outlet. For a wall-mounted television or desk, ask the electrician to plan power separately from signal cables, including any required separation and suitable cable types.
Troubleshooting
- The receptacle appears recessed after paneling. Stop final assembly and have the electrician reassess the complete finish depth. Longer screws or device spacers alone do not bring the enclosure edge to the combustible surface.
- The plate rocks against the slats. Revisit the flat landing detail and panel cutout. Do not bend the plate or crush the wood by overtightening its screw.
- The cutout is too large. Stop before attaching the panel permanently. Replace or rework the affected piece using an approved detail; a decorative cover must not hide an unresolved enclosure problem.
- A planned screw position meets a protective plate. Move the fastening position or revise the attachment method with the installer. Never drill through the plate to reach the stud.
- A cable or junction box appears during preparation. Pause the panel installation and have the electrician identify it. Keep the box accessible and resolve the route before closing the wall.
Customize your workflow
Plan every outlet on the wall together, including switches and blank-covered junction boxes. Repeating one checked mounting detail can simplify the decorative layout, but the electrician still needs to assess each enclosure individually.
For your 2026 room upgrade, decide furniture placement before outlet placement. In a bedroom, consider bedside access; in a home office, map the desk and equipment positions without routing everyday power cords behind permanent cladding.
The Panel Hub wood wall panels can provide the decorative finish around this plan. Their panel characteristics do not establish electrical approval for the surrounding installation, so keep finish selection and electrical acceptance as separate decisions.
FAQ
Can I install wood wall panels around existing outlets?
Yes, provided the electrical enclosure, device mounting, cover plate, and access remain compliant after the added finish. Have an electrician assess the new wall depth before attaching the panels.
Do I need a box extender behind wood wall panels?
You need an enclosure arrangement that reaches the combustible finished surface or projects beyond it. An electrician can determine whether a suitable listed extender or box repositioning is appropriate.
Can I just use longer outlet screws?
No, longer screws alone do not extend the electrical enclosure. They cannot substitute for the required enclosure detail at a combustible wood surface.
Can I hide an unused junction box behind paneling?
Not if it contains connections that must remain accessible. Have an electrician provide compliant access or rework the wiring so the concealed junction is no longer needed.
Can I run an extension cord behind a wood feature wall?
Do not use an ordinary extension cord as concealed permanent wiring behind wood panels. Have an electrician install a suitable permanent power arrangement instead.
Are acoustic wood panels different around outlets?
Acoustic wood panels still require an appropriate electrical enclosure and accessible connections. Slats, backing, and any battens must all be included when establishing the finished wall depth.
Which electrical code applies to my 2026 panel installation?
The code edition adopted by your local authority applies, including local amendments. Ask your electrician or building department about permits and inspections before changing wiring or outlet locations.
One last thing
A working outlet is not proof of a finished electrical installation. A receptacle can power a lamp while its box remains incorrectly recessed behind combustible wood.
Before calling your The Panel Hub wall-panel project complete, check the enclosure detail—not just the cover plate's appearance. That small check belongs before the wall becomes difficult to reopen.
Related guides
- Wall panels for DIY beginners
- Grooved wall panels for modern interiors
- Wall panels for home offices
- Wall panels for bedroom accent walls