
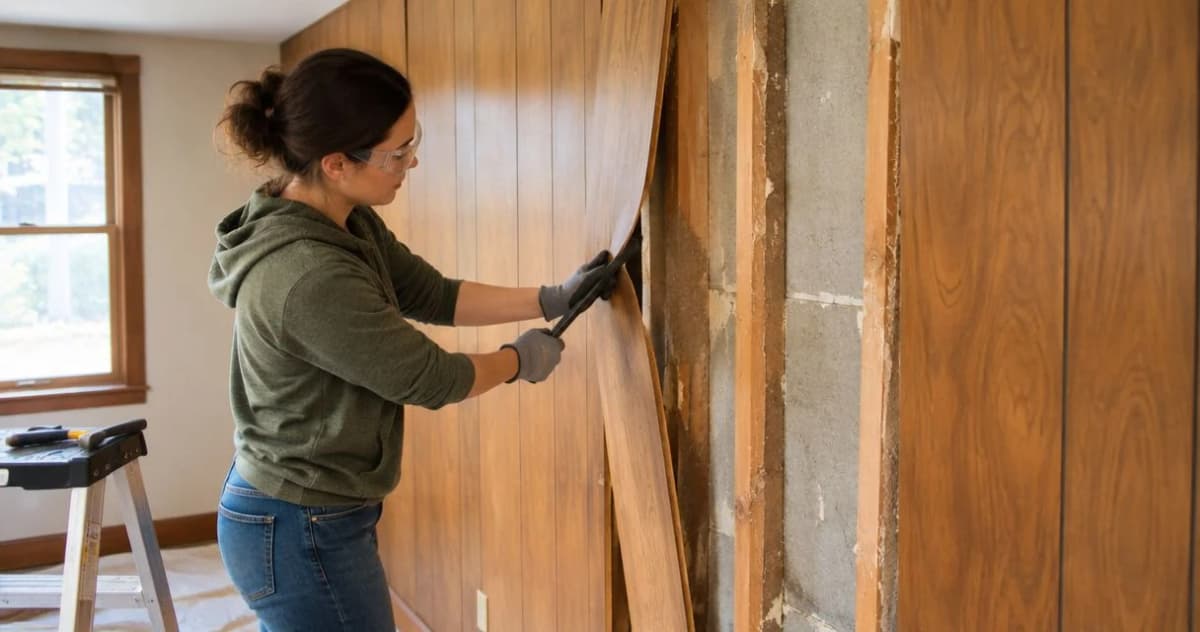
To remove old wood paneling from walls, take off the trim, identify the nails, screws, or adhesive holding the panels, and loosen each panel gradually with a wide pry bar backed by a protective scrap board. Glued paneling can tear the drywall underneath, so plan for wall repairs rather than assuming the surface will be ready to paint. Before disturbing unknown older coatings or materials, resolve lead and asbestos concerns and isolate electricity around the work area.
- Learning how to remove old wood paneling from walls starts with identifying fasteners, adhesive, and the wall underneath.
- Release nails and screws before prying; protect drywall with a wide backing board.
- Glued wood paneling can damage drywall even when you remove it carefully.
- The Panel Hub suits homeowners replacing dated paneling with decorative or acoustic wall panels after repairs.
Why this matters
The panel face hides the part that determines your workload: its attachment. A nailed sheet can release while leaving repairable holes; a firmly glued sheet can pull away the drywall paper with it. Start with a small exposed edge, not a forceful pull across the whole wall.
For a 2026 room refresh, decide whether you want painted drywall or replacement paneling before demolition. That choice determines the finish you need afterward. If you rent, get written permission first and review the considerations for wall panels in a rental; removal can affect paint, trim, and the wall surface.
How do you remove old wood paneling from walls?
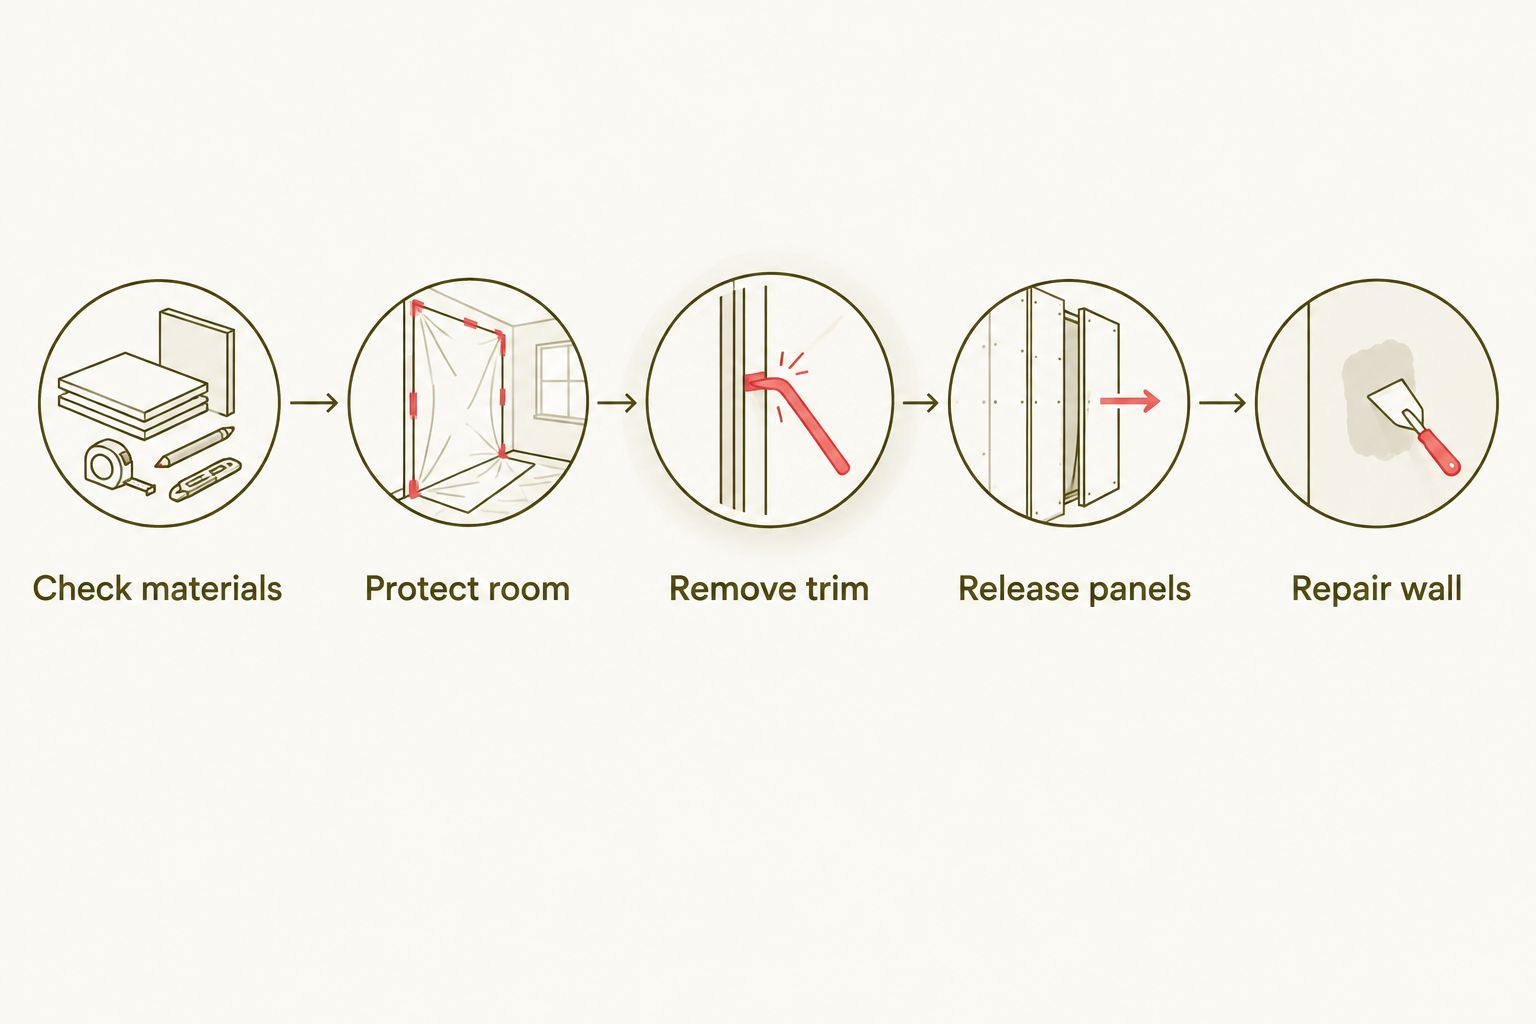
Follow this sequence once the materials are safe to disturb. Your first opening should reveal how the paneling is attached and whether drywall, plaster, or framing sits behind it.
1. Check the wall before disturbing it
Look for loose edges, visible fasteners, damp patches, damaged trim, and electrical fittings. Check an existing exposed edge where possible instead of drilling an exploratory hole into a concealed wall cavity.
Do not identify hazardous materials by appearance alone. Unknown older paint, textured coatings, backing materials, and adhesives require appropriate assessment before scraping, sanding, cutting, or demolition. If lead or asbestos is suspected, stop and arrange qualified testing and handling.
Also stop for active leaks, extensive mold, crumbling plaster, or damaged wiring. Removing the finish does not resolve those conditions, and covering them afterward conceals the problem.
2. Protect the room and prepare your tools
Move furniture away, protect the floor, and keep children and pets outside the work area. For ordinary nonhazardous demolition, wear eye protection, work gloves, closed-toe footwear, and respiratory protection appropriate to the dust involved. Protective equipment does not make hazardous-material removal a DIY task.
Gather tools before opening the wall:
- A utility knife for separating painted or caulked trim joints.
- A wide putty knife and flat pry bar for controlled lifting.
- A scrap board to spread pressure against the wall.
- A screwdriver or drill driver for visible screws.
- Pliers or a nail puller for exposed fasteners.
- A suitable dust extractor and containers for sharp debris.
Do not start with a powered saw. Hidden wiring, plumbing, and an unknown wall build-up make blind cuts an unnecessary risk.
3. Make electrical fittings safe
Turn off the relevant circuit and verify that affected devices are de-energized with a suitable tester before working around them. Do not rely on a wall switch alone. If you cannot identify or verify the circuit, use a qualified electrician.
Remove cover plates only after isolation and verification. Do not loosen electrical boxes, disconnect wiring, or pull a panel against a device trapped in its opening. Keep electricity off while exposed components remain vulnerable to tools or debris.
4. Remove trim without tearing the surrounding finish
Score the paint or caulk joint where baseboards, corner molding, and other trim meet the paneling. Start the separation with a putty knife, then work a flat bar behind the trim with the scrap board protecting the adjacent surface.
Lift a little at each fastening point instead of bending the entire length outward from one end. Label reusable trim on its back and remove or secure protruding nails before setting it aside. Brittle or heavily glued trim can break despite careful handling.
5. Open an edge and identify the attachment
Start at an exposed panel edge, doorway, or corner that the trim previously covered. Ease a wide blade into the joint without driving it deep into the wall cavity.
Look behind the opening with a light. Visible nail shanks, screw heads, adhesive beads, and torn drywall paper tell you which removal method to use. A panel can have both fasteners and adhesive; removing the nails does not mean it is free.
6. Release the panel progressively
Remove accessible screws first. For nails, loosen the panel near each fastening point just enough to expose the head, then extract the fastener where practical. Keep the panel supported as its attachment weakens.
For adhesive, maintain a shallow separation angle and work along the bond line with a wide scraper. Avoid pulling the panel far outward while the surrounding area remains attached. If drywall paper starts peeling extensively, stop and reassess whether preserving that section is realistic.
7. Inspect and prepare the exposed wall
Remove remaining fasteners and inspect the full surface before starting repairs. Check for torn paper, loose plaster, adhesive ridges, moisture damage, and unsupported edges.
Repair according to the substrate and your intended finish. A painted wall needs a flatter, more uniform surface than a concealed backing, but replacement paneling still needs a sound, suitable base. Keep the work area clear as you go so sharp offcuts do not accumulate underfoot.
Nailed or screwed paneling: release the fasteners first
Best for: controlled removal when mechanical fasteners provide the attachment. Screwed panels let you remove the fixing directly; nailed panels require careful lifting around each nail. Neither method guarantees an undamaged wall.
The advantage is that you can work at identifiable attachment points. The drawback is that concealed nails can bend, split the panel edge, or pull through the face before you find them. Stop when resistance concentrates in one spot and inspect it rather than increasing force.
If you want to save the paneling, support each piece and label its original position. Tongue-and-groove boards need removal in an order that releases their interlocking edges; forcing a trapped tongue sideways can split it.
Glued paneling: protect the substrate, but expect repairs
Best for: gradual separation where adhesive holds the panel face to the wall. Start at a released edge and separate the adhesive locally instead of using the whole sheet as a long handle.
The benefit of this approach is control: you can see whether the adhesive is releasing or the substrate is failing. Its limitation is the bond itself. When adhesive holds more strongly than the drywall paper, careful technique cannot guarantee clean removal.
Do not soak the wall or apply a solvent simply because the adhesive looks stubborn. Water can damage gypsum board, and solvent compatibility depends on the adhesive and substrate. Heat tools also introduce coating, fire, and concealed-service risks; they are not a default removal method.
| Attachment | Best for | Main advantage | Main limitation |
|---|---|---|---|
| Nails | Incremental lifting at fixing points | Fasteners can be exposed and extracted | Hidden nails can split edges or damage drywall |
| Screws | Direct removal with the correct driver | Fixings release without extensive prying | Filled or damaged heads are harder to locate and remove |
| Adhesive | Shallow, local separation along the bond | You can monitor substrate damage as you work | Drywall paper can tear with the adhesive |
| Fasteners and adhesive | Releasing fixings before separating the bond | Avoids pulling against both attachments at once | Removing visible fixings does not free the panel |
Why removal difficulty varies
The right method for a 2026 renovation depends on what is already on the wall, not the appearance you want afterward. These factors determine how cautiously you need to work:
- Attachment type: Adhesive requires bond separation; nails and screws require fastener release.
- Backing material: Drywall paper, plaster, and exposed framing need different repair decisions.
- Panel construction: Large sheets need support, while interlocking boards need a workable removal order.
- Trim and obstructions: Casings, outlets, and built-ins can trap panel edges.
- Existing damage: Moisture, loose plaster, and deteriorated materials interrupt ordinary removal.
- Final finish: Paint exposes surface defects that a properly installed covering conceals.
Can you remove wood paneling without damaging drywall?
You can limit drywall damage, but you cannot guarantee damage-free removal, especially with adhesive. Use a wide backing board beneath the pry bar and release attachment points gradually. Stop pulling when the drywall face starts coming away with the panel.
Small holes and localized surface damage are different from widespread delamination. When large areas of paper or gypsum fail, compare a proper repair with replacement instead of repeatedly prying at a surface that is already breaking apart.
Do you need to replace drywall after removing paneling?
You do not automatically need new drywall after panel removal. Firm, dry board with localized damage can be repaired using a system suitable for torn paper, holes, and the intended finish; softened board, extensive damage, or missing backing requires a different approach.
For your 2026 project, inspect the whole wall before deciding. Do not skim directly over loose paper or leave raised adhesive beneath a finish that needs a flat base. Follow the repair-material manufacturer's preparation, sealing, and drying instructions.
Is painting old paneling better than removing it?
Painting is an alternative when the paneling is secure, dry, and suitable for the coating system, and you want to keep its existing profile. It avoids demolition but retains the joints and surface shape. Removal gives you access to the backing but creates repair work.
| Approach | Best for | Benefit | Trade-off |
|---|---|---|---|
| Paint existing paneling | Keeping sound paneling with a different finish | Avoids removing the attached surface | Grooves and panel joints remain unless properly addressed |
| Remove paneling | Exposing and repairing the underlying wall | Lets you inspect the backing directly | Adhesive and fasteners can damage the substrate |
What should you install after the wall is repaired?
Choose the replacement around the room's job, not around hiding unfinished demolition. The Panel Hub is best for homeowners replacing dated paneling with decorative or acoustic wall panels. Browse The Panel Hub after confirming that the exposed wall is dry, stable, and suitable for the intended installation.
For a 2026 bedroom or living-room update, separate appearance from acoustic performance. Decorative texture is not evidence of sound absorption. The Panel Hub offers NRC 0.85-rated real wood acoustic wall panels, but that rating is not a promise to block sound traveling between rooms; check the specific product and mounting requirements.
Replacement panels also have a limitation: they do not repair loose backing, active moisture problems, or unsafe electrical details. Finish that work first, then confirm the installation instructions for your chosen panel.
FAQ
What’s the easiest way to remove old wood paneling from walls?
The easiest controlled approach is to remove trim, identify the attachment, and release fasteners before prying gradually. Glued panels require local adhesive separation and can damage the backing.
Can I remove wood paneling myself?
You can tackle straightforward removal when the materials are safe to disturb and you can manage the panels and tools safely. Use qualified help for suspected hazardous materials, uncertain electrical conditions, or unstable wall surfaces.
How do I remove paneling glued to drywall?
Separate glued paneling gradually at an exposed edge with a wide scraper and a shallow pulling angle. Stop and reassess if the drywall paper tears extensively; preserving every section is not always realistic.
What tools do I need to remove wood paneling?
Basic tools include a utility knife, wide putty knife, flat pry bar, protective scrap board, screwdriver, and nail-removal tool. Electrical verification and dust protection require equipment appropriate to the work.
Should I sand adhesive off the wall?
Do not sand unidentified adhesive or unknown older coatings before resolving hazardous-material concerns. For confirmed nonhazardous materials, follow a removal and repair method suitable for the substrate.
Can I reuse wood paneling after removing it?
You can reuse panels that remain intact, dry, and suitable for the new installation. Label pieces during removal and protect their edges; adhesive-backed sheets and interlocking boards can break while being released.
Can The Panel Hub panels cover damage left after removal?
The Panel Hub panels need a suitable backing rather than an unrepaired demolition surface. Repair loose, damp, or unstable areas and follow the chosen panel’s installation requirements before covering the wall.
One last thing
Before choosing the finish for your 2026 update, shine a work light across the exposed wall from the side. Low-angle light makes raised adhesive, torn-paper edges, and uneven repairs easier to see. Judge the wall after preparation, not immediately after the last panel comes off.
Related guides
- Can you install wall panels over drywall?
- Can you install wall panels over uneven or bowed walls?
- Can you install wall panels over water-damaged drywall?