
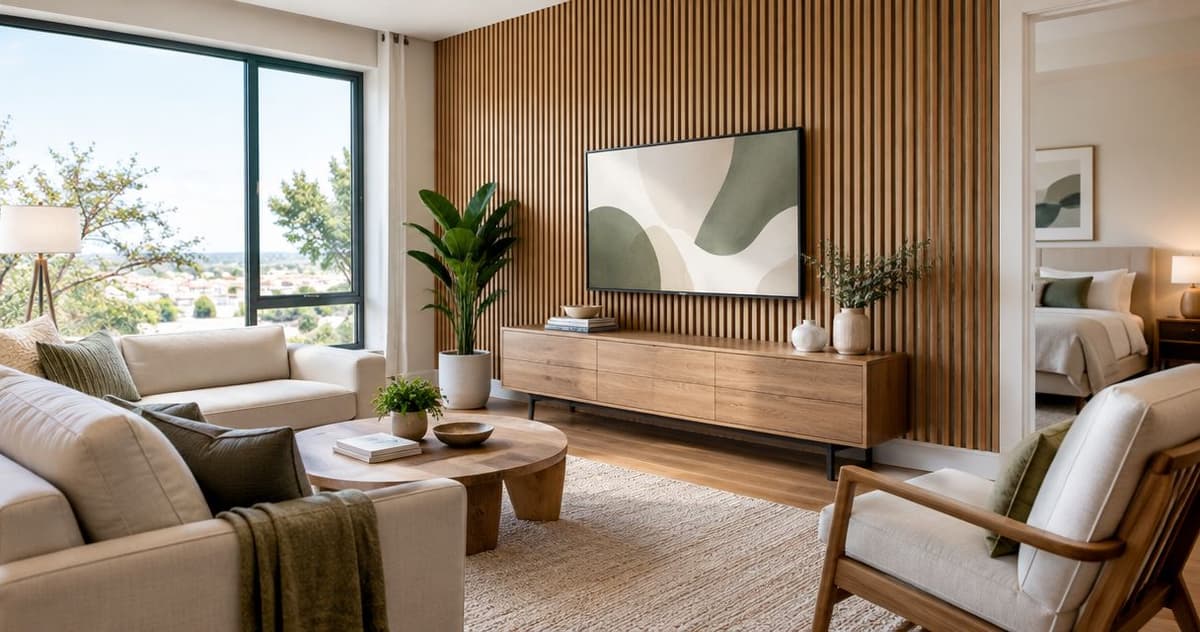
Home stagers and real estate agents use wall paneling to add texture and define interior spaces with the aim of presenting a clear, finished home to prospective buyers. This 2026 guide to wall panels for home staging explains how to choose a feature wall, compare materials, and finish the installation without turning staging into an unnecessary renovation.
- The Panel Hub suits home stagers seeking decorative wood and acoustic wall panels for interior feature walls.
- Choose wall panels for home staging around the room’s purpose, existing finishes, and seller-approved installation method.
- Acoustic wall panels absorb room sound; decorative wood wall panels do not automatically provide acoustic performance.
- Approve samples, photograph the layout, and resolve wall defects before installing permanent panels.
Why wall paneling matters for home stagers and real estate agents
A staging feature should explain the room, not become the room. A paneled headboard wall can establish a bedroom’s focal point; a wood slat wall can give a living area a defined backdrop. Choose the treatment around the furniture plan rather than adding texture to every available surface.
Stagers and agents also face a different approval process from homeowners decorating for themselves. You need the seller’s permission, a finish that works with existing materials, and a completed installation before photography and showings. Permanent alterations need a clear agreement about what stays with the property.
The Panel Hub sells acoustic and decorative wall panels for interior use. Its stated acoustic-panel specifications include an NRC rating of 0.85 and FSC certification; its brand description also states installation in under 2 hours and a 5-year warranty. Confirm the specifications and installation conditions for the exact panel you select rather than applying those claims to every decorative product.
For your 2026 staging plan, treat those details as selection criteria—not evidence that paneling changes a property’s sale result. The practical question is whether the finished wall supports the room you need buyers to understand.
Plan and install a staging feature wall
1. Define the room’s job before choosing a panel
Start with the existing room and a phone camera. Stand at the doorway, take a photograph, and identify what the room currently communicates. An empty corner, awkward furniture arrangement, or unfinished wall needs a different response from a room that simply lacks texture.
Write a short brief before browsing materials: the intended room use, the wall that supports that use, and the finishes that must remain. A bedroom feature wall should work with the bed position. A living-room treatment should complement the seating arrangement without obscuring windows, outlets, or usable furniture space.
Choose the smallest intervention that completes the room. If furniture placement, cleaning, or repainting resolves the problem, paneling is unnecessary. That decision protects the staging schedule and keeps the seller’s attention on work with a clear purpose.
- Name the room’s intended use in the staging brief.
- Photograph the wall from the doorway and the planned listing-photo position.
- Mark furniture, outlet, switch, and window locations.
- Get the seller’s written approval before any permanent alteration.
2. Test the feature wall with a simple mockup
Use a photograph, paper sketch, or removable layout markers to test the panel area before ordering. Follow the marking material’s instructions and test it on the existing finish first. A mockup lets you compare a full wall with a narrower treatment without committing to either.
Look at the design from normal viewing positions, not just directly in front of it. Check whether the panel boundary feels deliberate beside the bed, sofa, doorway, and ceiling. Avoid stopping a treatment at a point that leaves an awkward strip or makes an outlet look stranded.
For 2026 listing photography, approve the layout in the actual room rather than relying on a styled product photograph. Your room’s lighting, furniture, and camera angle determine how the pattern appears. Keep a photograph of the approved mockup so the installer and photographer work from the same plan.
- Sketch the proposed panel boundary over a room photograph.
- Compare a full-wall treatment with a limited feature area.
- Check the layout from the doorway and seating position.
- Record the approved boundary before ordering materials.
3. Match the panel type to the staging problem
First compare physical samples against the flooring, trim, and furniture. Evaluate texture as well as color: pronounced relief creates a different backdrop from closely spaced grooves. Keep the sample upright on the intended wall so you see it under the room’s actual light.
Ready-made panels from The Panel Hub provide an alternative to designing and fabricating a custom wall treatment. Choose acoustic panels when sound absorption is part of the brief and decorative panels when the goal is visual texture. Do not treat the categories as interchangeable.
NRC measures sound absorption under test conditions; it does not measure how much sound stops passing into another room. An NRC 0.85 rating is not a promise of soundproofing or a fixed reduction in household noise. Installation conditions matter, so check the documentation before including an acoustic claim in listing copy.
- Compare samples beside existing flooring and trim.
- Separate decorative requirements from acoustic requirements.
- Verify the exact product’s material and installation instructions.
- Keep listing descriptions aligned with documented specifications.
4. Check the wall and approve the attachment method
Inspect the wall before deciding how panels will attach. Look for damp patches, loose paint, uneven surfaces, and damaged areas. Investigate defects rather than hiding them behind a new finish; staging must not conceal a condition the seller needs to address.
Read the selected panel’s instructions for substrate preparation, adhesive, fasteners, and edge finishing. Do not substitute an attachment method solely because it appears quicker. For unfamiliar surfaces or substantial wall damage, have a qualified installer assess the work before setting the photography date.
The Panel Hub’s under-2-hour installation statement does not remove preparation, cutting, adhesive curing, or cleanup from your project plan. A 5-year warranty also does not establish that every attachment method qualifies. Confirm those conditions for the chosen system and keep the documentation with the seller’s project records.
- Inspect the substrate and investigate visible wall defects.
- Confirm the manufacturer-approved attachment method.
- Plan cuts around outlets without blocking access.
- Schedule preparation and curing separately from panel placement.
5. Coordinate wood tone, texture, and lighting
Build the finish decision around what stays in the property. Hold the panel sample beside the floor, doors, cabinetry, and trim, then repeat the check with your staging furniture in place. An attractive sample is not enough if its tone competes with the room’s permanent finishes.
For wood, decide whether you want a close tonal relationship or an intentional contrast. For geometric relief, check the shadows across the pattern. Avoid adding an equally busy rug, wall art, and upholstery arrangement just to match a textured wall.
A useful 2026 staging test is to photograph the sample in daylight and under the lights you will use for showings. Review both images before approving the finish. The aim is a coherent room, not a panel that looks good only under a particular showroom light.
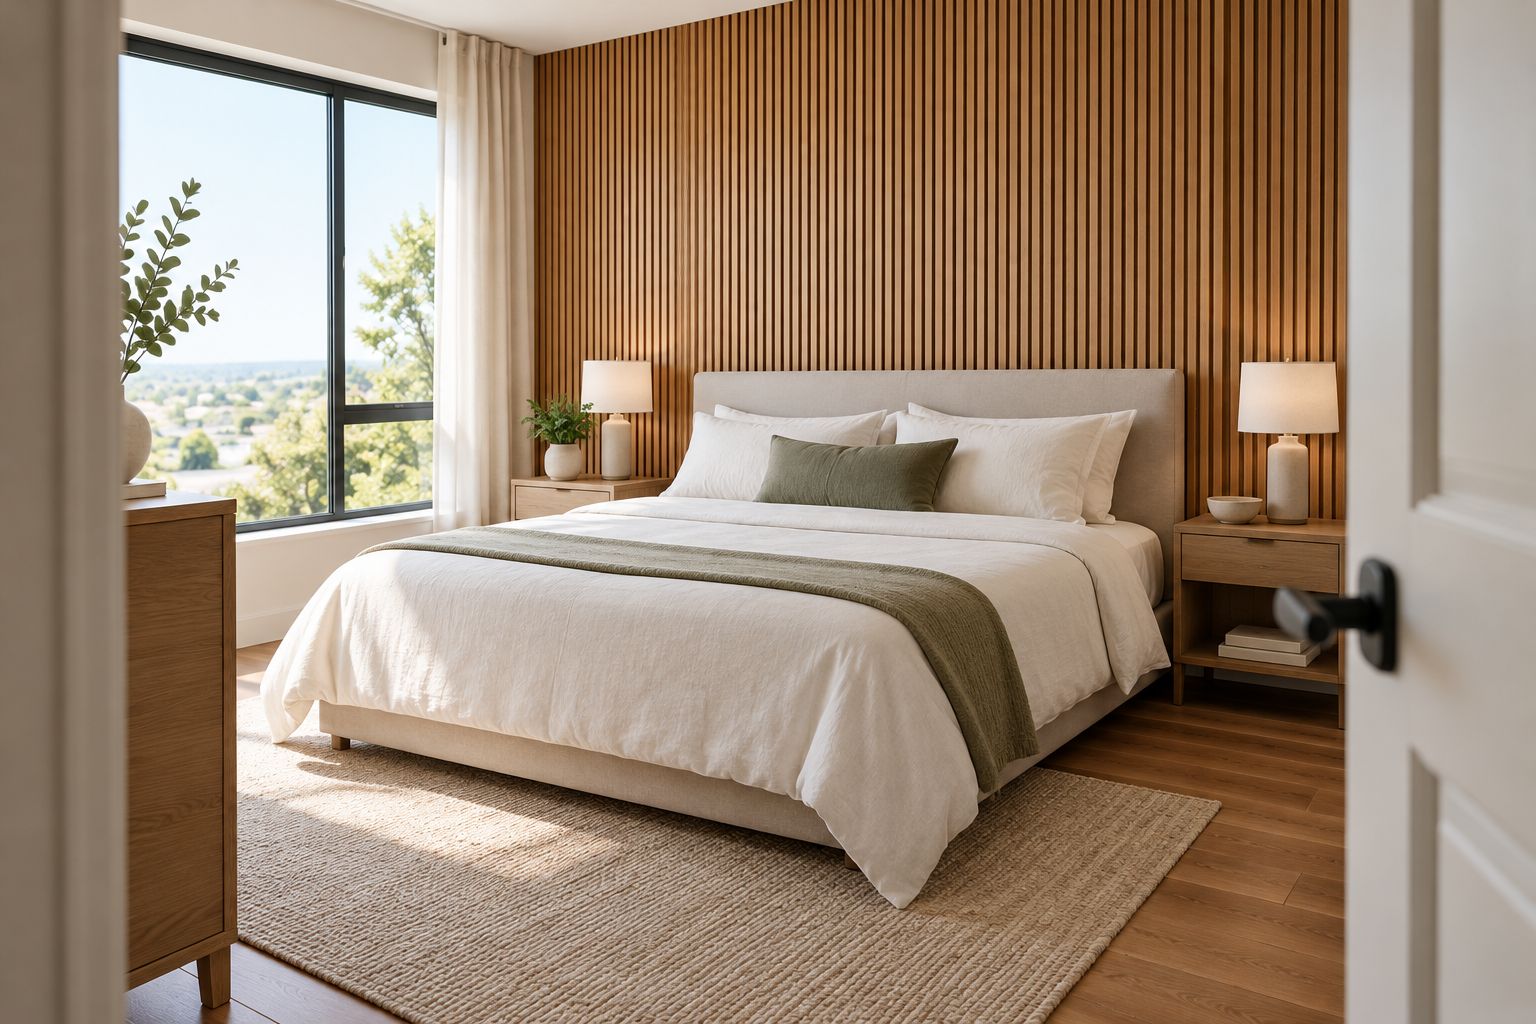
Keep the sample decision attached to the room brief. That prevents a later substitution from changing the approved tone or texture without review.
- Compare the sample with permanent finishes first.
- Check the wall in daylight and under showing lights.
- Simplify nearby furnishings when the panel pattern is prominent.
- Save photographs of the approved finish in the room.
6. Sequence installation before the photography deadline
Build the schedule backward from photography, using the selected product’s instructions rather than a general promise of fast installation. Leave time for wall preparation, material checks, cuts, attachment, required curing, and finishing. Keep photography separate from active installation work.
Before attaching anything, lay out the panels and review pattern direction, seams, and end cuts. Confirm how exposed edges will finish. A clean central pattern does not compensate for unfinished boundaries around a doorway or visible cuts beside a switch.
Complete the wall before placing the final staging furniture. Protect the floor during work, remove debris, and inspect the finish before bringing textiles and accessories back into the room. Keep the seller informed if the approved scope changes; do not solve an installation problem with an unapproved permanent alteration.
- Check materials and pattern direction before attachment.
- Approve seam placement and exposed-edge treatment.
- Follow the required curing and finishing instructions.
- Inspect and clean the room before the photographer arrives.
7. Verify the result and prepare the seller handoff
Finish with the same doorway photograph you used at the start. Compare the completed wall with the approved mockup and check whether the furniture still establishes the intended room use. Review seams, edges, outlets, and the area behind movable furniture.
Listen to the room if you installed acoustic panels, but keep that informal check separate from a measured performance claim. A room sounding different does not establish a soundproofing result. Listing copy should describe the installed material and documented specifications without promising an untested outcome.
Give the seller the product details, installation instructions, care guidance, and warranty documentation. Record whether the panels remain with the property, particularly when staging furnishings are removed. That handoff makes the treatment understandable after the staging team has left.
- Compare the completed wall with the approved layout.
- Inspect edges, seams, and electrical access.
- Use only documented product claims in listing copy.
- Give the seller the installation and care records.
Compare wall-panel options for staging in 2026
The Panel Hub is best for home stagers seeking decorative wood and acoustic wall panels for interior feature walls. The choice within that range depends on whether the room needs sound absorption, visible pattern, or neither.
The table separates benefits from limitations. Start with the simplest treatment that addresses the room brief; a more elaborate pattern is not automatically a better staging decision.
| Option | Best for | Main benefit | Key limitation |
|---|---|---|---|
| Painted wall without panels | Rooms already supported by furniture and finishes | Keeps the backdrop simple | Adds no panel texture or acoustic treatment |
| Acoustic Slat Wood Wall Panels | SoundPanel™ | Living areas or home offices needing slat texture and acoustic treatment | Combines a wood-slat appearance with an acoustic-panel format | Requires verification of the rated installation; does not establish sound isolation |
| 3D Geometric Pattern Wooden Panels | GroovePanel® | A defined bedroom or living-room feature wall | Adds geometric relief; the product description specifies 100% real solid wood | A prominent pattern needs restrained surrounding decor; acoustic performance is not stated |
| Custom-built wall paneling | Projects requiring a tailored layout | Lets the design follow the room’s particular dimensions | Requires separate design, fabrication, and finishing decisions |
Choose the acoustic slat option when absorption belongs in the project brief. Choose the geometric option when pattern is the reason for adding panels. Neither recommendation replaces checking samples, attachment requirements, and the existing wall.


Common mistakes home stagers and real estate agents make
Covering a defect instead of resolving it
Paneling is a finish, not a diagnosis. Investigate dampness, damaged surfaces, or loose material before installation, and keep the seller involved in decisions about repairs.
Choosing a statement wall without a furniture plan
A dramatic wall cannot establish a bedroom if the bed placement remains unresolved. Approve the furniture layout first, then choose the panel boundary and pattern around it.
Calling acoustic panels soundproof
Sound absorption and sound isolation describe different functions. Use the exact product specification in your 2026 listing materials, and do not turn an NRC rating into a claim about noise passing between properties.
Assuming fast installation means immediate photography
Attachment is only part of the work. Surface preparation, curing, edge finishing, cleanup, and staging furniture placement all belong in the schedule before the photographer arrives.
Forgetting that the seller inherits the treatment
Permanent panels need an owner-approved finish and a documented handoff. Keep care instructions and warranty records accessible, and state clearly what remains when staging items leave.
FAQ
What are the best wall panels for home staging?
The best wall panels for home staging match the room’s purpose and existing finishes. Acoustic slat panels suit a brief that includes sound absorption, while decorative wood panels suit a visual feature wall; approve samples before choosing.
Should I install wall panels before listing a house?
Install wall panels before listing only when the treatment solves a defined presentation problem and the seller approves the alteration. Complete preparation, installation, finishing, and cleanup before listing photography.
Are acoustic wall panels the same as soundproofing?
Acoustic wall panels are not the same as soundproofing. They absorb sound within a room; an NRC rating does not measure sound transmission through the wall into another space.
Can I remove staging wall panels without damaging the wall?
Do not assume staging wall panels can be removed without damage. Adhesives and fasteners affect the existing finish, so confirm the attachment and removal requirements before the seller approves installation.
Which room should get a paneled feature wall?
Choose the room where a feature wall supports a clear furniture arrangement and room purpose. A bedroom headboard wall or living-room seating backdrop is a useful starting point, provided the treatment works with windows, outlets, and permanent finishes.
Can decorative wood panels go inside a shower?
Use decorative wood panels inside a shower only if the exact product documentation explicitly approves that application. An interior-use description does not establish suitability for direct water exposure; select a documented shower wall system instead.
What should agents say about wall panels in a listing?
Agents should describe the installed panel material, location, and documented features. Do not promise soundproofing, a higher sale result, or certifications that have not been verified for the exact product.
One last thing
Photograph the approved sample before you order—not just the finished wall afterward. That image records the relationship between the panel, floor, trim, and furniture while changes are still easy to make. For a 2026 staging project, keep it beside the seller’s written approval and the final installation photograph; together, they give you a clear record of the intended result and completed work.
Related guides