
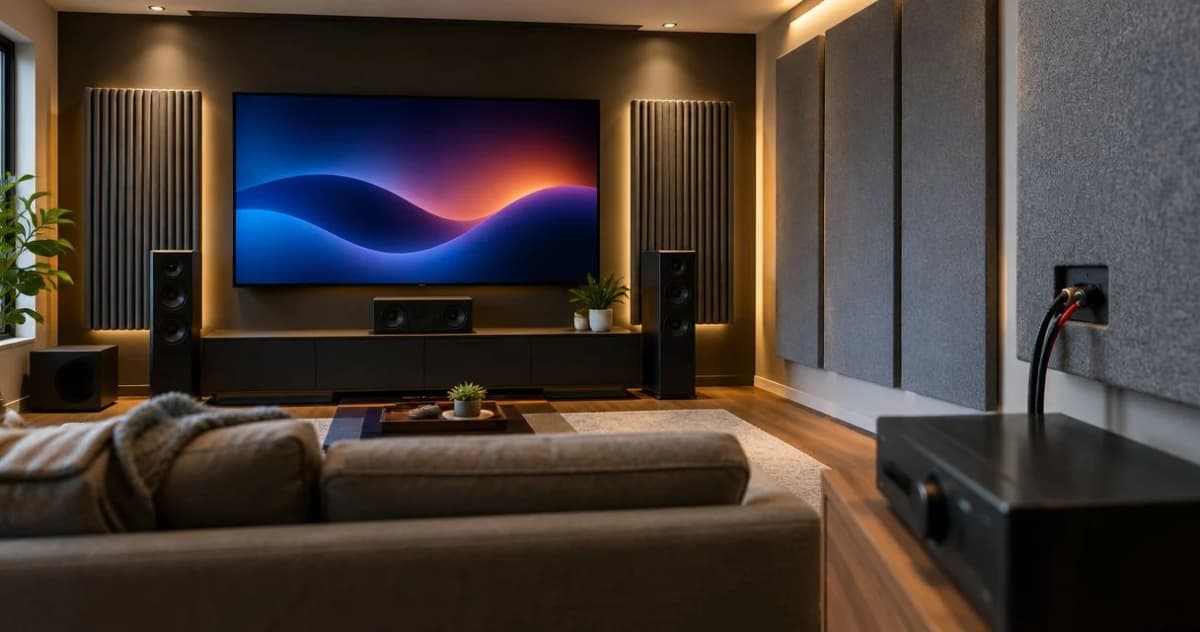
Instead of repeatedly adjusting your receiver to fix echoing dialogue, install acoustic wall panels at reflection points, then recalibrate your home theater system. Connecting acoustic wall panels to home theater system equipment requires no cables or pairing: this 2026 guide shows you how to combine passive wall treatment with speaker placement and receiver setup.
- Connecting acoustic wall panels to home theater system means treating reflections, not adding receiver connections.
- The Panel Hub acoustic wall panels suit homeowners seeking wood finishes and sound-absorbing wall treatment.
- Locate reflection points before mounting panels; keep speakers, outlets, and equipment ventilation clear.
- Install treatment before receiver calibration, then compare the same dialogue passage at the same volume.
- Acoustic wall panels reduce reflected sound; they do not replace structural sound isolation or dedicated bass treatment.
Why this matters
Your speakers send sound directly toward you and toward nearby surfaces. Reflections from bare walls arrive after the direct sound, making dialogue less distinct and the room sound more reverberant. Raising the volume does not remove those reflections.
The Panel Hub acoustic wall panels are best for homeowners who want wood finishes with sound-absorbing wall treatment. Start with the The Panel Hub catalog, but choose treatment around the room's listening problems rather than the appearance of an empty wall.
For a 2026 home theater project, separate three jobs: speaker placement directs sound, acoustic treatment controls reflections, and receiver calibration adjusts playback. None replaces the others. Sound isolation is a separate construction task that addresses sound traveling between rooms.
Before you start
- Gather equipment and access. Have your receiver manual, its calibration microphone if supplied, a tape measure, removable marking tape, and a helper with a mirror. Use the panel manufacturer's mounting instructions to select tools, fasteners, and adhesive.
- Confirm the wall and mounting method. Identify the wall construction, locate concealed services before drilling, and check whether you have permission to make permanent changes. Measure doors, outlets, speaker brackets, and cable routes before ordering or cutting.
- Catch the acoustic gotcha early. An absorption rating applies to the tested panel assembly, including its backing and mounting arrangement. Do not assume that changing the installation method preserves the published performance, or that an acoustic panel will solve deep-bass problems.
Keep the installation instructions beside your room sketch. A decorative layout that conflicts with the required mounting method needs changing before work begins, not after the first panel is fixed.
Room layout and listening baseline
- Choose the main listening position. Place the seat where you normally watch movies. If you regularly use several seats, mark those positions too; a wall layout optimized for one chair does not automatically address every seat.
- Position the speakers first. Follow the speaker and receiver manuals for your system layout. Keep speaker drivers unobstructed, and leave the required clearance around ports and equipment ventilation. Do not cover a speaker with decorative paneling.
- Record your starting settings. Note speaker positions, subwoofer position, listening mode, volume, and existing calibration settings. For your 2026 project record, add a simple wall sketch so you can distinguish layout changes from treatment changes.
- Choose repeatable listening material. Use a familiar dialogue passage and a familiar bass passage. Listen from the same seat at the same volume, with doors and curtains in the same positions each time.
Write down the symptom, not just whether the system sounds good. Examples include dialogue that sounds smeared, an audible flutter between parallel walls, or bass that changes sharply between seats. These observations point toward different remedies.
Expected result: You have a stable room layout and a listening baseline. You can compare later changes without confusing panel performance with a different volume setting or speaker position.
Reflection placement and wall coverage
- Find side-wall reflection points. Sit in the main seat while your helper slides a mirror along a side wall. Mark the position where you can see a front speaker's driver in the mirror. Repeat for the other front speaker and the opposite wall.
- Check the other listening seats. Repeat the mirror exercise from seats you use regularly. Mark the resulting area rather than assuming every reflection lands on one small spot.
- Plan treatment around the marked areas. Draw panel outlines that cover the relevant reflection zones while leaving outlets, doors, and speaker mounts accessible. A visually centered accent wall is not necessarily centered on the sound path.
- Assess other surfaces separately. Listen for reflections from the rear wall and ceiling. If the ceiling needs treatment, use a product and mounting system explicitly approved for overhead installation; wall approval alone is not enough.
The mirror method identifies a geometric reflection path. It does not measure how strongly a particular surface reflects sound or how much absorption your room needs. Use it to choose a starting location, then verify the result by listening or measurement.
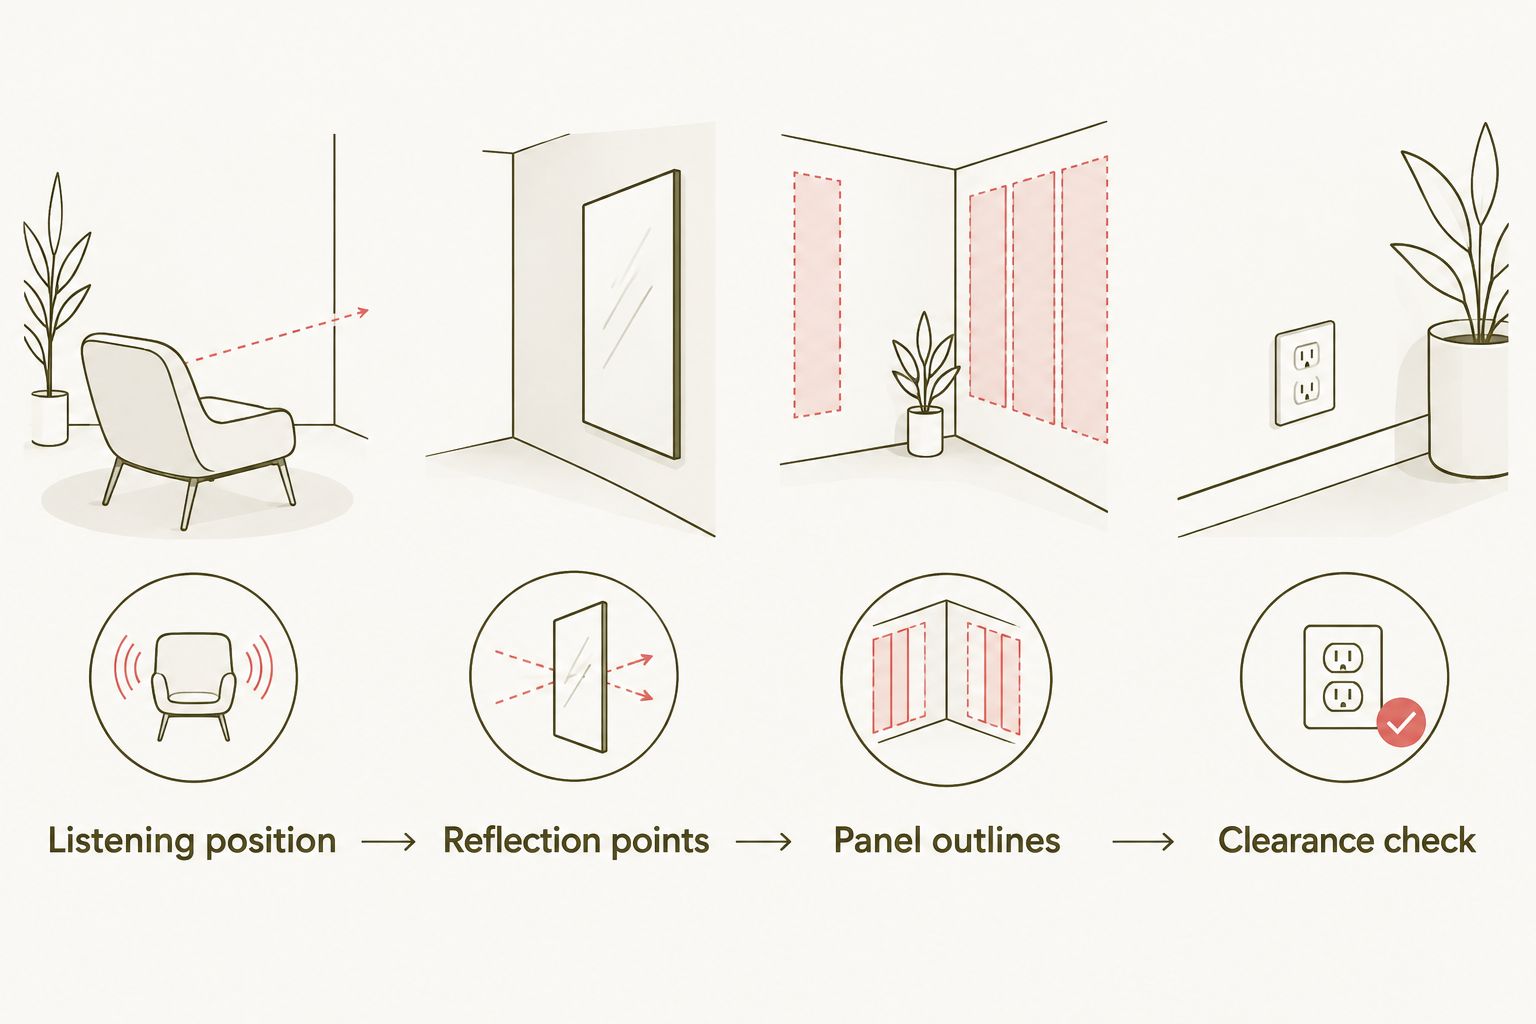
Expected result: Your wall sketch identifies treatment locations tied to actual listening positions. You also know where panels must stop to preserve access and clearance.
Panel selection and mounting
The Panel Hub describes its real wood acoustic panel offering as NRC 0.85 rated. NRC is an absorption rating, not a soundproofing rating. It does not mean movie sound reaching the next room drops by 85 percent.
For this 2026 guide, the relevant technical reference is ASTM C423, which covers laboratory sound absorption testing. NRC summarizes absorption coefficients at 250 Hz, 500 Hz, 1,000 Hz, and 2,000 Hz. A single NRC value therefore does not describe performance at every bass frequency.
Acoustic panel options
Choose the panel shape after locating the treatment areas. These options serve different layout preferences; the available product descriptions do not establish that one delivers better absorption than the other.
| Option | Best for | Practical advantage | Limitation |
|---|---|---|---|
| Acoustic Slat Wood Wall Panels | A slatted feature-wall layout | Combines a wood-panel finish with acoustic treatment | Does not replace structural sound isolation or dedicated bass treatment |
| Acoustic Hexagon Wood Wall Panels | Geometric treatment layouts | Offers a hexagonal format with a real-wood-veneer surface | Panel placement still needs to cover reflection areas rather than follow appearance alone |
Choose Acoustic Slat Wood Wall Panels for a slatted wall finish; choose Acoustic Hexagon Wood Wall Panels when a geometric layout suits the room. Neither shape removes the need to check mounting requirements and the relevant acoustic test data.


- Dry-fit the layout. Transfer the planned outlines onto the wall. Check alignment, edges, cuts, and access before applying adhesive or drilling fixing holes.
- Prepare the substrate. Follow the specified preparation procedure. Do not attach panels to loose paint, unstable wall coverings, or a damp surface without first resolving the underlying problem.
- Install the approved mounting assembly. Use the required backing, spacing, fasteners, and adhesive. Do not improvise an air gap or add hidden insulation and assume the original rating still applies.
- Inspect the finished wall. Confirm that panels are secure, outlets remain accessible, cables are not pinched, and speaker mounts still carry their loads independently.
Expected result: The panels are securely installed at the planned locations, with the mounting assembly and surrounding clearances intact.
Receiver recalibration and playback checks
- Finish physical changes first. Complete panel mounting, return furniture to its normal position, and remove tools and packaging. Follow any adhesive curing requirements before treating the installation as finished.
- Run the receiver's supported calibration procedure. Connect the supplied microphone if your receiver uses one. Follow the manual's microphone-position and measurement instructions. Menu labels vary by model, so use the labels documented for your receiver rather than a generic setup path.
- Review the resulting configuration. Check detected speakers, channel assignments, crossover settings, and reported distances against the receiver and speaker guidance. Do not force identical settings across speakers with different capabilities.
- Replay your baseline material. Use the same listening mode, seat, and volume. Compare dialogue clarity, reflection character, and bass consistency. Repeat from the other seats you marked.
A calibration system adjusts supported playback settings; it cannot make a thin decorative wall treatment behave like deep bass absorption. Likewise, more equalization does not turn an untreated room into a treated one.
Expected result: The receiver's calibration reflects the finished room, and your listening comparison identifies what improved and what still needs attention. Keep those results with your 2026 room sketch.
Recalibrate whenever the room layout changes
Moving the sofa, rotating the theater layout, or relocating a speaker changes the relationship between speakers, listeners, and reflective surfaces. Treat that as a new setup rather than assuming the previous panel positions remain correct.
Use this shorter repeat workflow:
- Update the layout sketch. Record the new speaker and seating positions before moving panels.
- Recheck reflection points. Repeat the mirror exercise and compare the marks with existing treatment coverage.
- Adjust treatment where the mounting system permits. Do not pry off permanently bonded panels simply to experiment; follow the removal instructions first.
- Run calibration again. Repeat the same listening comparison after physical changes are complete.
Best for: Homeowners who use one room for movies and everyday living. This workflow keeps treatment tied to the room you actually use, without rebuilding the entire wall whenever furniture moves.
Troubleshooting
Dialogue still sounds blurred
Confirm that the panels cover the marked reflection zones, not just the wall behind the television. Check that the center speaker is unobstructed and aimed according to its instructions. Listen for untreated rear-wall or ceiling reflections before adding more material to the same wall.
Bass still booms or disappears at particular seats
Treat bass as a separate problem. Compare nearby seat and subwoofer positions, then rerun calibration after changes. For persistent problems, use room measurements or an acoustic professional to assess placement, dedicated bass treatment, or another appropriate remedy.
A buzz appeared after installation
Check panel edges, trim, loose fasteners, and nearby cable covers while replaying the passage that triggers the noise. Secure the loose component using the approved installation method. If the noise comes from a speaker rather than the wall, troubleshoot the speaker separately.
The room sounds dull, but speech is not clearer
Check placement before increasing coverage. Treatment concentrated away from important reflection paths can change the room's overall character without addressing the main problem. Compare removable treatment arrangements where practical, and use measurements before making another permanent installation.
Receiver calibration will not complete
Check microphone connection, microphone position, background noise, and speaker connections against the receiver manual. Do not remove correctly installed panels to fix an equipment setup error. Stop and resolve the calibration failure before evaluating its settings.
Customize your workflow
Expand treatment according to the unresolved symptom. Side-wall reflections, rear-wall reflections, bass buildup, and sound transmission through shared walls require different decisions.
For a shared living room, make the panel layout work around furniture and access without losing the reflection coverage. For a dedicated theater, assess the ceiling and rear wall after the initial installation. Keep appearance and acoustic performance as separate checks: a wall can pass one and fail the other.
The next move is verification, not automatic full-wall coverage. Use the related home theater guide below to refine panel selection, and keep a record of every physical change before recalibrating.
FAQ
Do acoustic wall panels connect to a home theater receiver?
No. Acoustic wall panels are passive treatments mounted in the room, not devices connected to receiver outputs. Install them in suitable locations, then recalibrate the receiver if it supports room calibration.
Where should acoustic wall panels go in a home theater?
Start with the side-wall reflection points between the front speakers and your listening seats. Check rear-wall and ceiling reflections separately, and keep speakers, outlets, and ventilation clear.
Should I install panels before or after receiver calibration?
Install acoustic panels before running the final receiver calibration. Complete the room layout and mounting work first so calibration represents the room you will actually use.
Does NRC 0.85 mean panels block 85 percent of movie noise?
No. NRC 0.85 is a laboratory absorption rating, not a percentage reduction in sound transmitted to another room. Sound isolation depends on the wider wall, door, ceiling, and floor construction.
Will acoustic wood panels fix booming bass?
Acoustic wood panels are not a substitute for assessing low-frequency room problems. Start with seat and subwoofer placement, then consider measurements and dedicated bass treatment when needed.
Can decorative wood panels replace acoustic panels?
Appearance alone does not establish acoustic performance. Choose a product with documented absorption data and install it using the relevant mounting arrangement rather than assuming decorative grooves provide equivalent treatment.
Do I need to recalibrate after moving my sofa?
Yes, rerun supported room calibration after a meaningful seating or speaker change. Recheck reflection points too, because the new listening position changes where useful wall treatment belongs.
One last thing
A beautiful wall behind the screen is not automatically the most useful acoustic location. The side wall beside your seat can matter more when it carries an early reflection from a front speaker.
Before making your final 2026 installation permanent, stand back and check the marked reflection areas against the panel outlines. Keep the acoustic target inside the design, not outside it. That check ties the room's appearance to the reason you installed treatment in the first place.
Related guides
- Acoustic panels for home theater rooms
- Wall panels for DIY beginners
- Soundproofing wall panels for apartments