
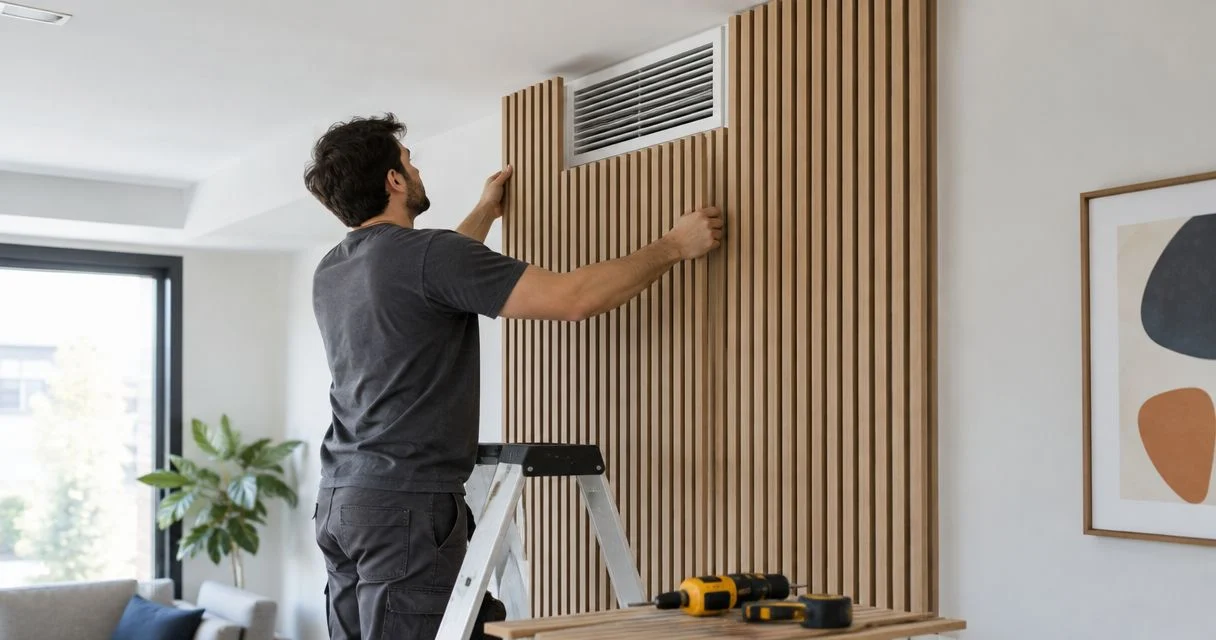
Instead of repeatedly trimming panels until a vent cover fits, plan the opening, dry-fit the finished wall depth, and cut before fastening. Installing wall panels around HVAC vents means keeping the duct opening clear, the grille removable, and the mounting connection secure—not simply hiding the cut behind a cover.
- Installing wall panels around HVAC vents starts with checking the opening, grille overlap, and finished wall depth.
- The Panel Hub wall panels suit decorative upgrades; vent openings still need clear airflow and service access.
- Dry-fit wood wall panels before cutting, and keep acoustic backing out of the duct opening.
- Use an HVAC professional when added panel thickness requires a duct extension or changes the grille mounting.
Why this matters
A vent cover hides an edge, but it cannot correct a blocked opening or a poor mounting connection. Added wall thickness changes where the grille sits. Slats, backing, adhesive, and trim all need to stay outside the air passage.
The Panel Hub is best for homeowners choosing decorative wall panels, not for solving ductwork modifications. Start with The Panel Hub for the wall finish, then treat the vent connection as a separate installation detail.
This 2026 workflow covers ordinary wall-mounted supply registers and return grilles. It does not cover combustion-air openings, appliance exhausts, or ventilation equipment with special clearance requirements. Identify the opening before changing anything around it.
Before you start
- Gather the materials and instructions: your selected panels, their installation guide, the vent manufacturer's instructions when available, a tape measure, square, level, pencil, cardboard, suitable cutting tools, eye protection, and dust control. Choose blades and fasteners for the actual panel material and wall construction.
- Check access and condition: confirm that the grille comes off without disturbing wiring or equipment. Photograph its position and mounting points. Address loose ductwork, damp surfaces, or damaged wall material before covering the wall.
- Catch the depth problem first: a grille that fits the existing wall does not automatically fit a thicker finished wall. Test with the complete panel assembly, including backing or battens; do not discover this after adhesive cures.
For your 2026 project, keep the panel instructions and vent instructions together. If their requirements conflict, stop and resolve the detail before installation. Decorative trim is not a substitute for the specified mounting arrangement.
Opening and mounting plan
Identify the vent and its attachment
- Identify the opening. A supply register delivers conditioned air; a return grille draws room air back toward the system. A return can include filter access. Keep both types unobstructed, and preserve any filter-door movement.
- Document the grille. Photograph its orientation, screw locations, and any movable louvers. Store the cover and hardware away from cutting dust so you can compare the finished installation with the original.
- Remove the cover. Follow the equipment instructions and stop system airflow during dusty work. Do not reach into the duct or disturb connections behind the wall.
- Inspect the attachment. Establish what supports the cover: existing wall anchors, a frame, or mounting points on the duct boot. Do not assume new screws can safely go anywhere near the opening.
Expected result: you know what the opening serves, how its cover attaches, and which parts must remain accessible.
Choose the mounting approach
Before measuring a cutout, decide how the grille will meet the new wall face. These are two adjacent workflows, not interchangeable shortcuts.
| Approach | Best for | Advantage | Limitation |
|---|---|---|---|
| Retain existing mounting | A cover that seats correctly with the proposed panel assembly and its permitted attachment | Keeps the existing arrangement without changing ductwork | Requires a successful depth and hardware check before panel installation |
| Approved duct extension | Added wall depth that prevents the cover from seating or connecting correctly | Brings the duct termination and grille mounting into a suitable relationship with the finish | Requires compatible parts and HVAC assessment; decorative trim alone does not solve it |
Retain existing mounting only after a successful dry fit. If the cover rocks, its neck no longer fits, or its mounting points become inaccessible, arrange the extension detail before continuing.
Neither approach permits reducing the duct opening. Do not move a return or redirect a supply register just to center it within a decorative pattern.
Template and panel layout
Establish the finished wall plane
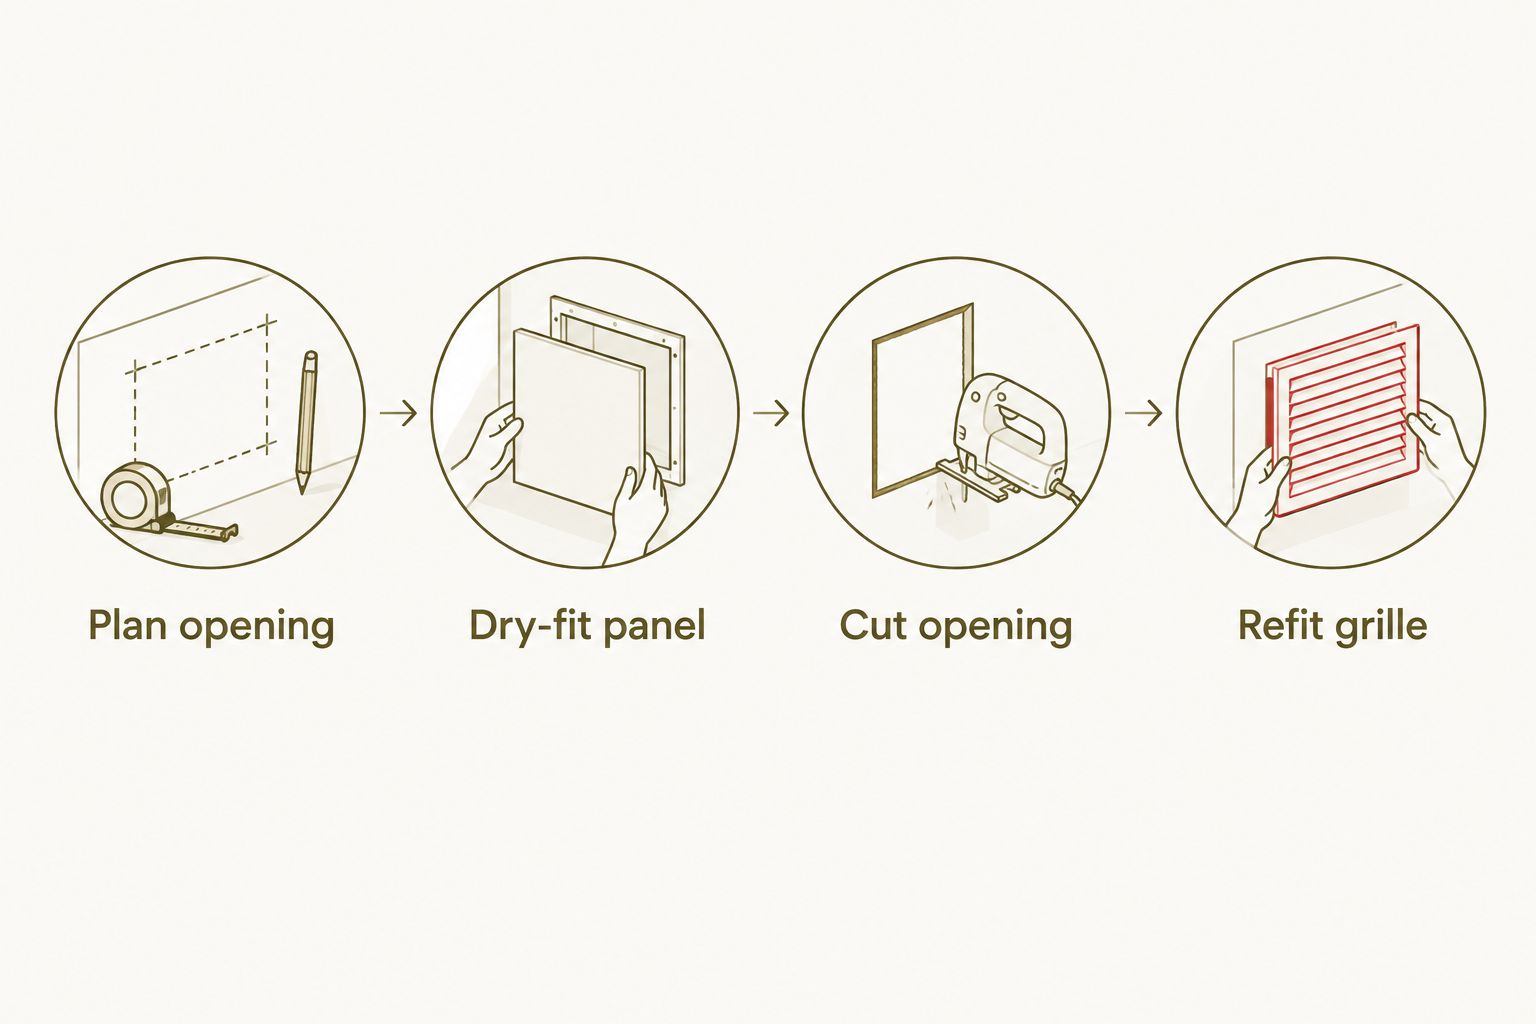
- Plan opening. Measure the actual duct opening and the cover separately. Record the grille's outer footprint, its projecting neck if present, and the mounting locations. The outside cover dimensions are not the cutout dimensions.
- Build a depth sample. Hold an offcut or representative assembly beside the opening. Include every layer that moves the finished surface outward, such as panel backing or installation battens.
- Dry-fit panel. Hold the grille against that sample at the proposed finished plane. Check its seating, overlap, attachment, louver movement, and access to any filter.
- Confirm the edge detail. Follow the panel manufacturer's movement-gap requirements and the grille's fitting instructions. Do not use a generic clearance measurement for every material and vent.
Expected result: you have a verified wall depth and a cutout plan that preserves both panel movement and grille function.
Transfer the opening without losing the pattern
- Make a template. Use cardboard to map the opening, mounting points, and grille footprint. Mark its top and room-facing side so you cannot accidentally reverse it.
- Set the panel position. Establish a level reference and position the surrounding panels according to their installation instructions. Check how seams or slats meet the vent before marking the affected panel.
- Transfer the cut line. Reference the same fixed wall edges for the template and panel. Recheck the measurements independently rather than trusting a single pencil mark.
- Check the remaining material. Avoid leaving a fragile strip beside a seam or a short, unsupported piece of slat. Adjust the panel layout where possible without changing the vent location.
Expected result: the cut line matches the real opening, while the surrounding pattern remains intentional and adequately supported.
Cutout and installation
Cut the panel away from the wall
- Support the workpiece. Place the panel on a stable cutting surface and secure it without damaging the finish. Check the tool manufacturer's instructions for blade selection, cutting direction, and dust extraction.
- Cut opening. Make the cut with a tool suitable for the material. Cutting on a bench avoids sending a blade into hidden ductwork, wiring, or plumbing behind the wall.
- Finish the edge. Remove loose fibers and debris. Treat exposed edges only as the panel manufacturer specifies; do not assume a finish intended for wood also suits PVC or a composite backing.
- Test before fastening. Hold the cut panel in place and refit the grille temporarily. Confirm that no slat, felt, backing, or trim crosses into the air passage.
Expected result: the panel fits around the opening without requiring the grille to conceal an obstruction or support a loose cut edge.
A 2026 installation plan should allow extra time for this fitting work. The Panel Hub describes general panel installation as taking under 2 hours and states a 5-year warranty; neither statement establishes the duration or warranty coverage of your specific vent detail.
Fasten the panel and restore the grille
- Attach the panel. Follow the panel installation instructions. Keep adhesive out of the opening and away from mounting points, and position fasteners only where the substrate and concealed-service checks permit.
- Refit grille. Use the approved attachment arrangement established during the dry fit. Longer screws are not an automatic fix: thread engagement, screw destination, and the cover's design all matter.
- Check movement. Open and close adjustable louvers and any filter-access door. Confirm the cover lies securely without bending the grille or crushing raised panel details.
- Clean and test. Remove cutting debris before restoring airflow. Run the system normally and check for new rattles, whistling, or a change in airflow at the register.
Expected result: the finished wall is secure, the grille remains removable, and normal operation does not introduce a new noise or obstruction.
Do not call the job complete just because the cover looks straight. Remove and reinstall it once after the panel is secured. That confirms future cleaning or filter access will not require damaging the wall finish.
When added wall depth requires a duct extension
The second workflow applies when the panel assembly moves the finished face beyond what the existing grille connection accommodates. Resolve the duct-to-wall connection before installing the surrounding panels.
Ask an HVAC professional to assess the duct boot, compatible extension, attachment, and sealing requirements. Provide the full wall-build-up depth and the actual grille, not just a photograph of the decorative panel.
Once the connection is resolved:
- Confirm the final duct termination and mounting positions.
- Rebuild the cardboard template around the corrected opening.
- Repeat the panel and grille dry fit at the finished wall plane.
- Install the panel without covering required attachment or service access.
Do not fill the space between a recessed duct and the grille with spare felt, loose foam, or decorative offcuts. Those materials are not a duct extension. Likewise, a picture-frame trim detail can finish the wall edge but cannot establish a sealed duct connection.
Troubleshooting
The grille rocks against raised panel details
The cover needs a stable seating arrangement compatible with its design. Stop tightening the screws; extra force can bend the cover or damage the panel. Revisit the dry fit and establish a suitable flat mounting detail without shrinking the opening.
The cut edge remains visible
Remove the cover and compare the opening with your template. If the panel was cut beyond the cover's footprint, replace the affected section or use a suitable finishing detail that preserves airflow and access. Do not push trim into the opening to hide the mistake.
The screws no longer reach their mounting points
Check what the original screws attached to and how far the finished wall has moved outward. Do not select longer hardware by appearance alone. Have the attachment or duct-extension arrangement corrected when the existing connection cannot accommodate the added depth.
A new whistle or rattle appears
Check for loose cover hardware, a vibrating cut edge, or material crossing the opening. Restore the original louver position and confirm that adhesive or debris has not entered the air passage. If the noise remains, stop further alterations and have the HVAC connection assessed.
Condensation or dampness appears near the vent
Do not seal the visible edge and assume the cause is fixed. Inspect the duct connection and surrounding wall with a qualified professional, then address the moisture source before replacing damaged panel material. A decorative finish should not conceal an unresolved damp area.
Customize your workflow
Match the cutout method to the panel construction. Slatted acoustic panels need secure slat ends and a clear backing cutout; patterned solid wood needs careful alignment so the opening does not leave awkward fragments.
The Panel Hub states an NRC rating of 0.85 for its real wood acoustic panels. NRC describes sound absorption, not an HVAC airflow allowance or permission to cover a return. Keep the acoustic treatment outside the vent opening.
A geometric product in the supplied catalog is described as 100% real solid wood, but that material claim does not establish vent clearances or cutting instructions. Use the selected product's installation guidance rather than transferring a technique from a different panel type.
For a broader 2026 wall layout, use the wall panels for DIY beginners guide before marking the vent cutout. Plan seams, corners, switches, and vents together so the opening is not the last obstacle you encounter.
FAQ
Can I install wall panels around HVAC vents myself?
You can handle the decorative panel work when the existing vent connection remains suitable and you follow the panel and grille instructions. Have an HVAC professional assess any duct extension, relocation, or unsuitable mounting connection.
Should I cut around the grille or remove it first?
Remove the grille before measuring and fitting the panel. Measure the duct opening and cover separately, then dry-fit both at the finished wall depth.
How much clearance should I leave around a vent?
Use the panel manufacturer’s movement-gap requirements and the grille manufacturer’s fitting requirements. There is no universal cutout gap that fits every panel assembly and vent cover.
Can acoustic slats run across a return vent?
Do not run decorative slats or acoustic backing across a return opening unless the ventilation assembly is specifically designed and approved for that arrangement. Keep the original air passage and service access clear.
Can I use longer screws after adding wall panels?
Longer screws are suitable only when the approved mounting arrangement allows them. Check the attachment point, required engagement, and concealed services rather than assuming added screw length solves the problem.
Do I need to extend the duct for thicker wall panels?
You need the connection assessed when added panel thickness prevents the grille from seating or attaching correctly. An HVAC professional can determine the compatible extension and sealing detail.
How do I check the finished installation in 2026?
Confirm that the grille is secure, removable, and unobstructed, then run the system and check for new noise or airflow changes. Also test any adjustable louvers and filter-access door.
One last thing
The most useful final check is taking the grille off again. A neat-looking installation that traps the cover behind trim fails the next cleaning or maintenance task.
Before closing your 2026 project, photograph the exposed opening, mounting points, and finished grille. Keep those photos with the panel instructions so a future repair does not begin with guessing what sits behind the wall.
Related guides
- Grooved wall panels for modern interiors
- Natural wood veneer wall panels
- Click-lock vs adhesive wall panels