
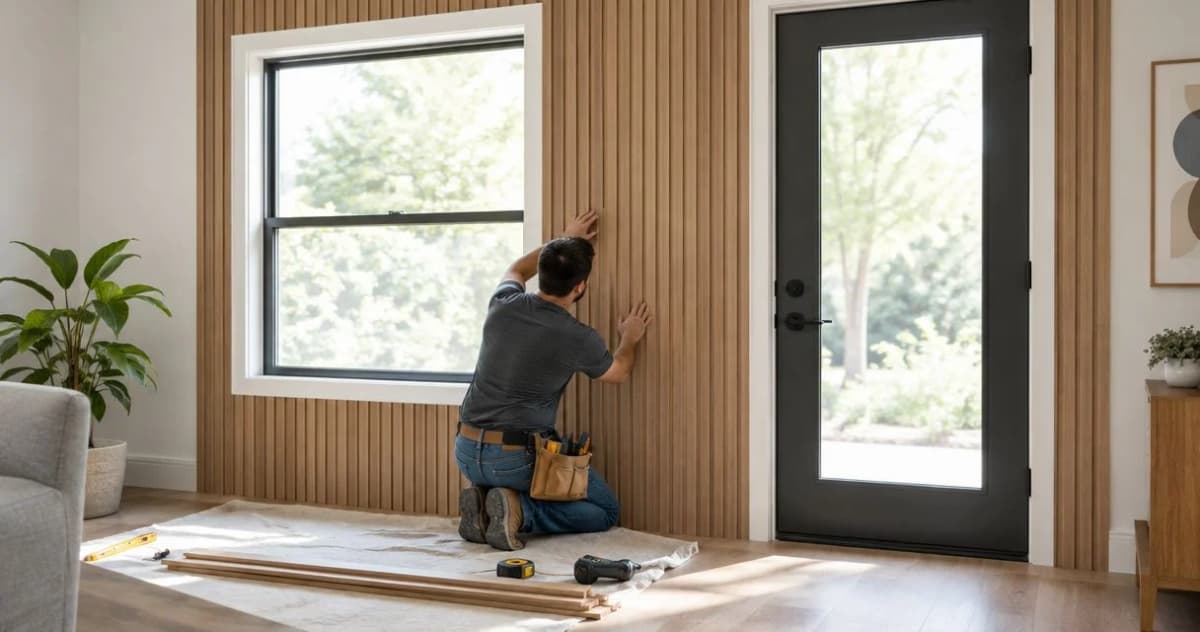
Instead of repeatedly trimming pieces that still leave uneven gaps, approach installing wall panels around window and door casings by checking trim depth, mapping the panel layout, and dry-fitting every cut before fastening. This guide from The Panel Hub shows you how to keep existing casings or refit them over the finished panel surface.
- Installing wall panels around window and door casings starts with checking whether the finished panels project beyond the trim.
- The Panel Hub sells wood wall panels for homeowners planning decorative and acoustic interior upgrades.
- Keep existing casings when their depth suits the finished wall; refit trim when panel edges would otherwise remain exposed.
- Dry-fit wood slat panels around each opening before fastening, and follow the product’s movement-gap requirements.
Why this matters
A straight panel edge can still look unfinished if it projects beyond the casing. The problem is depth, not cutting accuracy. Establish the finished wall thickness before choosing where the panels stop.
The Panel Hub wood wall panels are best for homeowners seeking decorative interior wall upgrades. Its acoustic panel offering includes an NRC rating of 0.85, which describes sound absorption rather than sound isolation. That rating does not tell you how to cut or fasten a particular panel.
The Panel Hub states a 5-year warranty, but warranty coverage and installation requirements are separate checks. For a 2026 renovation, keep the instructions supplied with your chosen panels alongside your measurements. Do not use a general tutorial to override the specified adhesive, fasteners, substrate preparation, or clearances.
Before you start
- Gather the panels and their instructions: Confirm the intended room, wall substrate, cutting method, fastening method, and any acclimation or movement requirements. Have compatible adhesive or fasteners, a tape measure, square, level, pencil, cutting tools, eye protection, and appropriate dust protection ready.
- Inspect the opening: Check that the casing is secure and that the wall is dry and sound. Identify outlets, switches, concealed-service risks, window hardware, door swing, and any signs of water damage before covering the wall.
- Check the hidden depth problem: Hold a panel sample against the wall with the planned backing or mounting arrangement. If the finished panel face projects beyond the casing, decide on an edge treatment or trim replacement before cutting full panels.
Choose your casing approach
Compare the finishing approaches before buying extra trim. Neither method corrects a loose casing, damaged substrate, or unsuitable panel material.
| Approach | Best for | Advantage | Limitation |
|---|---|---|---|
| Keep existing casings | Secure trim that projects beyond the planned panel face | Leaves the opening’s existing trim in place | Requires careful fitting around irregular edges |
| Refit or replace casings | A deeper finished wall or a planned trim update | Can cover the panel perimeter with a deliberate overlap | Adds trim work and can require jamb extensions |
| Add an edge profile | Exposed panel edges beside trim you intend to retain | Provides a defined termination where compatible | Adds another visible line and must suit the panel system |
Choose the edge detail before choosing the first cut. A neat joint depends on the relationship between the panel face, casing face, and exposed cut edge—not on caulk alone.
Opening measurements and panel layout
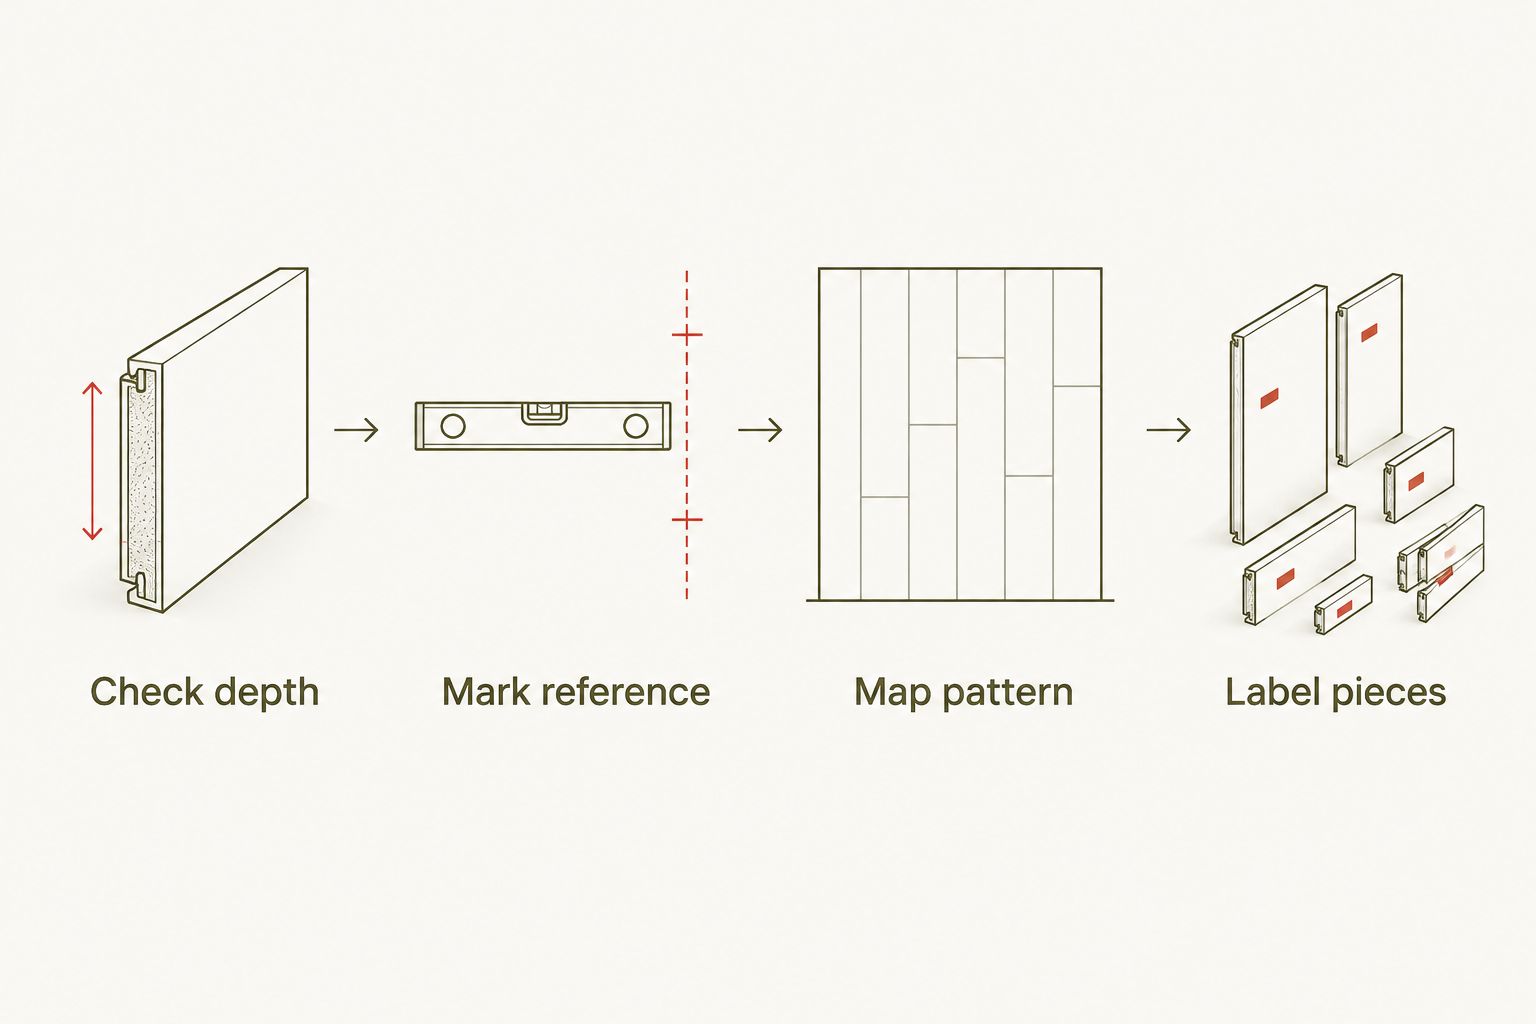
- Record the finished build-up. Place the sample against the actual wall, including any specified mounting layers. Check its relationship to the casing at the sides and above the opening. A flat sample on a workbench does not show an uneven wall.
- Establish a reference line. Use a level to mark a vertical layout line on the wall. Do not assume the casing is plumb or use its edge as your only reference. Check a square against the opening; a true square corner measures 90 degrees.
- Measure each location separately. Record the available panel width beside the opening and the height above it. For windows, also measure below the sill or trim. Take measurements where each actual cut will sit rather than copying the opposite side.
- Map the visible pattern. Mark panel boundaries and, where relevant, slat or groove positions. Check how the pattern continues above the door or window. Adjust the starting position before committing to an awkwardly narrow strip beside the casing.
- Label the pieces. Note each piece’s location, top edge, face, and orientation on its back or on removable tape. Keep the layout drawing with the cut list so similar-looking offcuts do not get mixed up.
Expected result: You have a measured layout showing every opening, panel joint, and trim termination. Your 2026 project notes should identify the chosen casing approach before any full panel is cut.
Templates and cut pieces
- Make a template where the outline is awkward. Use cardboard or stiff paper to capture a shaped sill, uneven casing edge, or inside corner. Fit the template on the wall first. Transfer only the confirmed outline to the panel.
- Mark the required clearance. Use the panel manufacturer’s movement-gap instruction at the casing and other fixed surfaces. Do not substitute a universal gap copied from a different material. Include the clearance in the template rather than cutting tight and correcting later.
- Test the cutting setup on an offcut. Select the blade, support, and cutting direction specified for the material and tool. Support the panel so it cannot flex or fall as the cut finishes. Disconnect power before changing blades or making tool adjustments.
- Cut with the finished edge in mind. Follow the marked line using a straight guide where appropriate. For a shaped notch, use a suitable tool and avoid overcutting past the inside corner. Never hold a small unsupported piece close to a powered blade.
- Dry-fit without adhesive. Position the cut piece at its intended location. Check the clearance, visible edge, and pattern alignment. Mark any interference directly on the piece, remove it, and make the correction at the workbench.
Expected result: Each cut piece fits its assigned position without force. The panel sits flat, the specified clearance remains open, and the casing does not have to bend to accommodate it.
Material-specific cutting checks
For slat panels with a backing layer, confirm how the instructions address both the slats and the backing. A cut that looks tidy from the front can still leave loose material behind it.
For relief-pattern panels, decide which parts of the pattern will remain visible beside the casing. A cut through a raised section needs a planned edge finish. Do not assume every decorative panel accepts the same sanding, sealing, or touch-up treatment.
Wall preparation and fastening
- Prepare the substrate. Remove loose material and correct problems that prevent sound attachment. Follow the specified cleaning and preparation process. Stop if you find dampness, staining from an unresolved leak, or a wall surface that is coming away.
- Confirm the attachment method. Use adhesive and fasteners approved for the panel and substrate. Do not assume adhesive alone is suitable for every panel. Where mechanical fixing is required, establish safe fixing locations before drilling.
- Install from the reference line. Fit the main panel sections according to the layout and fastening instructions. Recheck level and pattern alignment as you approach the opening. Do not let a slightly crooked casing pull the entire panel field off its reference.
- Fit the opening pieces in sequence. Install the prepared side, upper, and lower pieces in their marked positions. Maintain the specified clearances and avoid forcing the final piece into place. Remove adhesive squeeze-out using the approved method before it becomes difficult to clean.
- Check moving parts. Open the door through its usable swing and operate accessible window hardware. Verify that the new surface does not obstruct hinges, handles, locks, or removable trim components.
Expected result: The panel field remains aligned around the opening, every piece is attached by the approved method, and the door or window still operates without interference.
Do not drill blindly beside an opening. Pipes and cables can run near doors and windows. If you cannot establish a safe fixing position, stop and get qualified help rather than guessing.
Edge finishing and final checks
- Inspect the termination from different angles. Look along the casing from the side as well as straight on. Check for exposed backing, projecting panel edges, adhesive residue, and inconsistent clearances.
- Fit the planned edge treatment. Install a compatible profile or finish the cut edge as the panel instructions allow. Keep window drainage features and operating hardware unobstructed. Decorative finishing must not create an obstruction.
- Use sealant only where appropriate. Apply a compatible sealant where the chosen detail calls for it. Do not fill a required movement gap with a rigid material, and do not use a thick bead to disguise an incorrect cut.
- Complete the operation check. Reopen the door and window after finishing. Check that any removable screens, covers, or access points remain usable. Let adhesives and finishes cure as instructed before putting the area back into normal use.
Expected result: The opening has a deliberate finished edge, the specified movement allowance is preserved, and normal operation is unchanged.
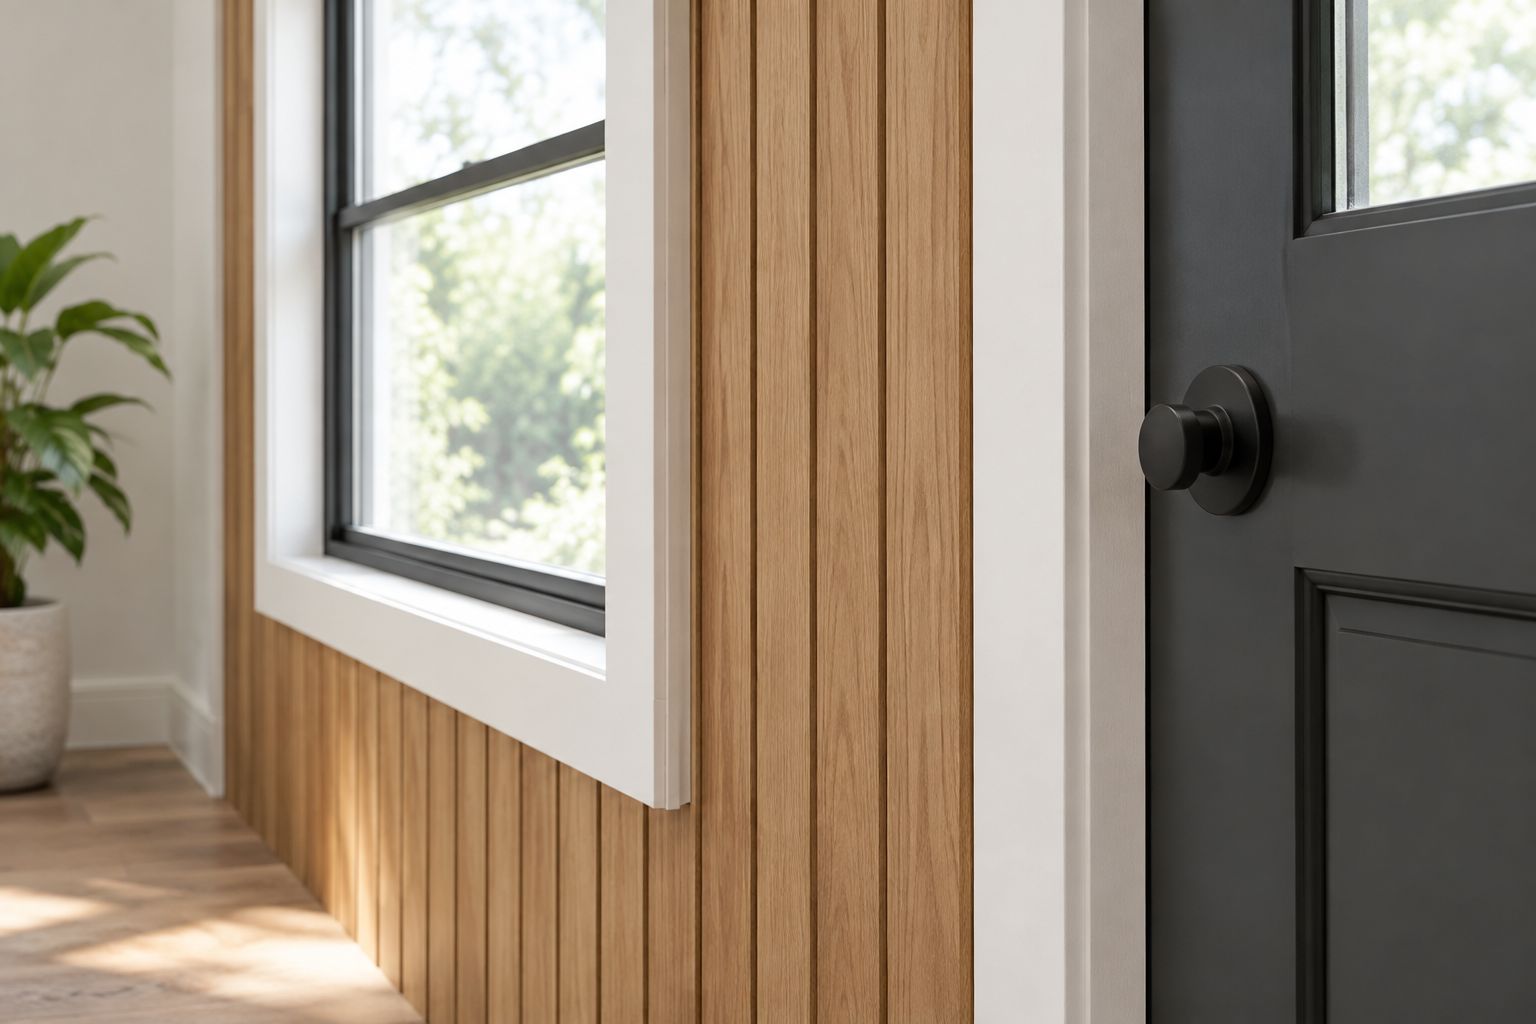
For your 2026 completion photos, include a side view of the casing. It records the depth relationship that a straight-on photograph often hides.
Alternative workflow: refit casings over the panels
Refitting trim is a separate approach, not a repair for inaccurate cutting. Choose it when the existing casing cannot provide the intended edge detail or when the renovation already includes new trim.
- Score painted joints before carefully removing the casing. Label reusable pieces and protect the wall and jamb from pry-tool damage.
- Recheck the panel build-up against the jamb. Determine whether jamb extensions are needed to bring the opening’s trim attachment surface forward.
- Install panels with the manufacturer’s required perimeter clearance. Plan enough trim coverage to conceal the panel termination without eliminating that clearance.
- Dry-fit the casing or replacement trim. Confirm that it sits properly against the finished wall and the jamb or extension without twisting.
- Fasten the trim to suitable support, then finish the joints and repeat the operation check.
The casing must bridge the finished detail without forcing the panels tight. If changing jamb depth or fitting extensions is beyond your experience, use a carpenter for that part of the work.
Troubleshooting
- The panel face sticks out beyond the casing: Recheck the complete mounting build-up. Use the planned compatible edge profile or revise the casing detail; do not taper away the panel face to make it disappear.
- A gap widens toward the top of the opening: Check the casing against the reference line. Template or scribe the panel edge to the actual outline while retaining the required clearance and keeping the panel field aligned.
- Slats or grooves fail to line up above the opening: Compare the dry-fit pieces with the layout marks. Correct the starting position before fastening more panels rather than compressing joints to chase the pattern.
- The door catches after installation: Identify the exact contact point. Check the panel termination and trim placement before altering the door; the new work should not intrude into its operating space.
- The panel rocks or will not lie flat: Check for debris, proud fixings, wall irregularities, or a tight cut. Correct the cause before fastening rather than pulling a stressed panel flat with extra screws.
Customize your workflow
Use the same depth check around baseboards, built-in cabinets, and other fixed trim. Each boundary needs its own termination decision. A successful door detail does not automatically suit a deep window sill or a cabinet side.
For a 2026 room update, choose the panel pattern and opening detail together. A strong geometric pattern calls attention to cropped shapes; straight grooves make alignment across the opening especially visible.
If this is your first paneling project, use the wall panels for DIY beginners guide to narrow the material choice before committing to complex cutouts.
FAQ
Can I install wall panels without removing door casings?
Yes, you can keep secure door casings when their depth and shape suit the finished panel surface. Check the complete mounting build-up and plan the required clearance before cutting.
Should wall panels go under the casing or stop beside it?
Either detail can work when planned for the panel system and trim depth. Stopping beside existing casing requires a finished termination; fitting beneath refitted casing requires planned overlap and movement clearance.
What gap should I leave between wall panels and window trim?
Use the gap specified by the panel manufacturer for that material and installation. There is no single clearance that applies to every wood, backed, or PVC panel system.
How do I cut wall panels around an uneven window casing?
Make a template of the actual casing outline and transfer it to the panel with the required clearance included. Dry-fit the cut piece before applying adhesive or fasteners.
Can I use caulk to hide a bad cut beside door trim?
Caulk is not a substitute for a correctly fitted panel edge. Use compatible sealant only where the finishing detail permits it, and preserve any required movement allowance.
Will acoustic wall panels around a window soundproof the room?
Acoustic absorption does not establish soundproofing. An NRC rating describes absorption performance, not how much sound passes through the window or wall.
What should I do if wall panels are thicker than my existing trim?
Choose a compatible edge profile or revise the casing detail before fastening the panels. Refitting deeper trim can also require jamb extensions, so check the entire opening rather than only the visible casing.
One last thing
Save a labeled offcut beside your installation notes. It gives you the actual panel build-up for checking future trim, fixtures, or repairs—not just a remembered measurement.
Before fastening The Panel Hub wall panels in your 2026 project, photograph the dry-fit opening from both the front and side. The front view checks pattern alignment; the side view checks the edge detail.
Related guides
- Grooved wall panels for modern interiors
- MDF wall panels for interior walls
- Oak wood wall panels for living rooms