
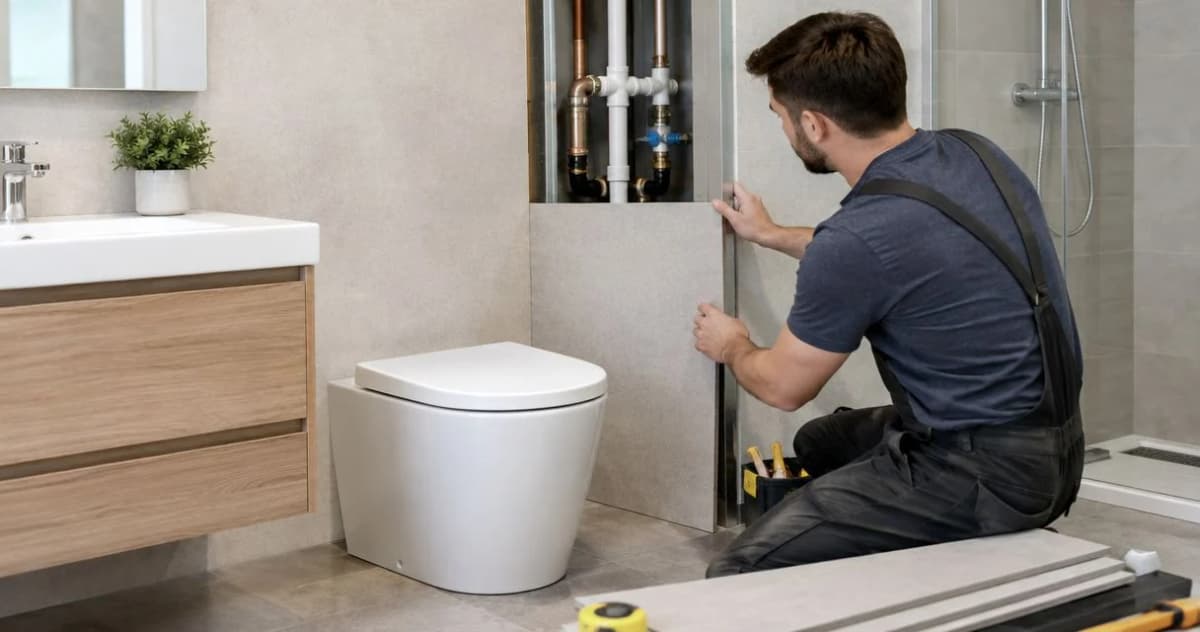
Instead of repeatedly trimming panels around taps, valves, and pipe outlets, use a template-first workflow for installing wall panels around bathroom plumbing fixtures: confirm wet-area suitability, transfer each opening, dry-fit, then seal and refit. This guide shows you how to keep cutouts tidy without blocking plumbing access or compromising the wall’s water protection.
- Installing wall panels around bathroom plumbing fixtures starts with templates, dry-fitting, and the panel manufacturer’s waterproofing instructions.
- The Panel Hub sells bathroom wall panels; select a system explicitly approved for your intended wet area.
- Bathroom wall panel installation must preserve valve access and the plumbing fixture’s required finished-wall depth.
- Pipe cutouts need system-approved sealing; decorative trim alone does not waterproof a penetration.
Why this matters
A neat-looking cutout can still hide a problem. Panel thickness changes the finished wall position, trim plates have limited coverage, and water can enter around an opening that looks fully concealed.
The Panel Hub is best for homeowners shopping for decorative and bathroom wall panels. Browse The Panel Hub with the installation location in mind: a dry bathroom feature wall and a shower enclosure require different material checks.
For your 2026 bathroom project, treat the panel, substrate, joints, and plumbing penetrations as one installation system. A waterproof panel face does not make every joint or cut edge waterproof. Follow the panel system’s instructions and the fixture manufacturer’s requirements wherever they meet.
Before you start
- Confirm the installation system. Have the panel instructions, fixture instructions, and the specified adhesive, joint treatment, sealant, and substrate materials. Check that the complete assembly is approved for the intended shower, splash, or dry-wall location.
- Prepare tools and plumbing access. Gather a tape measure, level, straightedge, cardboard, pencil, clamps, appropriate cutting tools, eye protection, and manufacturer-required protective equipment. Locate the water shutoff before removing anything connected to the water supply.
- Check the finished-wall depth first. Added panel thickness can prevent a shower handle, valve trim, or tub spout from fitting correctly. Compare the proposed wall build-up with the fixture’s permitted depth before cutting; resolve any required plumbing changes with a qualified plumber.
Do not treat a trim plate as permission to make an oversized hole. The opening must satisfy the fixture’s clearance requirements, remain within the trim’s coverage, and allow the specified waterproofing detail.
Panel suitability and fixture access
Start your 2026 installation plan by separating the wall’s appearance from its exposure to water. Read the documented use limits rather than choosing by material name alone.
| Panel application | Best for | Advantage | Limitation and next move |
|---|---|---|---|
| Shower-rated panel system | Direct-water areas | Provides a documented installation method for the intended exposure | Follow its substrate, joint, and penetration details; the panel face alone is not the complete assembly |
| Bathroom-rated decorative panel | Locations within its stated exposure limits | Adds texture or a decorative finish | Bathroom suitability does not automatically mean shower suitability; verify the exact location |
| Decorative wood or acoustic panel without wet-area approval | Dry interior feature walls | Adds visible warmth or acoustic treatment where specified | Do not place it in direct spray without explicit approval for that use |
Next, identify what passes through the wall. A supply pipe needs a different opening from a shower mixing valve. A removable trim plate is also different from a maintenance access cover.
Photograph the original arrangement before removing decorative components. Keep screws and trim together, and protect exposed openings from cutting debris. If removing a component would disturb a pressurized connection, stop and arrange plumbing assistance.
Wall layout and clearance checks
- Prepare the substrate. Remove loose material, address leaks, and repair damaged areas before covering the wall. Confirm that the surface meets the panel manufacturer’s requirements for flatness, dryness, cleanliness, and support.
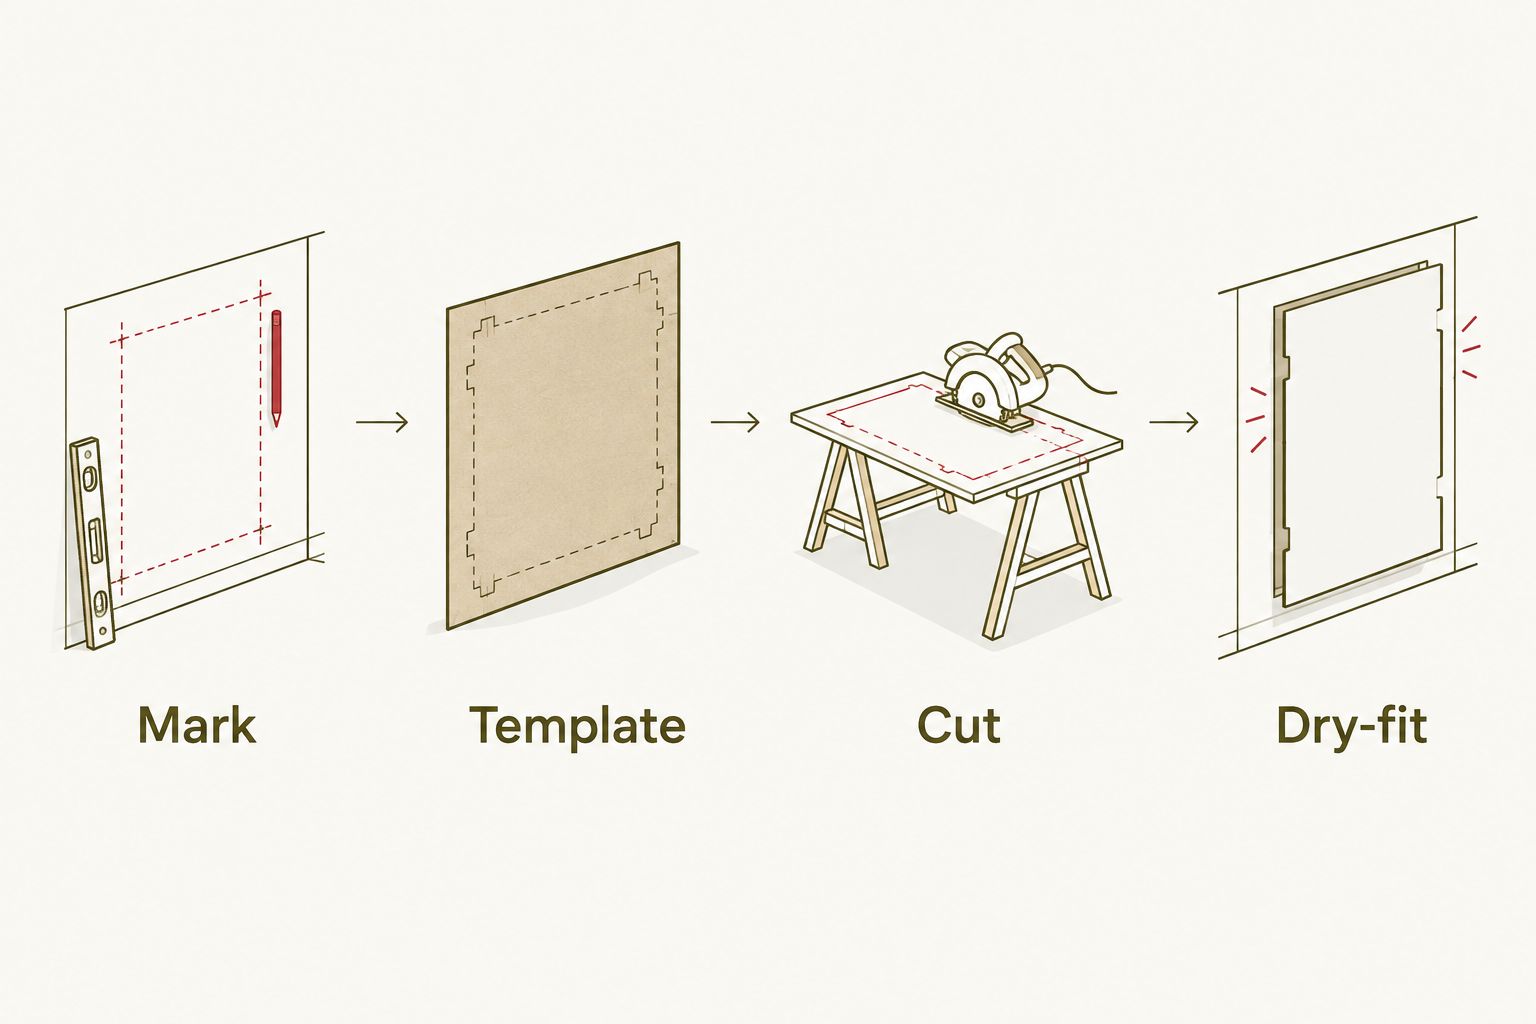
- Mark the panel layout. Establish a level reference and mark proposed seams. Position joints so the installation follows the panel system’s connection details and avoids awkward cuts around fixtures wherever the layout allows.
- Measure from fixed references. Use 2 reference edges—a consistent horizontal baseline and a vertical starting line—to locate each opening. Measure from those same edges when marking the panel or template, accounting for specified perimeter and joint clearances.
- Check trim coverage and fixture depth. Compare each proposed opening with the actual trim plate, mounting arrangement, and finished-wall requirements. Include the panel and any specified backing or adhesive build-up in that check.
Do not assume a floor, ceiling, or neighboring wall is square. Check the actual wall and carry its shape into your layout rather than forcing the panels to follow an inaccurate reference.
Expected result: you have a marked wall layout, known fixture locations, and a confirmed route for installing the panels without trapping serviceable plumbing components.
Keep your layout drawing beside the work area. Mark which face of every panel points into the room and which edge meets the starting line; that simple habit prevents reversed cutouts.
Templates and fixture openings
- Make a full-size template. Use 1 cardboard template for each panel that contains plumbing openings. Mark the panel perimeter, reference edges, fixture centers, and the required opening shapes.
- Test the template on the wall. Fit it around the actual fixtures and verify the layout with the trim components. Confirm that mounting screws and maintenance access remain usable.
- Transfer the template to the panel. Label the room-facing side before tracing. If you mark the back instead, reverse the template correctly so the finished opening lands in the intended position.
- Cut with the specified method. Support the panel securely and use a blade or hole saw appropriate for its material. Follow the manufacturer’s guidance on cutting direction, edge treatment, and required clearances; do not substitute a generic gap measurement.
- Dry-fit before applying adhesive. Check the panel against the actual wall and fixtures. Make controlled adjustments, then repeat the fit check before permanent attachment.
Expected result: the panel seats correctly, the trim covers the opening as intended, and the cutout satisfies the required sealing and service-access detail.
Use 2 dry-fit checks: one with the template and one with the cut panel. These checks catch location errors before adhesive makes correction difficult.
Keep cutting debris away from plumbing
Cut panels on a separate supported surface rather than against the installed wall. This keeps the blade away from concealed pipes and lets you support the material around the opening.
Clear debris before fitting the panel. Do not push dust or offcuts into a valve opening, drain, or exposed fitting. Use the panel manufacturer’s recommended method to finish cut edges before installation.
Panel fixing and penetration sealing
- Prepare the waterproofing detail. Follow the documented treatment around pipes, valves, and other penetrations. Where the system requires a collar, gasket, or specific sealant arrangement, install that detail rather than relying on a cosmetic bead afterward.
- Apply the specified fixing method. Use the approved adhesive or mechanical attachment arrangement. Follow the required application pattern, working time, and joint sequence, keeping adhesive clear of serviceable components.
- Set and align the panel. Place it against your references without forcing the opening against a pipe. Check the panel joint and fixture opening while adjustment is still permitted.
- Complete joints and exposed edges. Seal them exactly as the system requires. Keep any specified drainage paths open and allow the adhesive and sealant to cure before water exposure.
Expected result: the panel is secure, the joints follow the approved detail, and each plumbing penetration has its required water-management treatment.
For a 2026 shower update, write the required curing instructions into your work plan before starting. Do not confuse adhesive working time with the time before the shower can be used; follow both product labels.
A continuous visible bead is not proof that the hidden detail is correct. Inspect the penetration while it remains accessible, not after the trim plate conceals it.
Fixture refitting and final inspection
- Refit decorative components correctly. Follow the fixture manufacturer’s instructions for handles, trim plates, and covers. Do not tighten them to pull an uneven panel flat.
- Preserve access and drainage. Leave required service openings accessible. If the fixture instructions call for an unsealed drainage section around a trim plate, keep it open.
- Check operation and connections. Confirm that controls move freely and shutoff valves remain reachable. Have any disturbed plumbing connection checked by a qualified person before concealing it.
- Inspect after the permitted curing period. Check joints, penetrations, and accessible plumbing during initial use. If you find moisture where it should not be, stop using the affected fixture and investigate rather than adding sealant over the symptom.
Expected result: the fixture operates normally, trim sits correctly, and the installation retains the access required for maintenance.
Record the panel system and the adhesive and sealant used. Keep the instructions with your project photos so a future repair does not depend on guessing what is behind the finished surface.
Paneling behind an existing vanity
You can use the same template-first method around a vanity, but plan access to supply valves, pipe connections, and the drain before choosing the panel layout.
Best for: a decorative update where the existing plumbing stays in place. The benefit is retaining the fixture arrangement; the drawback is restricted working space and more difficult cutting around existing connections.
If pipes prevent a panel from sliding into position, do not disconnect them simply to make the panel fit. Consider a manufacturer-approved joint arrangement or have a plumber remove and refit the necessary connections. Avoid an improvised slit that leaves an unsupported or unsealed edge in a splash area.
A removable access section can help where the panel system allows it, but it must remain genuinely removable. Do not glue a maintenance cover shut or hide a shutoff valve behind a permanently fixed panel.
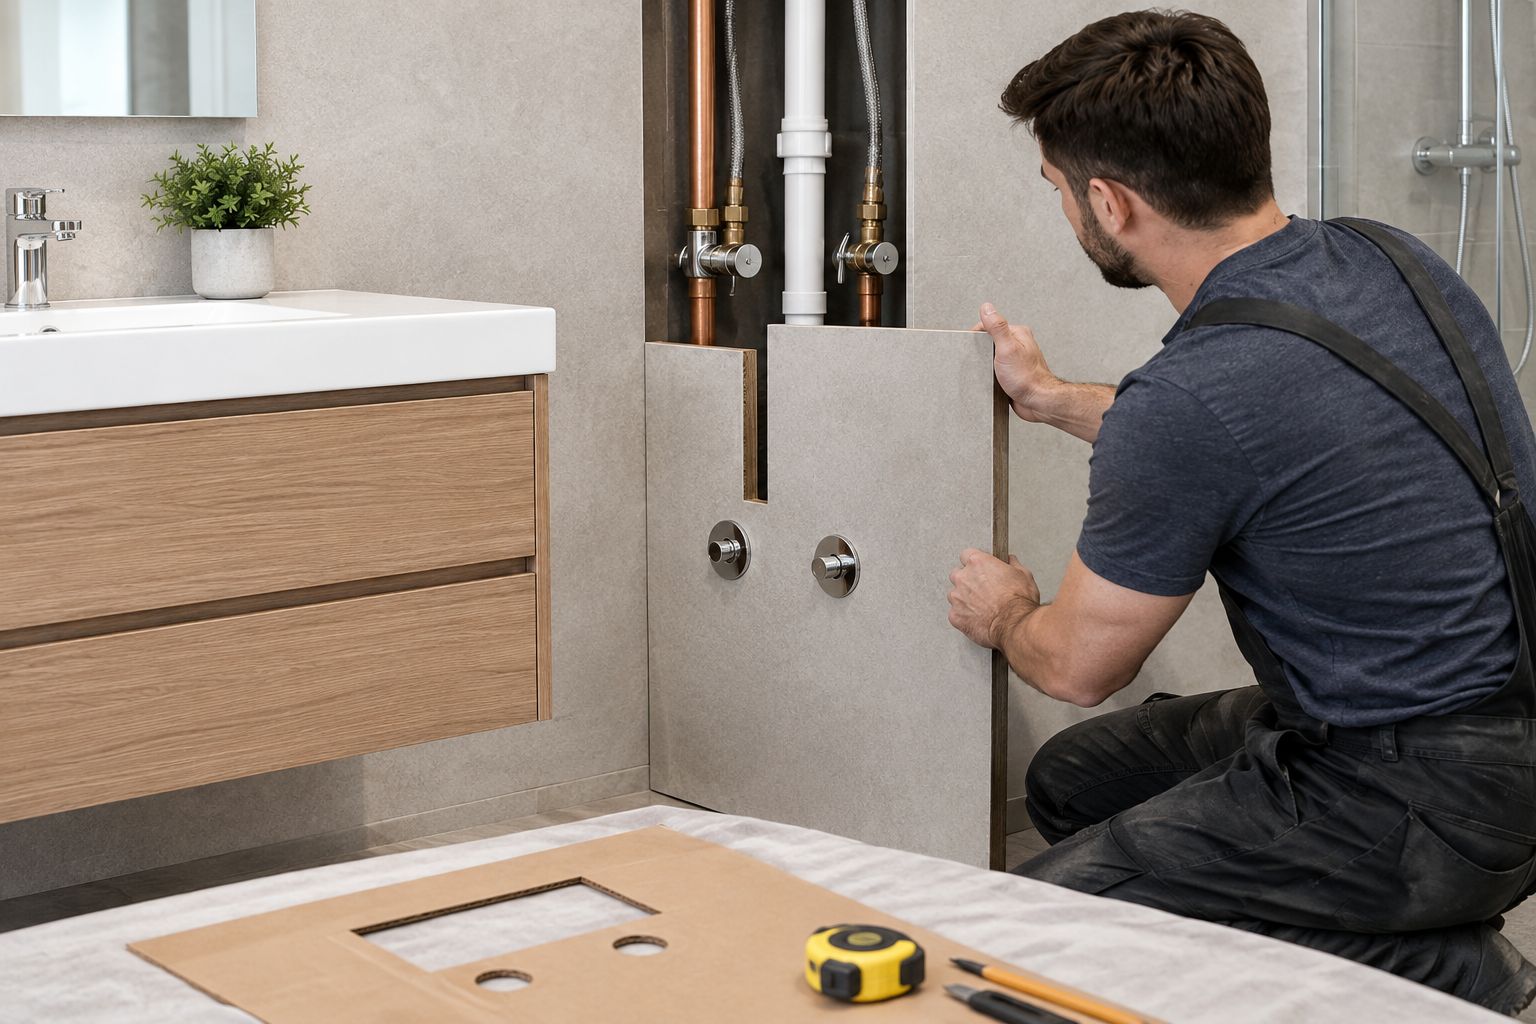
For your 2026 vanity project, also check drawer travel and the clearance behind the cabinet. Added wall thickness can affect how the cabinet sits even when the pipe openings line up correctly.
Troubleshooting
- The opening is in the wrong position. Recheck the reference edges and whether the template was reversed. Remake the affected panel if correction would exceed trim coverage or invalidate the required sealing detail.
- The trim plate will not sit flat. Check panel alignment, debris, and the fixture’s permitted finished-wall depth. Do not solve the problem by overtightening mounting screws or grinding away a sealing surface.
- A panel joint lands across a fixture opening. Revisit the layout before fixing the panels. Use only a joint-and-penetration arrangement supported by the installation instructions; decorative trim does not rescue an unsupported detail.
- Water appears behind a cover or beneath the vanity. Stop using the affected fixture and identify whether the source is a plumbing connection, joint, or penetration. Repair the cause before closing the area again.
- The panel bows around the pipe. Check whether the opening is too tight, the substrate is uneven, or adhesive has accumulated locally. Correct the fit and support rather than clamping the panel into strain with the fixture trim.
Customize your workflow
Break a larger bathroom project into wall-by-wall layouts while preserving the panel system’s required installation sequence. Make each fixture template before committing to permanent fixing, and inspect concealed details before covering them.
The Panel Hub bathroom wall panel range belongs in the material-selection stage, not as a substitute for installation instructions. If this is your first panel project, use the wall panels for DIY beginners guide to narrow your approach before taking on plumbing cutouts.
Keep decorative upgrades separate from plumbing alterations. Changing the position of a valve or pipe is a different job from fitting a panel around it, and it changes the installation plan.
FAQ
How do I install wall panels around bathroom plumbing fixtures?
Confirm the panel system’s suitability, template each opening, cut and dry-fit the panel, then complete the specified fixing and sealing details. Check fixture depth and service access before permanent attachment.
Can I use any PVC wall panel inside a shower?
No. Use a PVC panel system explicitly approved for shower exposure, and follow its substrate, joint, and penetration instructions. The material name alone does not establish suitability.
How big should a hole around a bathroom pipe be?
Use the clearance specified by the panel system and plumbing fixture manufacturers. The opening must also fit within the trim coverage and accommodate the required sealing detail; there is no universal hole size for every assembly.
Do I need to remove the shower valve before installing panels?
Not automatically; the required removal depends on the fixture and panel arrangement. Distinguish removable decorative trim from the valve body, and use a qualified plumber when work involves pressurized connections or valve repositioning.
Can I seal all the way around a shower trim plate?
Follow the shower fixture manufacturer’s instructions. Some trim arrangements require a drainage opening, so a continuous bead around every edge is not a universal rule.
Can wall panels cover bathroom shutoff valves?
Wall panels must not prevent access to shutoff valves. Plan a suitable accessible arrangement before installation rather than permanently covering valves or serviceable connections.
Does The Panel Hub sell panels for bathroom projects?
The Panel Hub sells PVC and shower wall panels for interior use. Confirm the selected panel’s documented exposure limits and installation requirements before fitting it around bathroom plumbing fixtures.
One last thing
Check the trim before the final cut, not after the panel is fixed. Lay the actual cover over your template and confirm its mounting points, coverage, and drainage requirements. That check catches a mismatch that measuring only the pipe center will miss.
For a 2026 bathroom installation, the finished result should look tidy and remain serviceable. A concealed valve that cannot be reached is not a completed upgrade.
Related guides
- PVC wall panels for bathrooms
- Click-lock vs adhesive wall panels compared
- Wall panels for kitchen backsplashes