
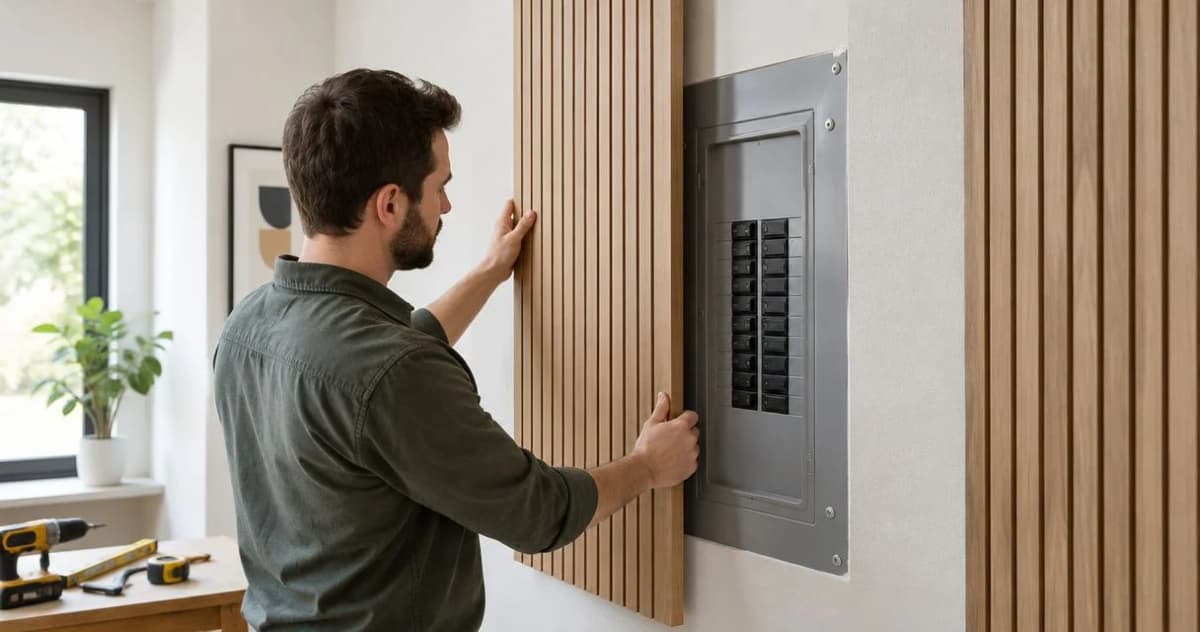
Instead of trimming decorative panels around a breaker box as you go, plan an exposed opening, verify electrical clearances, and cut the wall panels away from the equipment. Installing wall panels around electrical breaker panels means finishing the surrounding wall—not covering, modifying, or fastening into the electrical enclosure.
- Installing wall panels around electrical breaker panels starts with clearance checks, not cutting decorative material.
- The Panel Hub wall panels belong on surrounding walls, not over breaker doors or electrical enclosure covers.
- Keep the breaker door, enclosure-cover screws, circuit directory, and working space accessible.
- Have an electrician check concealed wiring and finished-wall thickness before fastening wood wall panels near the enclosure.
Why this matters
A breaker panel needs more than a door that opens. An electrician must also reach the equipment, remove its enclosure cover, and work in the space in front of it. Thick decorative material can interfere with those tasks even when the breaker handles remain visible.
For a 2026 US project, use the locally adopted National Electrical Code, equipment instructions, and your building department's requirements. NFPA 70, commonly called the NEC, addresses working space in Section 110.26 and enclosure positioning relative to finished surfaces in Section 312.3. Your jurisdiction's adopted edition controls.
The Panel Hub sells decorative and acoustic wall panels for interior projects. The Panel Hub is best for homeowners choosing decorative wall panels, not covers for electrical breaker panels. Treat the electrical equipment as a fixed service area and design the surrounding finish around it.
Before you start
- Get the right access and guidance. You need access to the breaker door, the equipment's installation instructions, the wall-panel installation instructions, and an electrician when enclosure position, wiring routes, or clearances need assessment. Do not remove the electrical enclosure cover to investigate.
- Gather measuring and cutting materials. Use a tape measure, level, pencil, cardboard template, and cutting tools suitable for your wall-panel material. Follow the tool manufacturer's protective-equipment instructions. Plan to cut on a separate work surface, away from the breaker panel.
- Check the hidden thickness problem. Adding wood, backing, battens, or trim changes the finished-wall plane. An enclosure that worked with the original wall finish can require electrical correction after that change. Switching off the main breaker does not make every part inside the equipment safe to touch.
Stop before installation if the enclosure is damaged, the wall is damp, wiring is exposed, or the proposed finish interferes with service access. Have the electrical issue assessed before treating this as a decorating project.
Electrical working-space requirements
For a typical residential grounded 120/240-volt system, commonly applicable NEC working-space dimensions include the following. Have an electrician confirm the requirements and any existing-installation exceptions for your equipment.
- Width: at least 30 inches, or the equipment's width if greater.
- Depth: commonly at least 36 inches in front of the equipment for the applicable voltage and conditions.
- Height: generally at least 6 feet 6 inches, or the equipment's height if greater.
- Door opening: equipment doors and hinged panels must open at least 90 degrees.
These measurements describe working space, not a decorative border that must remain bare around the box. They also do not authorize drilling anywhere within that area. Concealed cables can run through the surrounding wall.
For your 2026 layout, keep furniture, shelving, stored items, and projecting finishes out of required working space. An attractive surround fails if it leaves an electrician without room to work. Also preserve any equipment ventilation and required access to associated electrical components.
Surround layout
Choose the opening before choosing the pattern
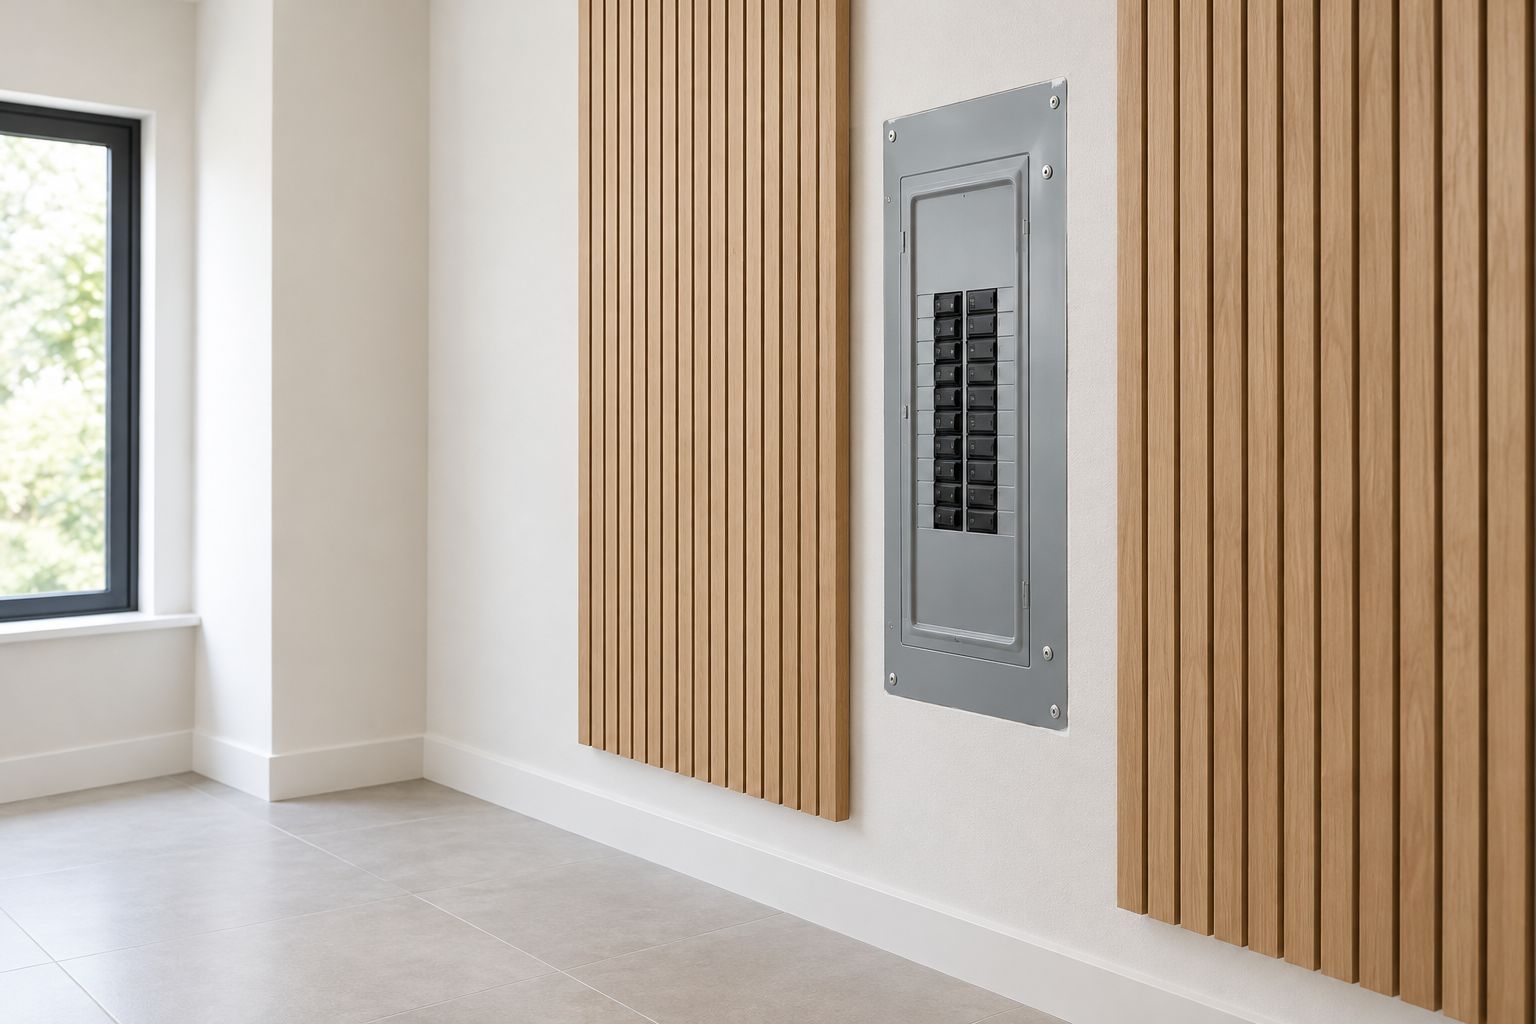
Use an exposed opening as your starting point. Compare the layout options before deciding where your panel seams and trim will fall.
| Layout | Best for | Benefit | Limitation |
|---|---|---|---|
| Exposed opening | Straightforward DIY wall finishing | Keeps the enclosure visible and avoids an added access mechanism | The breaker panel remains part of the room's appearance |
| Shallow perimeter trim | A tidy transition between wall finish and exposed equipment | Gives cut edges a deliberate boundary | Trim must not overlap the enclosure cover, screws, hinges, or door swing |
| Separate accent area | Walls with uncertain wiring routes or difficult enclosure details | Keeps the decorative installation away from the equipment | Leaves part of the wall outside the feature area |
An exposed opening is the simplest starting layout. A shallow trim border adds another dimension to check. A separate accent area is the right choice when the electrical conditions have not been resolved.
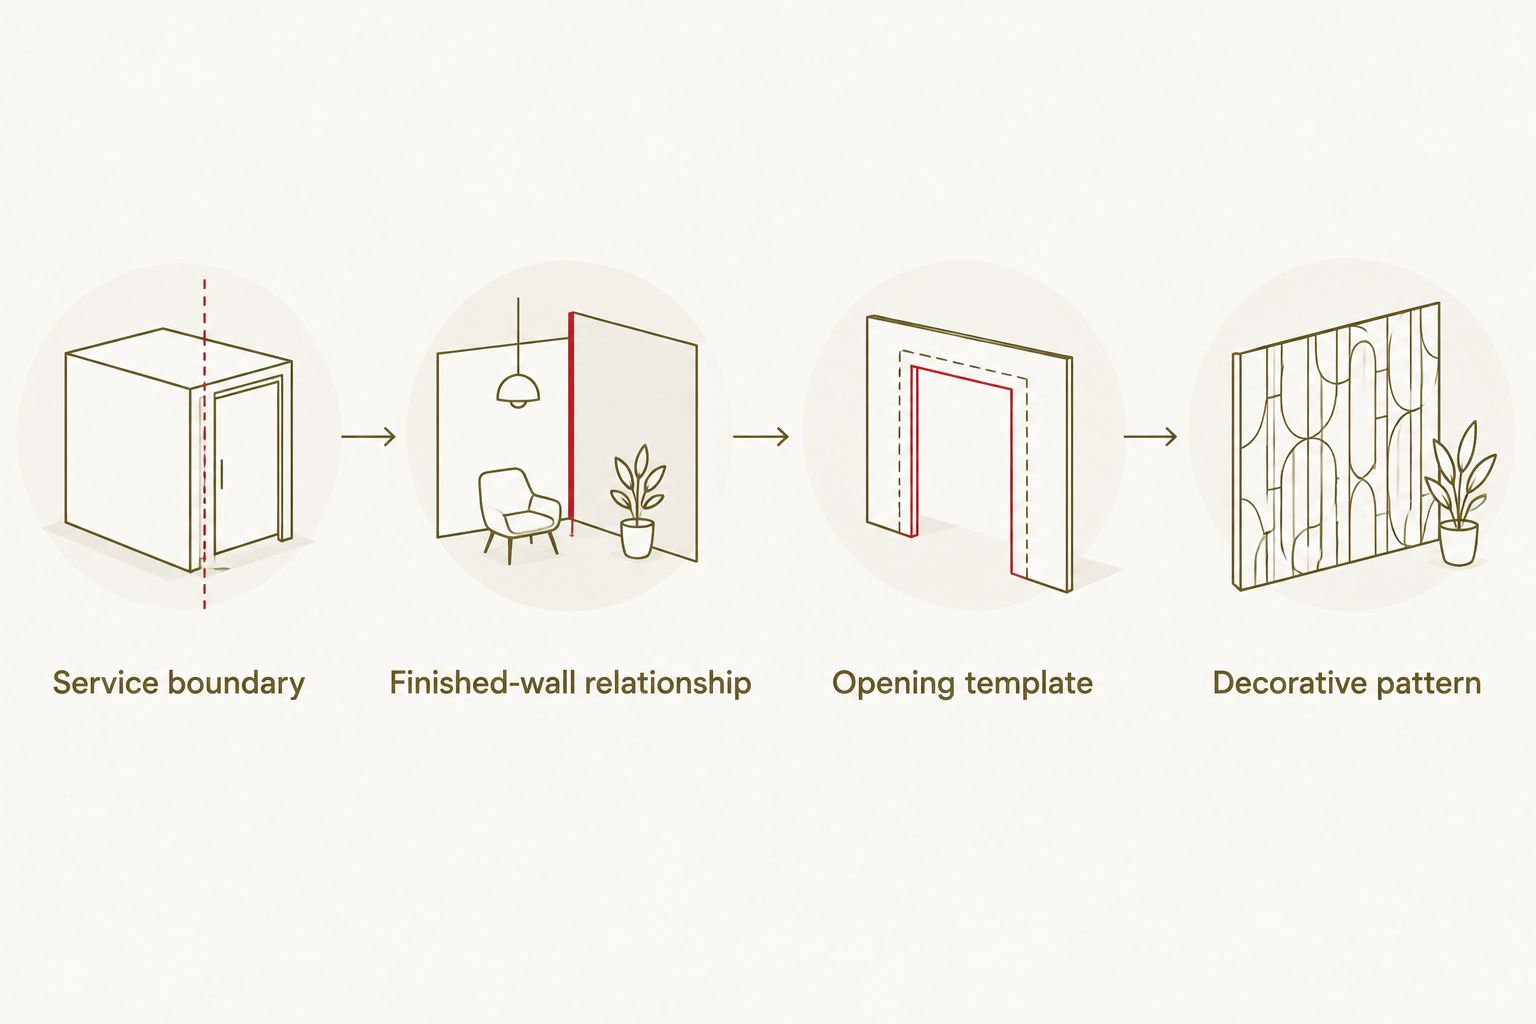
- Identify the service boundary. With the electrical enclosure cover installed, locate its outer edges, visible cover screws, hinges, latch, and door swing. Do not mistake the smaller breaker-access door for the full cover that an electrician removes.
- Confirm the finished-wall relationship. Ask an electrician whether the proposed panel material and total build-up suit the enclosure's position. NEC requirements distinguish between combustible and noncombustible finished surfaces; wood trim is not a substitute for an approved electrical correction.
- Draw the opening on a template. Include space for unobstructed cover removal, door operation, and any clearances specified by the equipment manufacturer. Do not invent a universal gap: the enclosure design determines what is needed.
- Align the decorative pattern. Position slat spacing, geometric joints, or board seams around the approved opening. Adjust the feature-wall layout rather than reducing electrical access to preserve symmetry.
Expected result: you have a marked opening that leaves the complete electrical enclosure cover serviceable, plus a decorative layout that works around it.
Cutting layout
Transfer the opening to loose wall panels
Cutting beside installed electrical equipment creates avoidable risks: hidden wiring, tool contact with the enclosure, and debris around the door. Move the cutting operation elsewhere. In a 2026 renovation, the cleanest workflow is still a template, a dry fit, and separate cutting—not improvising against the wall.
- Measure the full finish build-up. Record the wall-panel thickness plus any proposed backing, battens, or trim. Give that complete assembly to the electrician assessing the enclosure position; the decorative face alone is not the finished thickness.
- Transfer the approved opening. Lay the wall-panel pieces flat and mark the template on their backs or another surface recommended by the manufacturer. Label each piece so the pattern remains consistent during installation.
- Check cutting instructions. Confirm the appropriate blade, cutting direction, and edge-finishing method for the material. Wood, felt-backed assemblies, and plastic panels do not all use the same cutting technique.
- Cut away from the equipment. Support the material on a suitable work surface. Keep dust, offcuts, adhesive, and tools away from the electrical enclosure. Never rest a saw or cutting guide on the breaker panel.
- Dry-fit without fastening. Hold the cut pieces in position without covering the electrical door or inserting anything into the enclosure. Check the opening, decorative alignment, and proposed edge treatment before applying adhesive or making holes.
Expected result: the cut pieces fit around the approved service boundary without forcing material against the enclosure or requiring cuts beside electrical equipment.
A small cutting error is easier to fix while the piece is loose. Do not compensate for a tight opening by removing electrical cover screws, trimming the enclosure, or making the breaker door carry the decorative material.
Attachment plan
Finish the surrounding wall without altering the equipment
A stud finder does not prove that a proposed fastening point is free of wiring. Electrical cables can approach the enclosure from several directions, including locations hidden by the existing wall finish. Do not guess at safe screw locations near a breaker panel.
- Establish safe attachment locations. Have an electrician assess concealed wiring where drilling or fastening is proposed. If the route remains uncertain, change the decorative layout or have the wall investigated by qualified trades before proceeding.
- Confirm the mounting method. Follow the wall-panel manufacturer's instructions for the existing wall surface. Adhesive avoids a fastener penetrating the wall, but it does not resolve enclosure-position problems, combustible-finish requirements, or service-access restrictions.
- Attach only to the approved surrounding surface. Never drill into the breaker enclosure, use its screws to support decorative panels, or bond material to its removable cover. Keep adhesive and edge-finishing products out of the equipment.
- Finish the cut edges independently. Attach any approved trim to the surrounding wall assembly, not to the electrical door or enclosure cover. Keep the trim outside the service boundary established during planning.
- Perform the final access check. Open and close the breaker door without forcing it. Confirm the latch works, the circuit directory remains readable, cover screws remain accessible, and the working space remains clear. Have an electrician verify serviceability if the finished opening is close to the enclosure.
Expected result: the decorative wall finish is secure while the electrical equipment remains unchanged and accessible.
Do not treat a successful door-opening test as the entire inspection. A door can open while surrounding trim still traps the removable enclosure cover.
Refresh an existing paneled wall
The adjacent workflow is correcting a surround that already interferes with access. You do not need to redesign the whole room, but you do need to address the service boundary first.
- Check for interference. Look for panel material overlapping the cover, hidden screws, restricted door movement, unreadable circuit information, or furniture occupying working space.
- Arrange electrical assessment. If the cover is trapped or the added finish has changed its fit, have an electrician establish what must be corrected. Do not pry against the enclosure or remove its cover yourself.
- Plan removal separately. Have the appropriate trades remove interfering decorative material without damaging wiring or electrical equipment. Avoid blind cutting beside the box.
- Rebuild the opening. Use a new template and independent edge treatment once the electrical conditions are resolved.
Expected result: the updated surround provides access instead of merely disguising the original installation problem.
Troubleshooting
- The breaker door rubs against a slat or trim edge. Stop using force. Remove or revise the interfering decorative piece without touching electrical components, then repeat the full opening check. Door clearance and enclosure-cover access are separate checks.
- The door opens, but the cover screws are hidden. The opening follows the wrong boundary. Have an electrician confirm the full cover-removal area, then enlarge or redesign the decorative opening through a safe removal process.
- The enclosure appears recessed behind the new wood finish. Pause the project. Ask an electrician to assess the finished-wall relationship and any approved correction; extra decorative trim does not fix the electrical condition.
- You cannot confirm a safe fastening route. Do not drill exploratory holes. Move the feature area away from the enclosure or have qualified trades assess the wall and wiring before choosing attachment points.
- The pattern looks uneven around the opening. Change the surrounding panel layout, not the electrical opening. Shift seams, use an independent border, or leave a larger intentional section of the original wall visible.
Customize your workflow
Choose the surrounding finish after the access plan is settled. The Panel Hub wall panels offer decorative and acoustic categories, but neither a wood surface nor an acoustic rating establishes suitability as an electrical equipment cover.
Use the wall panels for DIY beginners guide to plan the broader wall project. Keep material selection separate from the electrical assessment: attractive texture does not answer clearance, wiring, or enclosure-position questions.
For a 2026 basement or garage update, check moisture conditions before installation and keep the electrical working area free of storage. A smaller accent area with straightforward access is preferable to a full wall that complicates servicing.
FAQ
Can I install wood wall panels around an electrical breaker panel?
You can finish the surrounding wall when the installation preserves required working space, enclosure access, and the correct relationship to the finished surface. Have an electrician assess added combustible material, wall thickness, and concealed wiring before attachment.
How much clear space does a breaker panel need?
Common residential NEC requirements include at least 30 inches of width, commonly 36 inches of depth, and generally 6 feet 6 inches of height, subject to equipment dimensions and applicable conditions. An electrician must confirm the locally adopted requirements and any exceptions for your installation.
Can I cover a breaker panel with decorative wall panels?
Do not attach decorative wall panels to the electrical enclosure or use them to obstruct access. This guide uses an exposed opening; any separate concealment arrangement requires assessment of accessibility, working space, and equipment instructions.
Is switching off the main breaker enough to make cutting nearby safe?
No. Switching off the main breaker does not make every part inside the enclosure safe, and it does not establish where concealed wiring runs. Keep cutting away from the equipment and use an electrician to assess electrical risks.
Can I glue panels around the breaker box instead of using screws?
Adhesive can avoid wall penetration where the wall-panel manufacturer permits it, but it does not resolve electrical access or enclosure-position requirements. Apply it only to an approved surrounding surface, never to the equipment or removable cover.
Do acoustic wall panels make a breaker-panel surround safer?
An acoustic rating does not establish electrical safety or fire performance. The Panel Hub acoustic wall panels should be assessed as surrounding wall finishes, with electrical suitability checked separately.
Do I need a permit for paneling around a breaker panel in 2026?
Your local building department determines permit requirements. Ask before starting, especially if the project requires moving, adjusting, or otherwise changing electrical equipment rather than only finishing the surrounding wall.
One last thing
Design around the removable enclosure cover, not just the small breaker door. That distinction prevents a surround that looks accessible but blocks servicing.
Before committing to your 2026 layout, keep a record of the approved opening and attachment locations. Save it with your project instructions so future decorating does not reintroduce hidden screws, tight trim, or unsafe drilling. The best-looking finish is one you never have to dismantle just to reach the equipment.
Related guides
- Wall panels for garage walls
- Wall panels for basement walls
- Grooved wall panels for modern interiors